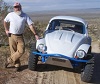
Making progress...
-
Skidmark

- Posts: 3508
- Joined: Mon Aug 28, 2006 7:19 pm
Re: Making progress...
First time sitting on the new hard stops. My math was shooting for 3" under the rear cage tubes. I can live with this. I will need to trim my fenders up a little higher, though!
You do not have the required permissions to view the files attached to this post.
"Your car sounds angry, and it wants to go fast all the time..."
(quote from my daughter, after driving my car)
It's not complicated, it's just expensive...
(quote from my daughter, after driving my car)
It's not complicated, it's just expensive...
-
Skidmark
- Posts: 3508
- Joined: Mon Aug 28, 2006 7:19 pm
Re: Making progress...
You do not have the required permissions to view the files attached to this post.
"Your car sounds angry, and it wants to go fast all the time..."
(quote from my daughter, after driving my car)
It's not complicated, it's just expensive...
(quote from my daughter, after driving my car)
It's not complicated, it's just expensive...
-
baja5

- Posts: 2615
- Joined: Thu Aug 10, 2006 1:22 pm
Re: Making progress...
So if you wanted that inch or so back you could still add a rubber snubber to the upper stop. I used older F150 front bumpstops on my Baja.
-
Skidmark
- Posts: 3508
- Joined: Mon Aug 28, 2006 7:19 pm
Re: Making progress...
I could add a piece of 11 ga. steel to the hard stop and that would gain me some. Not sure I need it with the reduction of compression with the air bumps.
"Your car sounds angry, and it wants to go fast all the time..."
(quote from my daughter, after driving my car)
It's not complicated, it's just expensive...
(quote from my daughter, after driving my car)
It's not complicated, it's just expensive...
-
Ol'fogasaurus
- Posts: 17881
- Joined: Mon Nov 13, 2006 10:17 pm
Re: Making progress...
What could happen if one or both of the air-bumps should fail/break? Always plan for the worst possible condition then add additional potential problems to that. This sounds stupid but you are dealing with in-animate objects who have no rules
Lee
I'm not trying to be an AH here but "if something can go wrong it will go wrong and at the most in-opportune time" (Murphy's Law https://www.thoughtco.com/murphys-laws- ... hs-2832861).
-
Skidmark
- Posts: 3508
- Joined: Mon Aug 28, 2006 7:19 pm
Re: Making progress...
The hard stop is made from a 1.5" x .120" wall square tube, with the seam wall cut off. This has created a sacrificial part that under a seriously hard impact will crush. Also it is easily cut off so a replacement can be welded back on. I will take a picture at a better angle. Since the contact point had to be lowered on the original stop, I used this idea to create a replaceable crush zone. I tried using rubber snubbers for the stops before. The tend to explode, or fracture under extreme compression. My thoughts are if I get all the way to the hard stops, the impact will be greatly reduced by the air bumps. If the air bumps fail, I will be able to tell (rather quickly). A visual inspection will reveal if my "crush stops" have deformed.
"Your car sounds angry, and it wants to go fast all the time..."
(quote from my daughter, after driving my car)
It's not complicated, it's just expensive...
(quote from my daughter, after driving my car)
It's not complicated, it's just expensive...
-
Skidmark
- Posts: 3508
- Joined: Mon Aug 28, 2006 7:19 pm
Re: Making progress...
Here is a better angle of the stop, showing the idea better.
You do not have the required permissions to view the files attached to this post.
"Your car sounds angry, and it wants to go fast all the time..."
(quote from my daughter, after driving my car)
It's not complicated, it's just expensive...
(quote from my daughter, after driving my car)
It's not complicated, it's just expensive...
-
Ol'fogasaurus
- Posts: 17881
- Joined: Mon Nov 13, 2006 10:17 pm
Re: Making progress...
Skid, what I see is if one stop broke (or something similar enough to put a side load on the stop) and your suspension hit the stop variations of this could happen. I would at least box the ends for additional support for any deflection.
Lee
Lee
You do not have the required permissions to view the files attached to this post.
-
Skidmark
- Posts: 3508
- Joined: Mon Aug 28, 2006 7:19 pm
Re: Making progress...
In my opinion, you need a failure mode or weak link somewhere. Making this part harder to bend by plating the ends and boxing it in is defeating the design intent. Easily replaced with a cut off wheel if/when damaged. This piece is meant to fail before the energy transfer damages something harder to fix/replace.
"Your car sounds angry, and it wants to go fast all the time..."
(quote from my daughter, after driving my car)
It's not complicated, it's just expensive...
(quote from my daughter, after driving my car)
It's not complicated, it's just expensive...
-
Ol'fogasaurus
- Posts: 17881
- Joined: Mon Nov 13, 2006 10:17 pm
Re: Making progress...
It's your toy.
Lee
Lee
-
dustymojave
- Posts: 2314
- Joined: Mon Dec 01, 2008 9:08 pm
Re: Making progress...
You must have one of those Chinese toilets in your garage.
Richard
Lake LA, Mojave Desert, SoCal
Speed Kills! but then...So does OLD AGE!!
Tech Inspection: SCCA / SCORE / HDRA / ARVRA / A.R.T.S. OffRoad Race Tech - MDR, MORE, Glen Helen BajaCup
Retired Fabricator
'58 Baja with 955K Miles and counting
Lake LA, Mojave Desert, SoCal
Speed Kills! but then...So does OLD AGE!!
Tech Inspection: SCCA / SCORE / HDRA / ARVRA / A.R.T.S. OffRoad Race Tech - MDR, MORE, Glen Helen BajaCup
Retired Fabricator
'58 Baja with 955K Miles and counting
-
Leatherneck

- Moderator
- Posts: 17104
- Joined: Sat Jul 01, 2006 6:47 pm
Re: Making progress...
What else is on the drawing board?
-
Skidmark
- Posts: 3508
- Joined: Mon Aug 28, 2006 7:19 pm
Re: Making progress...
I need to design and fab the mountings for the air bumps. A bit tricky since the cage is round tube, and the cans for the bumps is round as well. The bumps will be at a slightly different angle than the tubes they need to mount to. So angle and position (height) are critical.
"Your car sounds angry, and it wants to go fast all the time..."
(quote from my daughter, after driving my car)
It's not complicated, it's just expensive...
(quote from my daughter, after driving my car)
It's not complicated, it's just expensive...
-
baja5
- Posts: 2615
- Joined: Thu Aug 10, 2006 1:22 pm
Re: Making progress...
I can send you pics of how mine are mounted if you need more ideas.
-
Skidmark
- Posts: 3508
- Joined: Mon Aug 28, 2006 7:19 pm
Re: Making progress...
So here is what I have come up with so far. If I can get the copes at the right angle, the bump cans will lay across this tube perpendicular. It is 1-1/2" x .12w sq tube. I may still need to move my cell forward an inch or so to access the valves on top of the bumps. Bummer they have to be so far inboard on the trailing arms. But I really don't want to cut off the hard stops and start over. In this position I will only be using half of the bump's travel.
You do not have the required permissions to view the files attached to this post.
"Your car sounds angry, and it wants to go fast all the time..."
(quote from my daughter, after driving my car)
It's not complicated, it's just expensive...
(quote from my daughter, after driving my car)
It's not complicated, it's just expensive...