Page 9 of 16
Re: My chenowth 4lwd upgrades
Posted: Thu Mar 28, 2013 7:03 am
by tikotiko
Finding the beer was like a where's Waldo book I couldn't find it
Re: My chenowth 4lwd upgrades
Posted: Thu Mar 28, 2013 7:08 am
by fordfreak
Leatherneck wrote:Instead of notching the bottom tube would you get more room by cutting out the straight piece that you notched and welding in one with a bit of curve to it?
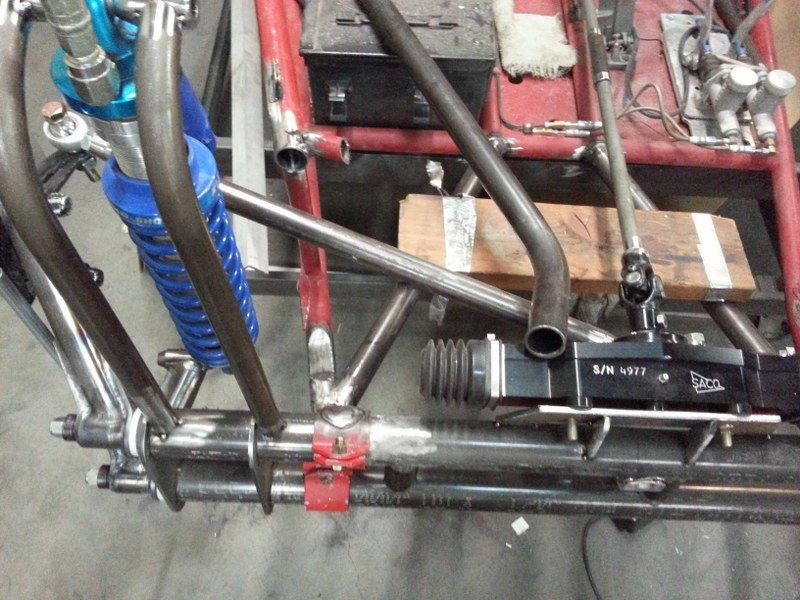
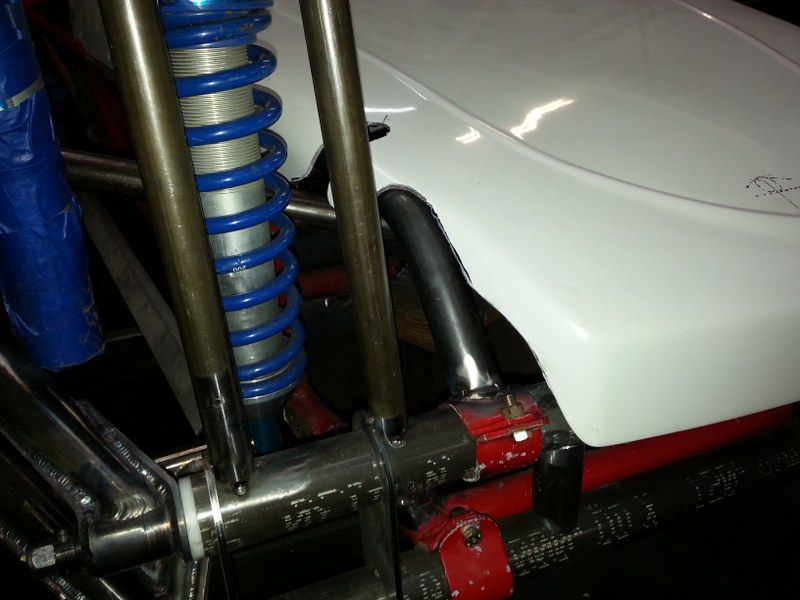
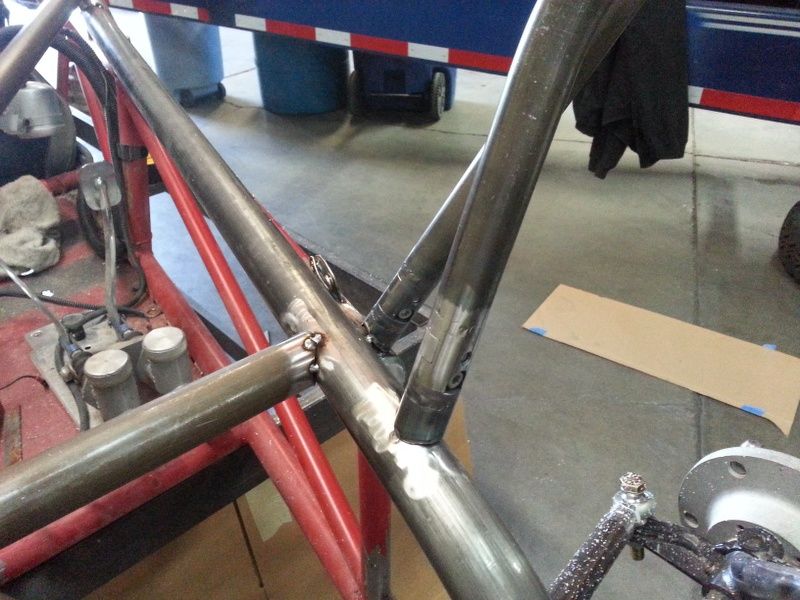
At full steering lock and when the coil spring is about 3/16" away from the beam, the tie rod is touching the tube right there. So I just notched it a little. Plus, I don't want any protrusions on the bottom of the car.
Re: My chenowth 4lwd upgrades
Posted: Thu Mar 28, 2013 7:32 am
by Ol'fogasaurus
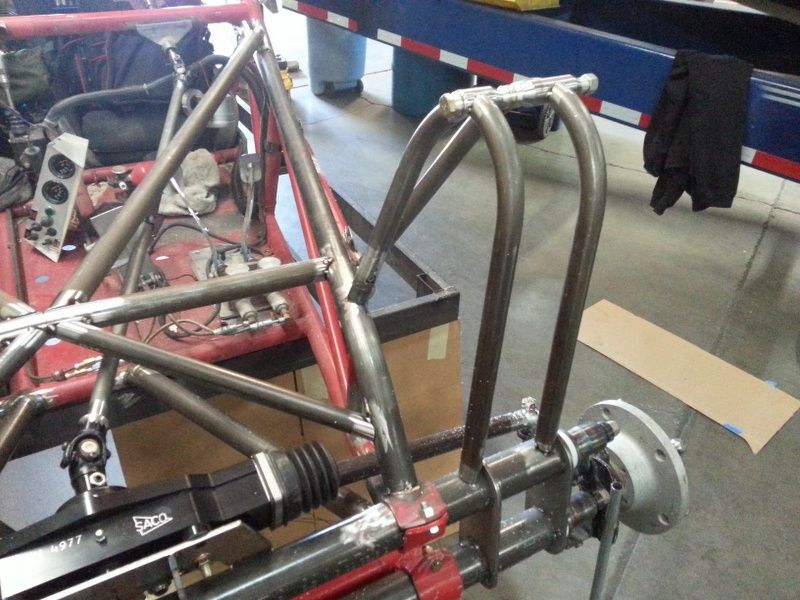
On that upper tube where it hooks into the clamp on the beam, I would not do what it looks like you are planning (I hope I am wrong in what I thing I am seeing). For several reasons you will want a doubler at the join
and building a doubler, internal or external is going to be hard as the tube material has thinned out on the upper radius and compressed on the lower side of the bend and (probably) slightly ovaled within the bend area itself.
How are you going to tie in the upper bar you are now installing? Are you going to replace the bar below it or tie the new bar to it. You need to accommodate load transfer similar to the way the two original bars ate tied together. The same with the new bar all the way to the rear of the buggy; any loads you induce in that upper bar needs to be able to be "shared"/distributed though out the whole buggy's frame.
With the square ended notch in the lower tube you have introduced a stress-riser in the tube. You need to cleanly remove that to put an oval filler in place that is bent to match the arc of the spindles make which influences the travel of the tie-rods. (edit) I forgot to add that since you have weakened this area you will have to add some support on the bottom side of the tube also.
A few things to think about. Sorry it is late but I have been trying to keep my mouth (hands) shut.
Lee
Edited to add note in the para on notching the tube to clear the steering.
Lee
Re: My chenowth 4lwd upgrades
Posted: Thu Mar 28, 2013 6:33 pm
by fordfreak
Thank you for the tips Lee! I am aware of what you're suggesting. I made a living designing and building parts, chassis, and race cars for awhile, so I will be sure things are right. I am new to the off road buggy stuff though. That's why I am here, to learn. A lot of my stuff is mocked up first for fit and clearance then will usually redo. Sorry you had to type that out. ha
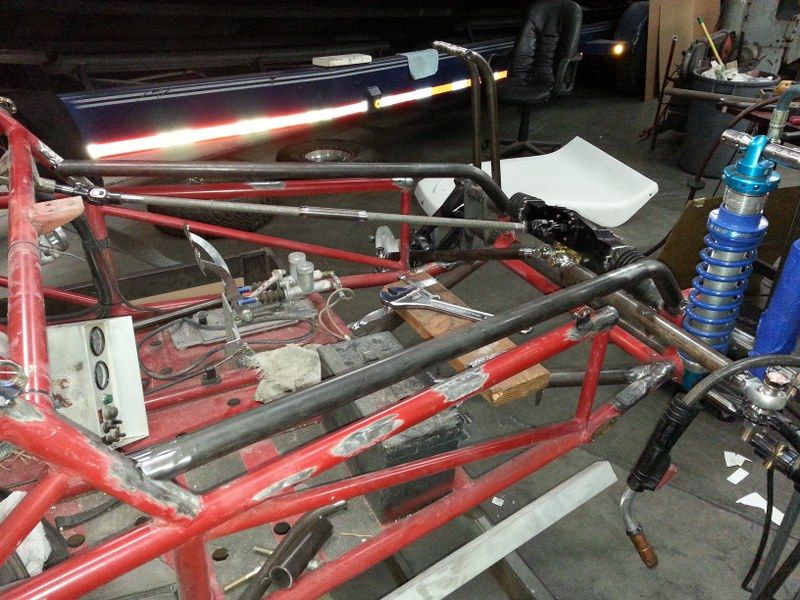
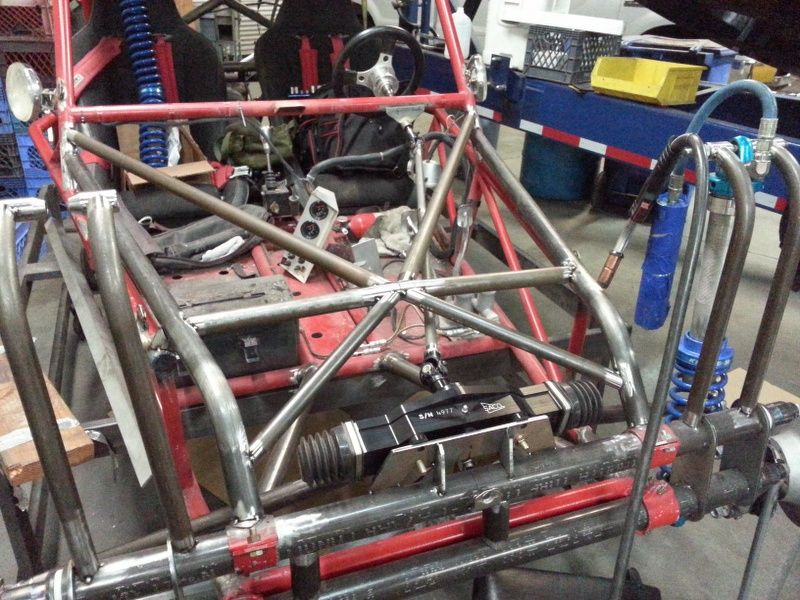
The top tube has to be ran on the inside of the original tube like that for my hood to fit and will be tied into the original tube. The joint up by the beam will be welded and wrapped in .100 cr sheet and taper off back towards the car. I may re bend the top tube with less radius to go directly to the beam instead of that funky traffic jam I have goin on.lol
I would like to completely rebuild the front end from the A pillar forward, but I work five 16 hour shifts per week and don't have much extra time. Also, this is a temporary frame and will be building a new one with the changes.
As for the notch in the front lower tube, I cut out an easy square just to figure out the depth of cut I needed. The fill shape will be a concave oval insert.
Ill be banging out a lot of work this weekend. So Ill post some major updates.
Re: My chenowth 4lwd upgrades
Posted: Sun Apr 07, 2013 4:28 am
by fordfreak
Re: My chenowth 4lwd upgrades
Posted: Tue Apr 09, 2013 3:56 am
by fordfreak
Re: My chenowth 4lwd upgrades
Posted: Tue Apr 09, 2013 4:36 am
by Getrdone
I beleive they are drilled for pins right?
Re: My chenowth 4lwd upgrades
Posted: Tue Apr 09, 2013 6:45 am
by fordfreak
what do you mean pins?
Re: My chenowth 4lwd upgrades
Posted: Tue Apr 09, 2013 7:55 pm
by Turbo_Manx_Maniac
I sold my 2332 and have a complete fuel injection system, turbo & exhaust, computer/harness and crankfire ignition system for sale, you know, just in case you're interested.....
Re: My chenowth 4lwd upgrades
Posted: Tue Apr 09, 2013 8:35 pm
by CentralWAbaja
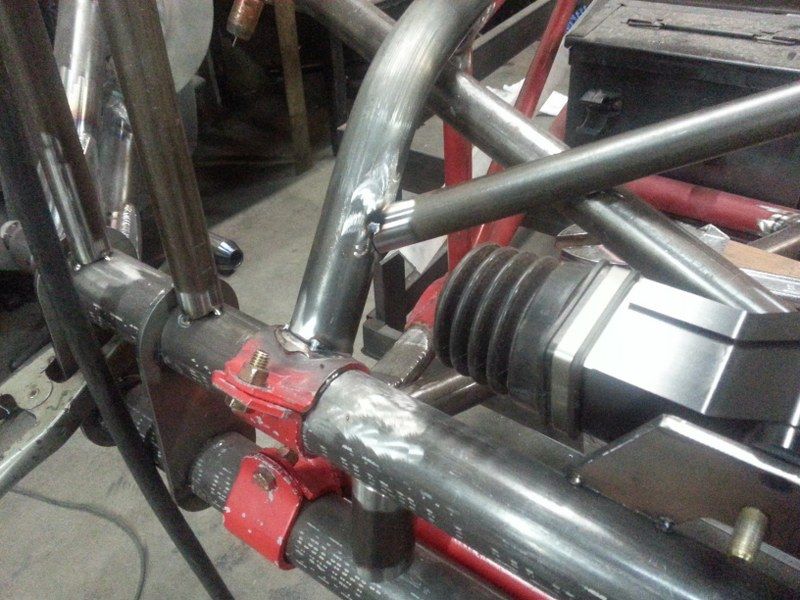
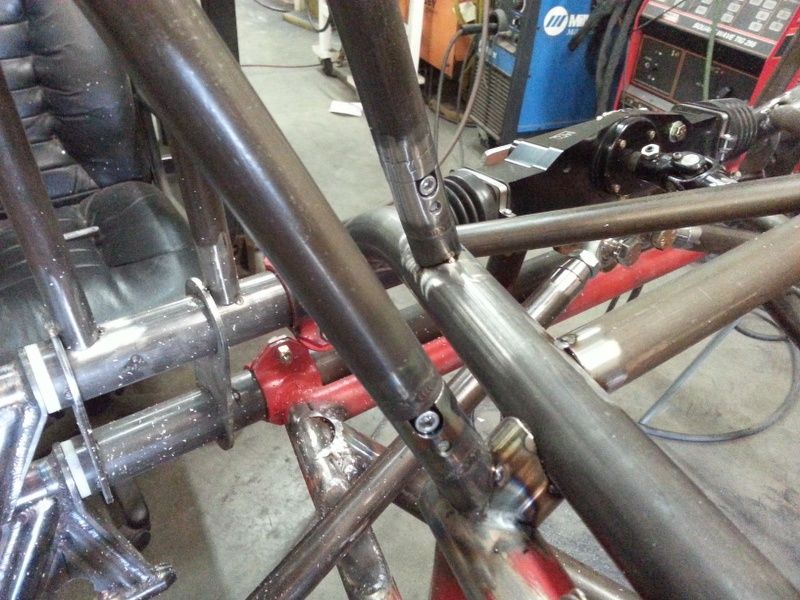
Those tube clamps look to have the step in them? If so, I would think that they would be strong enough.
This is an old school car with another approach

Re: My chenowth 4lwd upgrades
Posted: Tue Apr 09, 2013 10:39 pm
by fordfreak
Turbo_Manx_Maniac wrote:I sold my 2332 and have a complete fuel injection system, turbo & exhaust, computer/harness and crankfire ignition system for sale, you know, just in case you're interested.....
Im the same fordfreak on glamisdunes that has been talking to you about your motor. So you sold the engine already without turbo? ? Dammit!

Re: My chenowth 4lwd upgrades
Posted: Wed Apr 10, 2013 8:14 am
by Ol'fogasaurus

FF’s use of these little honkers is interesting, never seen or thought of doing it his way. As long as he has maneuvering room to disconnect I don’t see why it would work well. Because of the interlocking feature I would suspect that it is going to be stronger than the double sheer method (w/o knowing more about bolt and material of the double sheer method) that was used on the blue buggy.
A tip of the hat from me FF for a unique idea.
Lee
Re: My chenowth 4lwd upgrades
Posted: Wed Apr 10, 2013 9:58 am
by fordfreak
Thank you lee. They are 4130 and were EXTREMELY hard to find in the interlocking design for 1" tube. All but one mfg do not machine
interlock for the 1" adapters. Only 1.250" and up.
The cap screws dont really provide any shear strength. They just keep the two interlocking lugs together. I clocked them so they will all release at the same time. Im sure they will still be a bitch to disengage after welding. Ha
Re: My chenowth 4lwd upgrades
Posted: Wed Apr 10, 2013 10:04 am
by fordfreak
The only problem I have with them is the sharp radii on the lugs. I can totally see it cracking there since these are not really made for tensile applications.
Re: My chenowth 4lwd upgrades
Posted: Wed Apr 10, 2013 10:45 am
by DesertGuy
The first time you whack your frontend hard enough that you want to take the front off... let us know how that works out. Once those clamps get tweaked, I bet you cut them off.
My thinking...If you hit hard enough that repairs are needed, you will need to buy another tube clamp to graft into the rebuilt section. If you chose to sleeve in the area - saving from buying a new tube clamp... well... you could have done that to begin with and save yourself 25.00-50.00 per clamp. An interesting concept but not too sure I would hang my entire frontend out there with a handful of bolts.