I'm always up for visitors coming by, v-dubbers in LA.(not L.A.) gotta stick together.
Thanks for the offer of the rim, I may take you up on that offer. I have a spare off a bay bus but haven't tried to fit it yet. The bus one may not work unless I get the correct centering lugs.
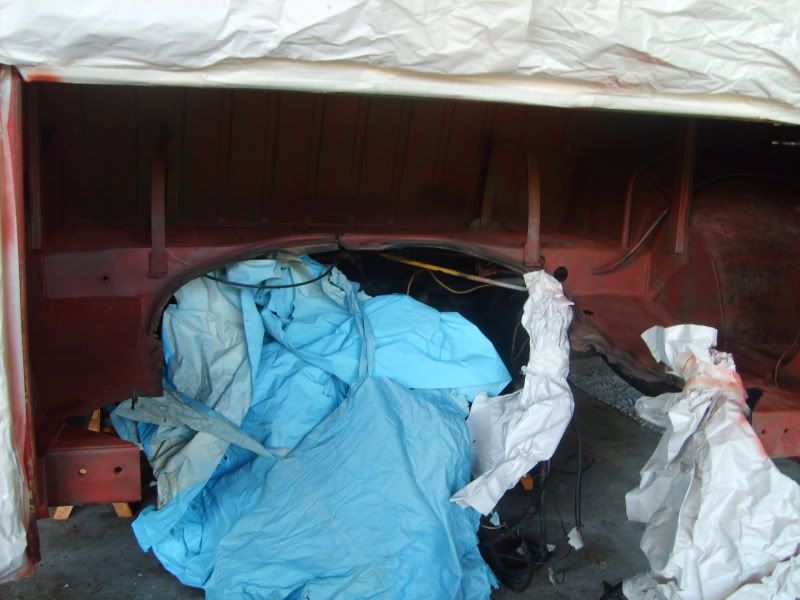
Doing a lot of sanding and prepping to the engine area now, a lot of grime and tiny spots to sand at this point.
Bus into bus trans swap...searched, found little
-
Jadewombat

- Posts: 1447
- Joined: Sat Jun 22, 2002 12:01 am
-
Jadewombat
- Posts: 1447
- Joined: Sat Jun 22, 2002 12:01 am
-
Jadewombat
- Posts: 1447
- Joined: Sat Jun 22, 2002 12:01 am
Well guys, change of plans. This is no longer a bus into bus swap anymore.
Long story short, I didn't do my homework well enough. I found out the hard way why no one really does this bus IRS swap. The Gene Berg adapter involves taking the whole thing apart, essentially shy of a complete trans rebuild. This in turn involves a few special trans tools for alignment, etc. The learning curve is simply too steep to get into the trans innards and I don't want to see my bus sit for too long.
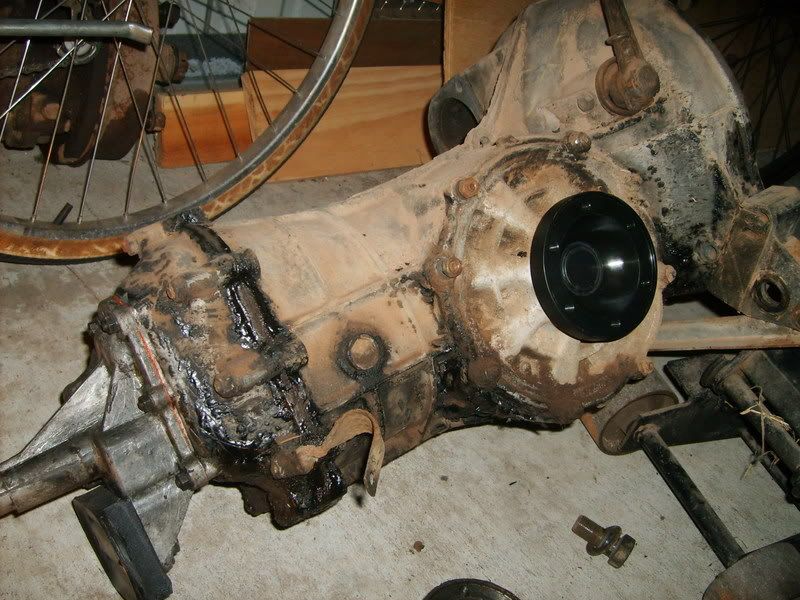
Anyhoo, I pulled the single-side cover trans out of my '73 Super to put in my bus. The bug isn't running and awaiting an engine swap as well. I'm going to use the 002 bus trans in the bug.
The nosecone swap from the swing axle to the bug IRS trans was easy, took all of an hour, mostly cleaning. Did a test fit of the trans tonight, seems to be centered pretty much where the old one was, not sure if it will shift the engine back.
I'm going to swap the output flanges to Thing/Bus size CVs to keep everything the same.
Long story short, I didn't do my homework well enough. I found out the hard way why no one really does this bus IRS swap. The Gene Berg adapter involves taking the whole thing apart, essentially shy of a complete trans rebuild. This in turn involves a few special trans tools for alignment, etc. The learning curve is simply too steep to get into the trans innards and I don't want to see my bus sit for too long.
Anyhoo, I pulled the single-side cover trans out of my '73 Super to put in my bus. The bug isn't running and awaiting an engine swap as well. I'm going to use the 002 bus trans in the bug.
The nosecone swap from the swing axle to the bug IRS trans was easy, took all of an hour, mostly cleaning. Did a test fit of the trans tonight, seems to be centered pretty much where the old one was, not sure if it will shift the engine back.
I'm going to swap the output flanges to Thing/Bus size CVs to keep everything the same.
-
Jadewombat
- Posts: 1447
- Joined: Sat Jun 22, 2002 12:01 am
Got the spring plates on. Did a little dremel notching of them first for reference, I set it one click lower as I want to lower the bus a little. Stock setting is 20 deg., swing axle or bay bus IRS. This is a grey area the Bus Boys instructions say, I won't really know how high or low it will be sitting until I get it bolted up and on the ground.
Also got to putting the IRS pivots on. This involves quite A LOT of cutting of the heater tubes for clearance. We find things out as we go, of course, this really is crap design though. I like having heat, even in Louisiana it gets chilly during the winter. Beside the fact, I just plain don't like hacking up my bus. Had to get in there with a very long sawzall blade.
One more thing, I found out you need bug IRS pivot bolts which are NOT included in the kit for some strange reason. This really is getting a bit silly, their catalog only generally outlines you need donor bay window spring plates/hubs, etc. but does NOT say specifically 68-70 which I had to find out the hard way, and now I find out I'm missing pieces, as well as the 'clearancing' issues of the heater ducts and the trans. cradle which I haven't got to yet--none of this is spelled out in the catalog. Just how great the system works and lowering options/CV options, etc.
If you're going to do this conversion like I'm doing, get the instructions for setup and read over them first. There's a LOT more information in the instructions such as the above that's not included in the catalog. Even a note in the catalog that says, 'Hey Idiot, look over the instructions first and make sure you understand not everything's here and you'll be cutting up your bus,' would've helped. I'll get off my soapbox now, but I do have some valid complaints here.
-
Jadewombat
- Posts: 1447
- Joined: Sat Jun 22, 2002 12:01 am
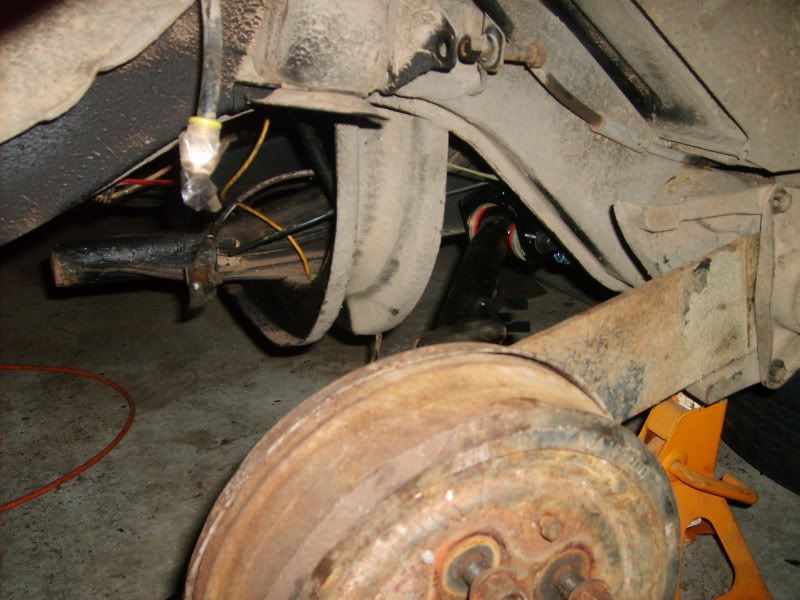
I've been on vacation the last couple of weeks. I started working again on the bus this evening and got one side together here. The drum is frozen so tomorrow I'll get the axle nut on it and try to budge it. So far everything looks OK, the metal brake line is too long so I may try to route it on the bottom side of the spring plate.
-
Jadewombat
- Posts: 1447
- Joined: Sat Jun 22, 2002 12:01 am
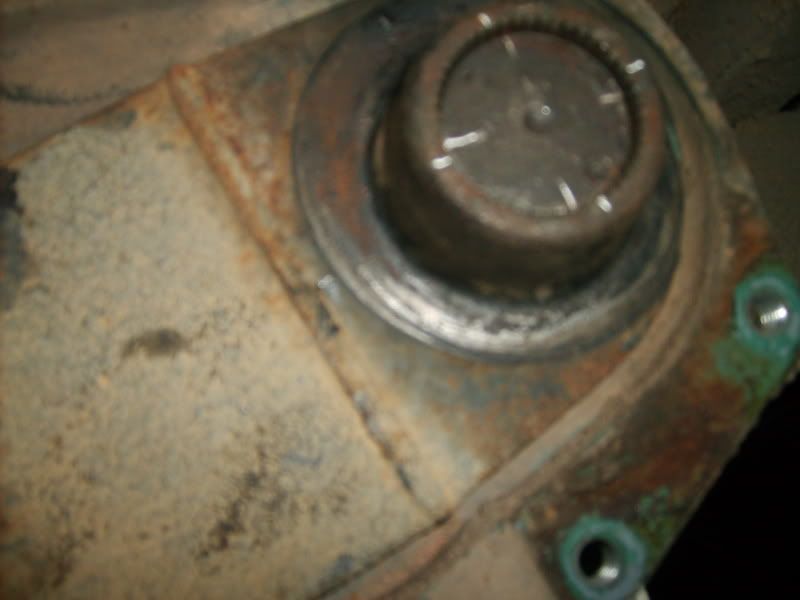
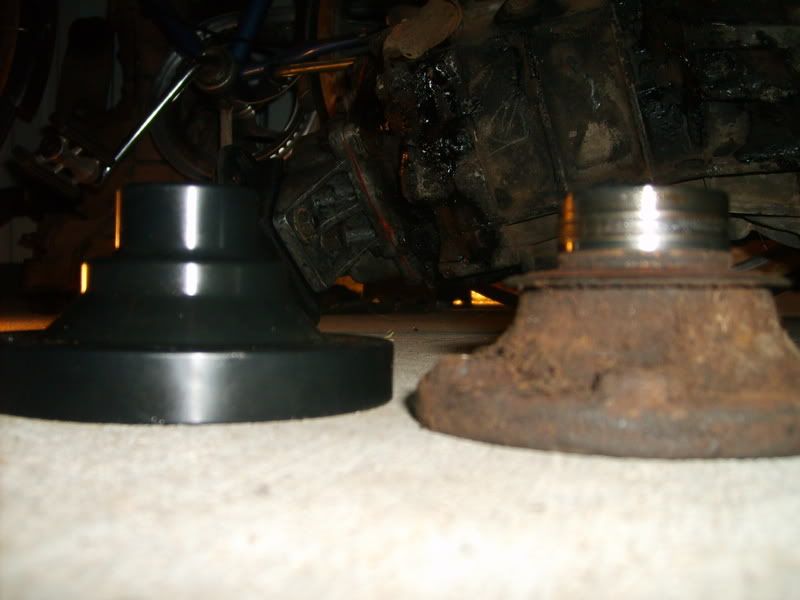
Got the drum freed up cleaned off the surface rust. Changed over the studs on the rear and bolted everything for a test fit. Changed over the output flanges on the trans as well, these are T2, Thing, whatever you want to call 'em output flanges on the trans, very straightforward. I bought these from Weddle, about $45 each. Get the cup seals too in case you rip 'em.
The output flanges seem wider than the stock ones as you can see here.
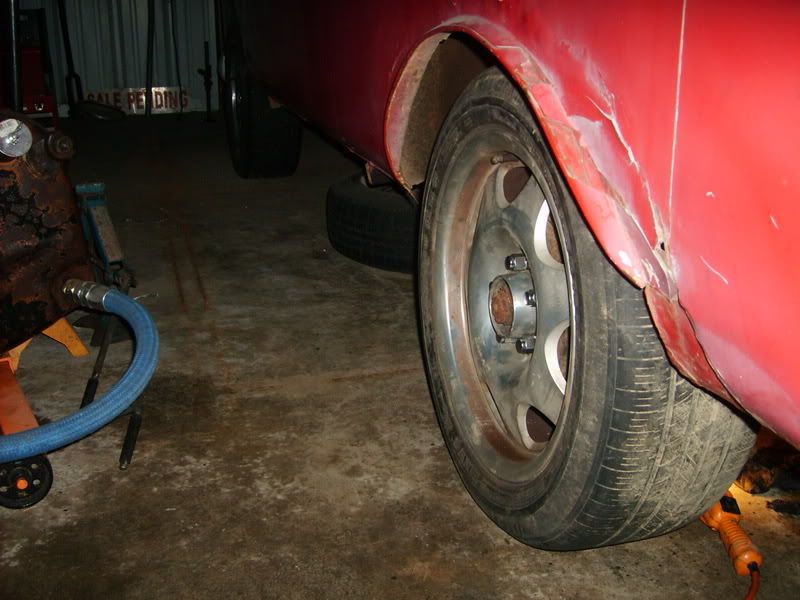
Got everything bolted up today for a test fit and set the bus back on the ground. Rims are looking good, I apologize for the hokey fender flares and the dirty wheels. The stock wheel wells are going back on.
I have a question I posed to the offroad guys as well. I wanted to lower the rear a little, not slam it. I set the plates down one click from 20 deg stock to 13 deg. So far the bus is sitting level with no motor, axles, etc. I stood in the back and had my wife measure the drop which was about 5/8". I'm guessing the total drop will be an 1 or more which is fine. I will be doing airbags as well.
My question is:
I'm measuring the distance from the face of the output flange to the face of the stub axle which is 18", again no motor, bumpers, tank, etc. in place. The distance from the inner part of the output flange to the inner portion of the stub axle is 19 3/4". The axles they sent with the kit are 19". Will this work with these axles, keeping in mind the rear end will drop a little and shorten up the axle length even more??
The output flanges seem wider than the stock ones as you can see here.
Got everything bolted up today for a test fit and set the bus back on the ground. Rims are looking good, I apologize for the hokey fender flares and the dirty wheels. The stock wheel wells are going back on.
I have a question I posed to the offroad guys as well. I wanted to lower the rear a little, not slam it. I set the plates down one click from 20 deg stock to 13 deg. So far the bus is sitting level with no motor, axles, etc. I stood in the back and had my wife measure the drop which was about 5/8". I'm guessing the total drop will be an 1 or more which is fine. I will be doing airbags as well.
My question is:
I'm measuring the distance from the face of the output flange to the face of the stub axle which is 18", again no motor, bumpers, tank, etc. in place. The distance from the inner part of the output flange to the inner portion of the stub axle is 19 3/4". The axles they sent with the kit are 19". Will this work with these axles, keeping in mind the rear end will drop a little and shorten up the axle length even more??
-
Jadewombat
- Posts: 1447
- Joined: Sat Jun 22, 2002 12:01 am
Still been making progress, found out the T2 stub axles are a little cheaper from Moore Parts, about $70 for the pair FYI. I found out that the 19 1/4" axles they sent aren't going to work. At the shortest point of the spring plate range it's 19 1/4", minus 1/2" of clearance means I need 18 3/4". I located some through LowBugget for a decent price.
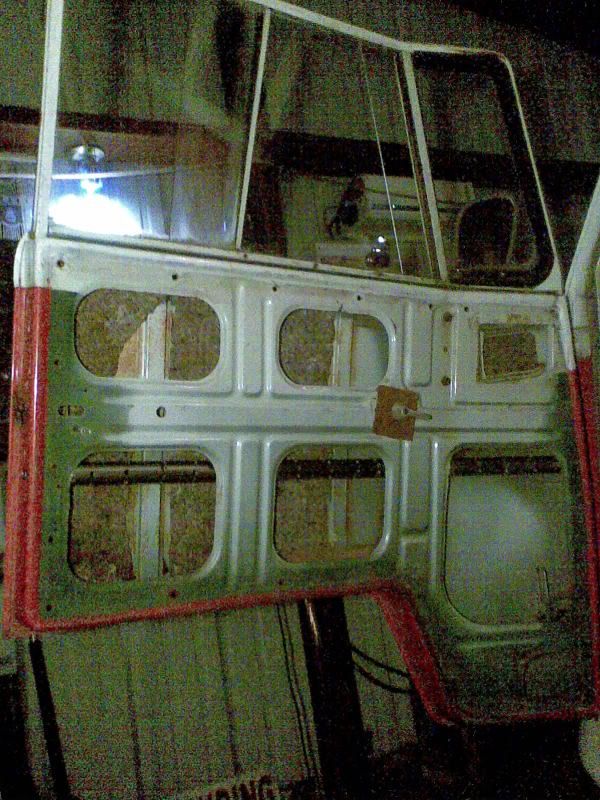
Also got the tank painted and put back in place. I also fabbed up a side impact beam for the drivers' door. There's a few too many Suburbans and duallys on the road for my liking where I live, anything helps in the old bus if the worst were to happen. It's 1 1/4" steel tubing I drilled to lighten and make the bending easier. It's secured with two big phillips screws(similar to what VW used in the door latches, etc.) and two nuts welded in the ends. Drilling the holes for the screws was about the worst part as I had to guess a little where the hole was supposed to wind up. Anyhoo, just a thought for you safety-minded ones.
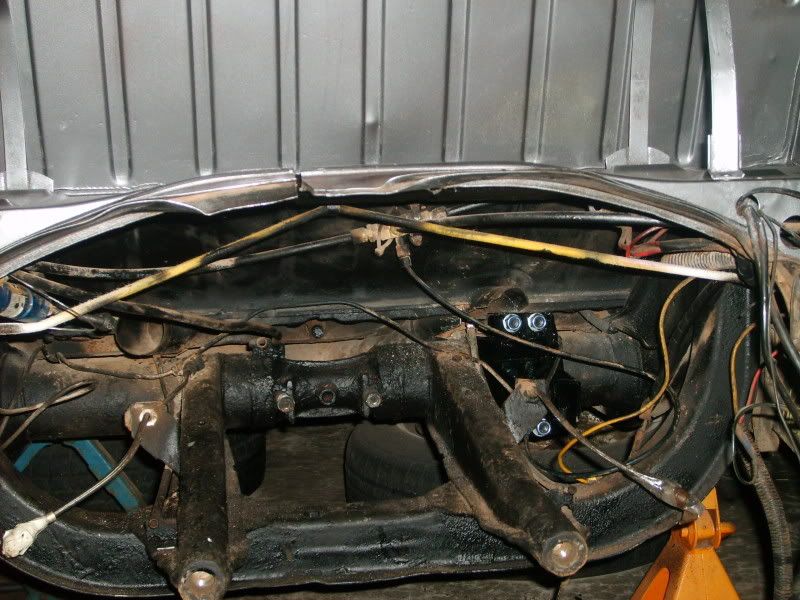
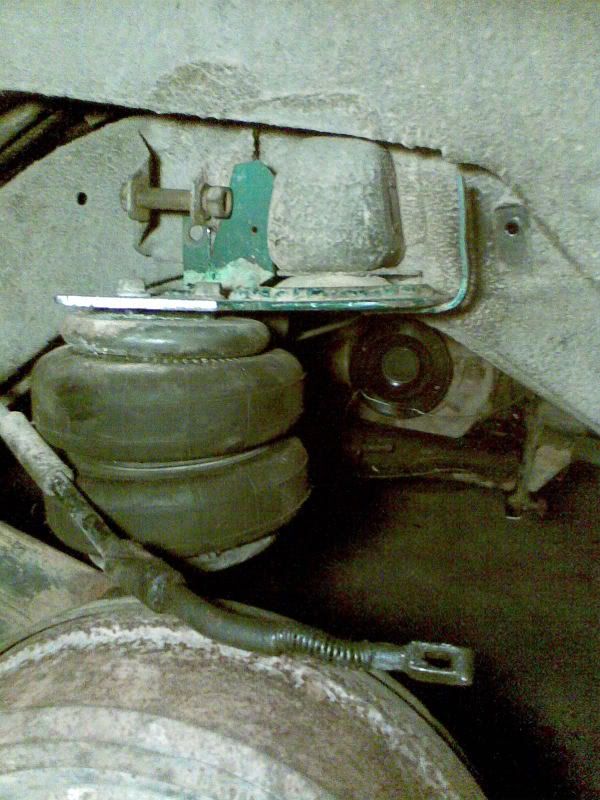
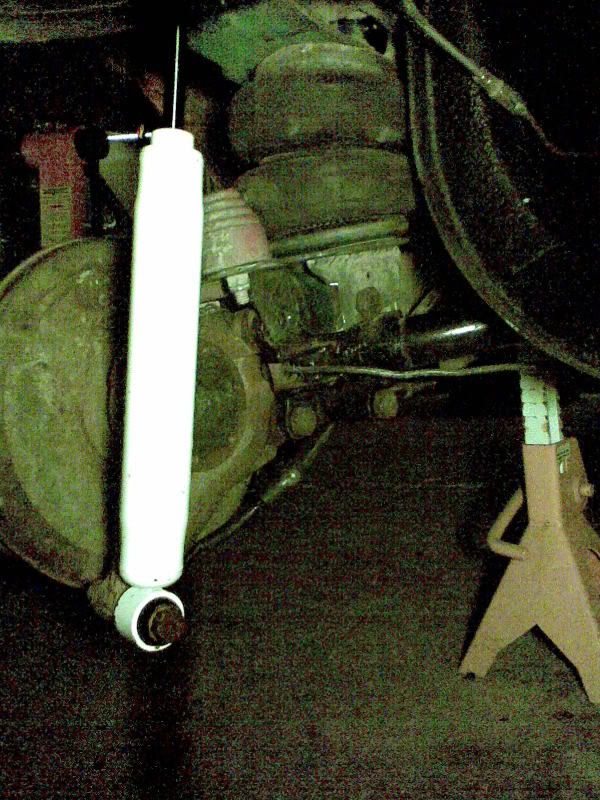
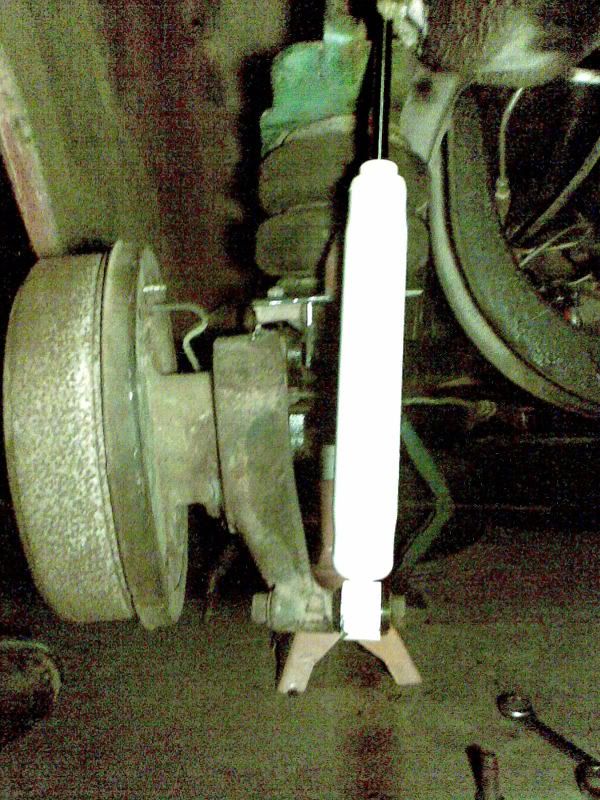
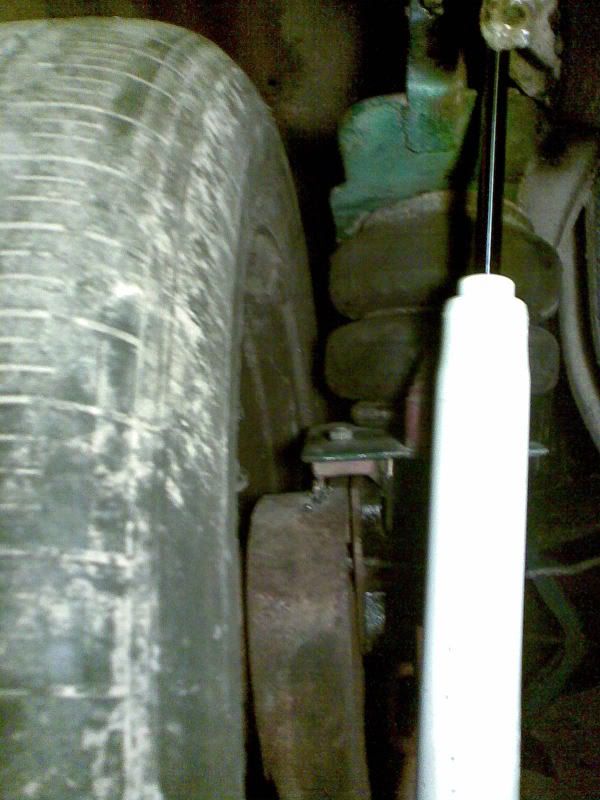
Before this whole trans swap, I did have airbags on the rear of the bus. I've been able to use the original upper brackets so far by simply swapping sides and clearancing the brackets. I designed the bracket to use the stock bump stop on the bus to minimize drilling or welding. The shock used to be ahead of the axle, after the swap as you can see, it will be behind the axle. I don't have a most recent picture, this was from last night, but I've already got the upper shock mount welded which comes with the kit. Pretty straightforward so far, usual problems of things not fitting and doing grinding here and there.
Also got the tank painted and put back in place. I also fabbed up a side impact beam for the drivers' door. There's a few too many Suburbans and duallys on the road for my liking where I live, anything helps in the old bus if the worst were to happen. It's 1 1/4" steel tubing I drilled to lighten and make the bending easier. It's secured with two big phillips screws(similar to what VW used in the door latches, etc.) and two nuts welded in the ends. Drilling the holes for the screws was about the worst part as I had to guess a little where the hole was supposed to wind up. Anyhoo, just a thought for you safety-minded ones.
Before this whole trans swap, I did have airbags on the rear of the bus. I've been able to use the original upper brackets so far by simply swapping sides and clearancing the brackets. I designed the bracket to use the stock bump stop on the bus to minimize drilling or welding. The shock used to be ahead of the axle, after the swap as you can see, it will be behind the axle. I don't have a most recent picture, this was from last night, but I've already got the upper shock mount welded which comes with the kit. Pretty straightforward so far, usual problems of things not fitting and doing grinding here and there.
-
Jadewombat
- Posts: 1447
- Joined: Sat Jun 22, 2002 12:01 am
-
Jadewombat
- Posts: 1447
- Joined: Sat Jun 22, 2002 12:01 am
-
Jadewombat
- Posts: 1447
- Joined: Sat Jun 22, 2002 12:01 am
Still chugging away. Got the wiring cleaned up a little and found two more air leaks. I originally went with airbags on the rear of my bus about seven years ago. Well, these push-on fittings haven't stood the test of time. I've switched to normal, compression fittings, a lot cheaper to replace just the compression bushing from now on. I don't recommend these push on connectors that come with so many airride kits, etc.

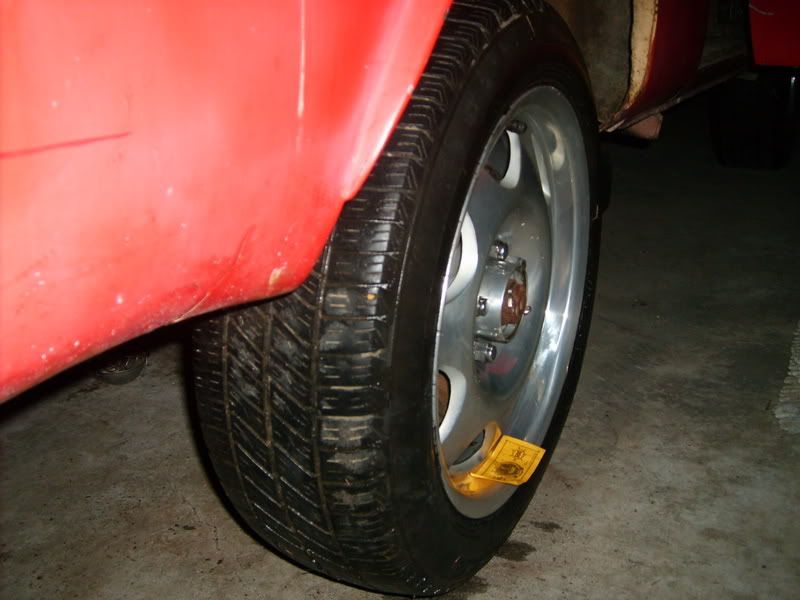
Here's a shot of one of the rear rims mounted on the drum. That's a monetary note in the rim for reference. I've seen so many kids do this on Vortex and whatnot, I figured I'm supposed to by law or something. I'm still not really sure what it means, you make a lot of money, or you have a lot of money invested in your car or the rims. Monopoly seemed appropriate(Spongebob Squarepants edition-->Beat that!) here for some reason.
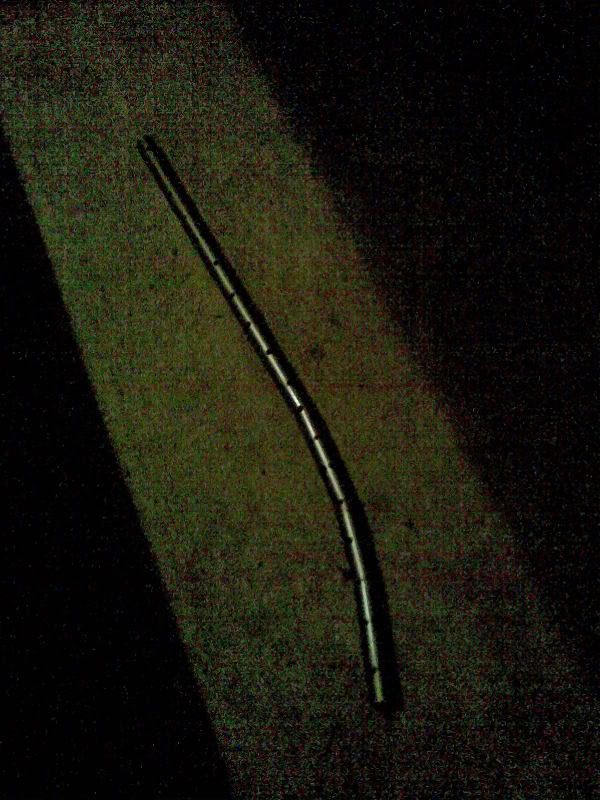
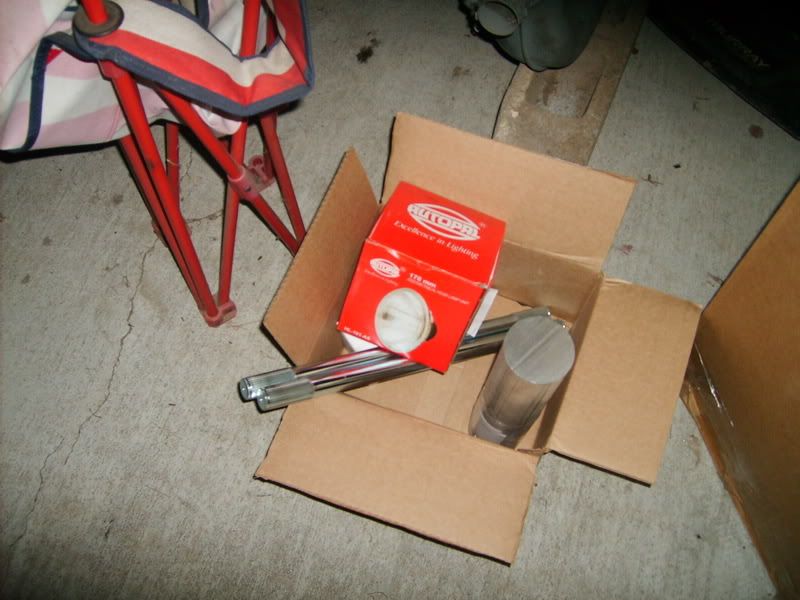
On to the next portion, getting the axles hooked up. I have a pair of 18 3/4" floating axles which should do the trick. The round rod pictured here is for some 2" spike center caps a friend is going to fab up for me for the rims.
Here's a shot of one of the rear rims mounted on the drum. That's a monetary note in the rim for reference. I've seen so many kids do this on Vortex and whatnot, I figured I'm supposed to by law or something. I'm still not really sure what it means, you make a lot of money, or you have a lot of money invested in your car or the rims. Monopoly seemed appropriate(Spongebob Squarepants edition-->Beat that!) here for some reason.
On to the next portion, getting the axles hooked up. I have a pair of 18 3/4" floating axles which should do the trick. The round rod pictured here is for some 2" spike center caps a friend is going to fab up for me for the rims.
-
Jadewombat
- Posts: 1447
- Joined: Sat Jun 22, 2002 12:01 am
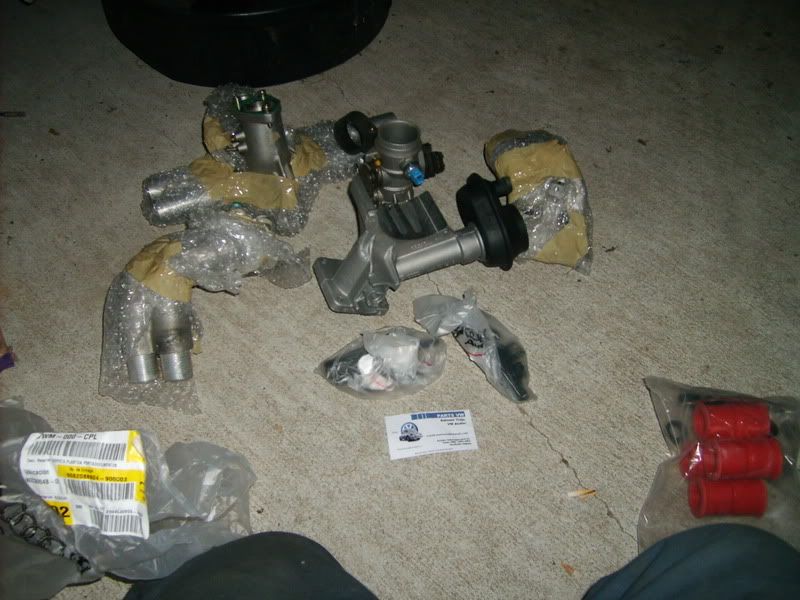
Been dealing with a bolt that broke off in the torsion bar cover a while ago. Finally got it drilled out and the stock one back in. I also started tearing into the engine. I flycut the heads last summer and the 300 mile retorque has come, as well as the gas tank was rusting out, and the IRS swap...also plan on ditching the carb for an L-jet setup. Waiting on some parts from Mexico which should be here soon (Throttle body, end castings, fuel rails, etc.).
-
Jadewombat
- Posts: 1447
- Joined: Sat Jun 22, 2002 12:01 am
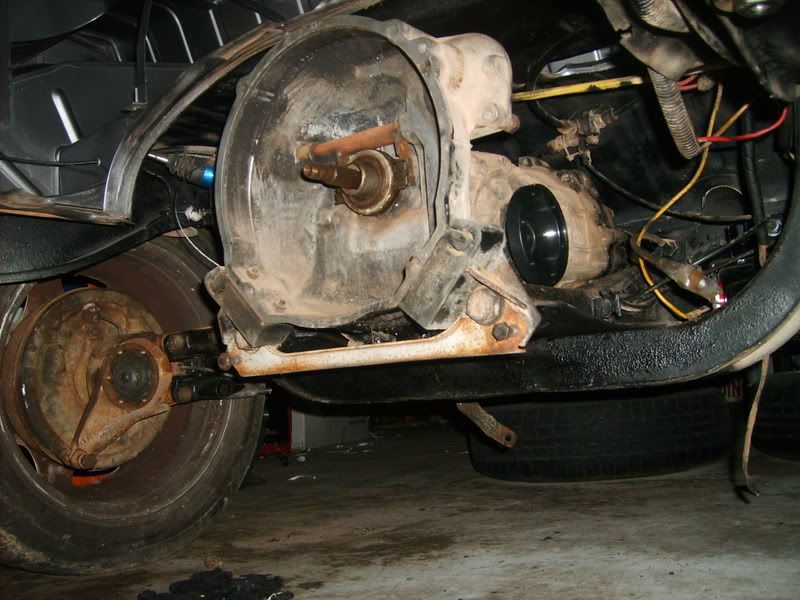
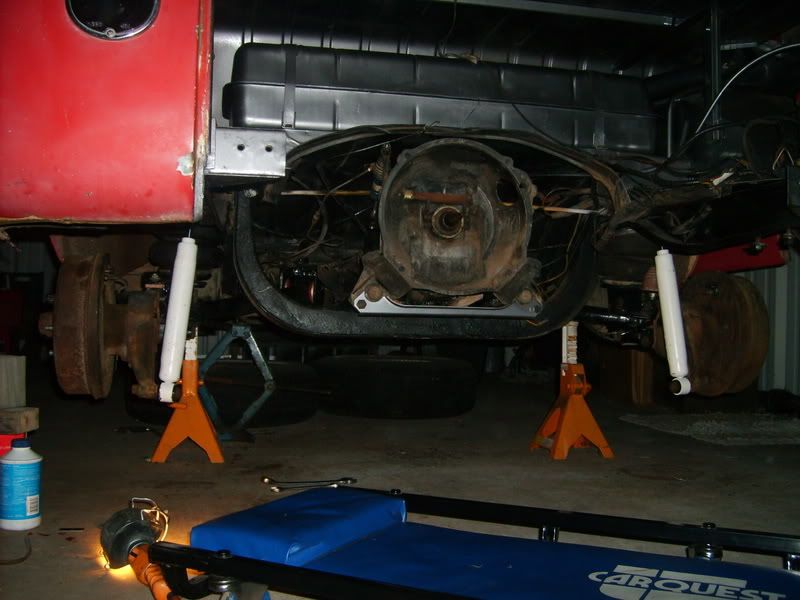
Well, here's a shot of the 'done' IRS swap as it is now. Won't know what gremlins need to be tackled until I get the engine in and fired up. I have to adjust the shifter, getting ready to paint the engine tin and still waiting on parts in the mail.
Get this, hate to name drop but these guys deserve it (Fedex, not the seller). The guy ships me the stuff Fedex from Mexico this past Tues. morning and it gets to the distribution station here in Lafayette the next day (Wed.). I'm following the tracking info. on-line. As of Wed. at 8AM it's within miles of my house. Somehow, these geniuses ship the box (re-route, whatever you want to call it) later that day, where to but--drumroll please....Korea!!!
Yes Korea!!! Halfway around the f'ing globe these Fedex idiots sent my box, not from Mexico mind you from Lafayette, LA!! We'll give you your money back. Gee thanks.
-
Jadewombat
- Posts: 1447
- Joined: Sat Jun 22, 2002 12:01 am