Page 2 of 16
Posted: Fri Jul 10, 2009 7:55 am
by turbobaja
Bumper is coming along really nice. Looks like you've got some practice on that bender. Are you going to solid mount your engine/trans? Looks like you don't have much wiggle room, could just be goofy camera angles though.
Posted: Fri Jul 10, 2009 12:17 pm
by Chris V
turbobaja wrote:Bumper is coming along really nice. Looks like you've got some practice on that bender. Are you going to solid mount your engine/trans? Looks like you don't have much wiggle room, could just be goofy camera angles though.
Actually it's my first time on a JD2 tubing bender - but I bend electrical tubing by profession, so it's not too alien for me.
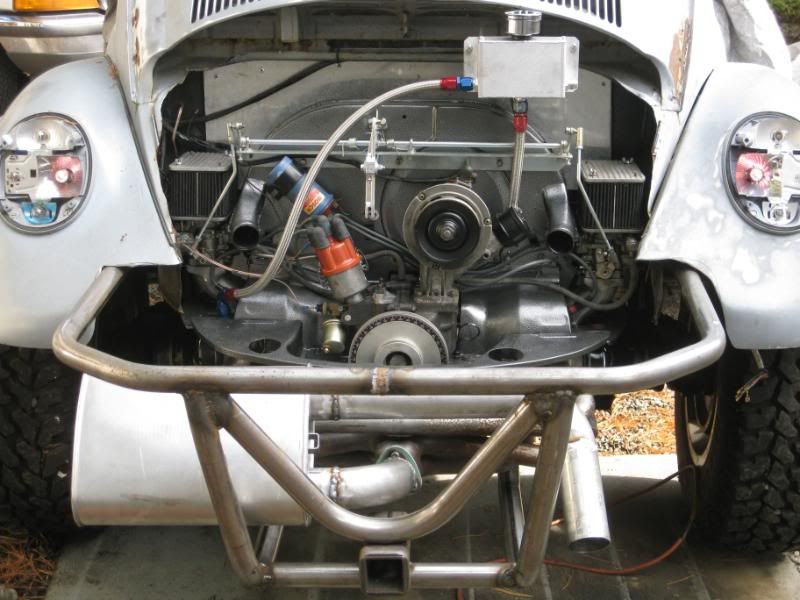
I'm actually planning on running stock early front and rear mounts and adding a Type III rear engine hanger so I'm hoping it'll be fairly rigid but not so much that it'll shake out the fillings

There's a little wiggle room on the exhaust too just in case

Posted: Sat Jul 11, 2009 4:07 am
by Leatherneck
Looking very nice, any plans for the upper part or leaving it open?

Posted: Sat Jul 11, 2009 12:24 pm
by Chris V
The upper part has been up for debate around the shop I've been building it in...I came up with an idea that would hold a spare tire and be attached by trailer hitch pins (for easily removal) that they guys seem to like, so I might just go that route - but it's not a priority at the moment.
As I want to use it as a honest daily driver I'm very hesistant to put more tubing in the car and run braces through the firewall...we'll see in time.
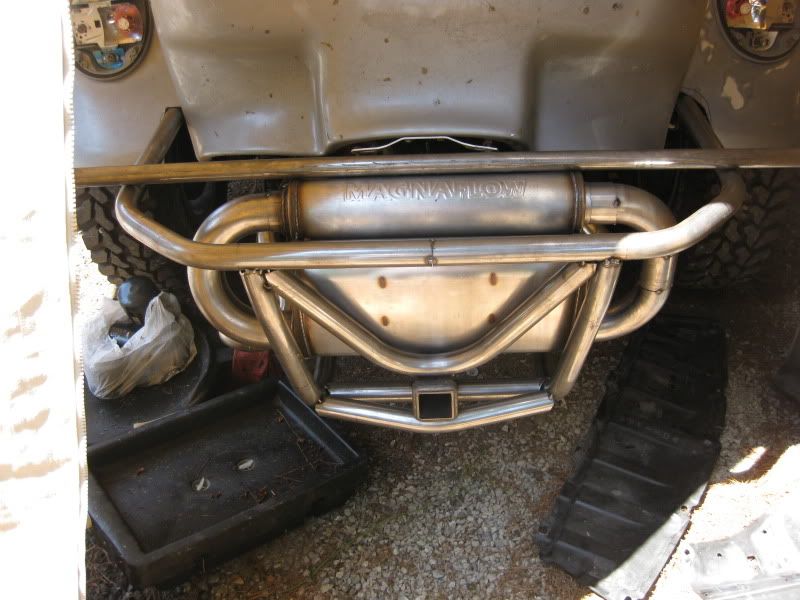
Yesterday I got the trailer receiver located and tacked into place, bent a couple somewhat snazzy looking tubes to support it. Bottom is at ~14" - just a hair higher than an old Land Cruiser that was in the shop.
Up to now the bumper mounts are just 1-1/2" with ~3" stubs of 1-1/4" hanging out (they're plugwelded in). the rear bumper simply pushes on... I'm having a local exhaust shop make me some flanges and hopefully Monday I'll get to flanging everything on top of the 'locating' stubs.
I think I forgot to mention I tied the bumper mounts together side to side by running an 1-1/2" above the starter motor/clutch lever.
Posted: Thu Oct 08, 2009 9:39 pm
by Chris V
Ouch, apparently I'm not good enough for the list of guys' with build threads...
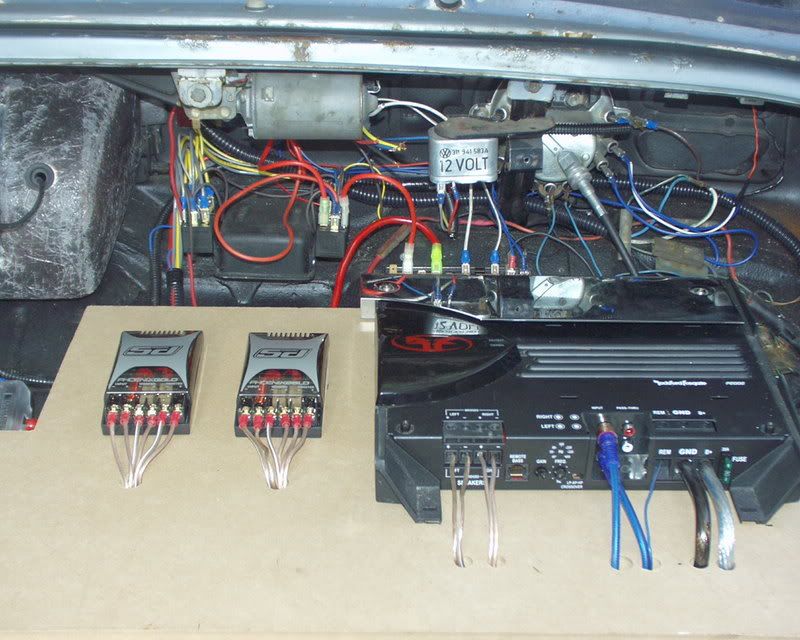
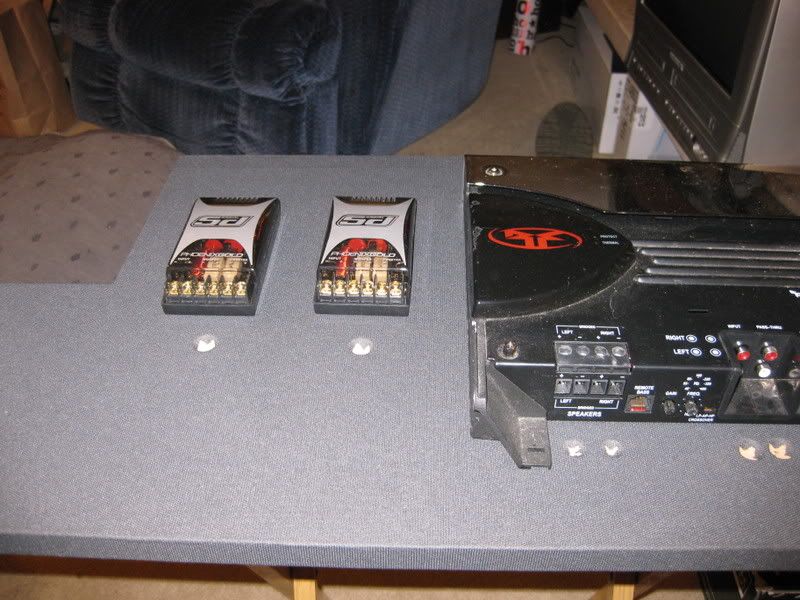
Got the rear bumper all welded, flanged, and bolted on...installed the 2087cc engine, started to think about finishing the amp-rack and calling to put it on the insurance.
This isn't the 'final' engine, so I modified a Thing header, and made a new muffler using a Dynomax...it's also tinned out upright for now, not yet Type III.
Posted: Thu Oct 08, 2009 9:42 pm
by david58
Chris V wrote:Ouch, apparently I'm not good enough for the list of guys' with build threads...
Got the rear bumper all welded, flanged, and bolted on...installed the 2087cc engine, started to think about finishing the amp-rack and calling to put it on the insurance.
This isn't the 'final' engine, so I modified a Thing header, and made a new muffler using a Dynomax...it's also tinned out upright for now, not yet Type III.
You need to ask a off road mod to add your build.
Posted: Thu Oct 08, 2009 9:52 pm
by Chris V
Posted: Thu Oct 08, 2009 11:56 pm
by Leatherneck
Chris V wrote:Ouch, apparently I'm not good enough for the list of guys' with build threads...
Got the rear bumper all welded, flanged, and bolted on...installed the 2087cc engine, started to think about finishing the amp-rack and calling to put it on the insurance.
This isn't the 'final' engine, so I modified a Thing header, and made a new muffler using a Dynomax...it's also tinned out upright for now, not yet Type III.
Not the reason Chris, we don't add a build to the "Build threads" unless a guy/girl asks for it. If build quality was a a prerequisite you would of been on awhile ago.
By the way, we need more pictures.

Posted: Fri Oct 09, 2009 11:21 am
by Chris V
Posted: Fri Oct 09, 2009 3:04 pm
by turbobaja
Chris V wrote:
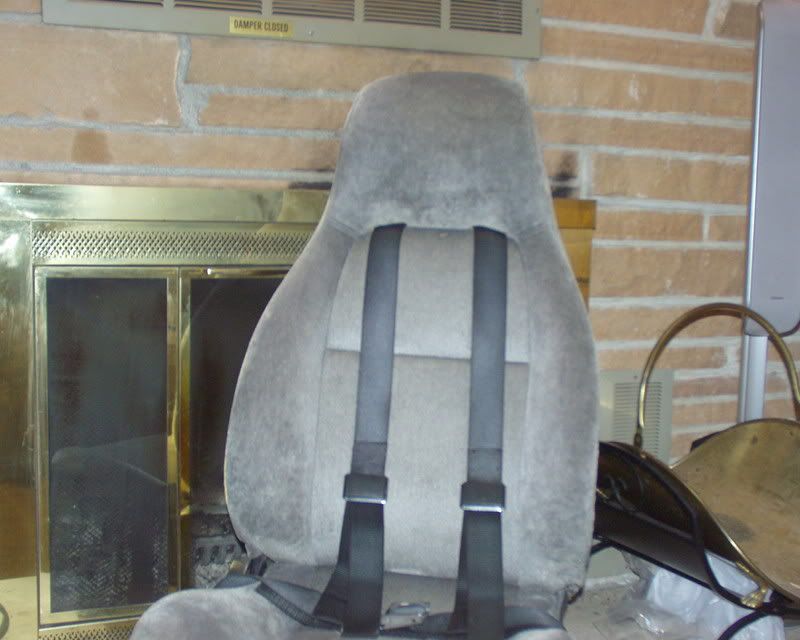
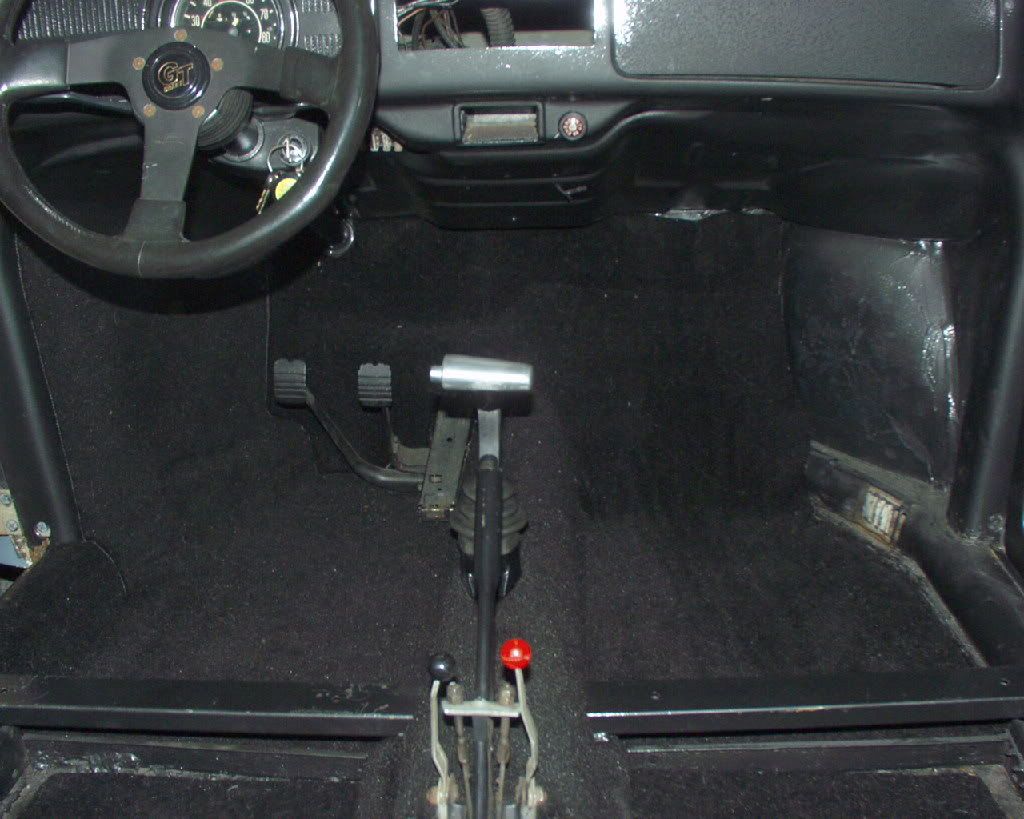
What kinda seats are those? I'm assuming you added the shoulder harness setup?
I've got the same fireplace in my house

. It was in pretty bad shape when I baught the place so I took it off and cleaned it up (not nearly as good as yours look though). I painted the outer frame flat black and just cleaned up the 4 door frames and the vents
Posted: Sat Oct 10, 2009 1:19 pm
by Chris V
turbobaja wrote:
What kinda seats are those? I'm assuming you added the shoulder harness setup?
I've got the same fireplace in my house
. It was in pretty bad shape when I baught the place so I took it off and cleaned it up (not nearly as good as yours look though). I painted the outer frame flat black and just cleaned up the 4 door frames and the vents
They're Eagle Talon, pretty comfy - bit of PITA to modify like this...still need to do the other one

You'll see in the upper right corner it's pulling away from the brick...I probably need to see about a replacement rope and figure out how to anchor it back to the wall...It's one of those things that bothers me, but not enough to dive into it.
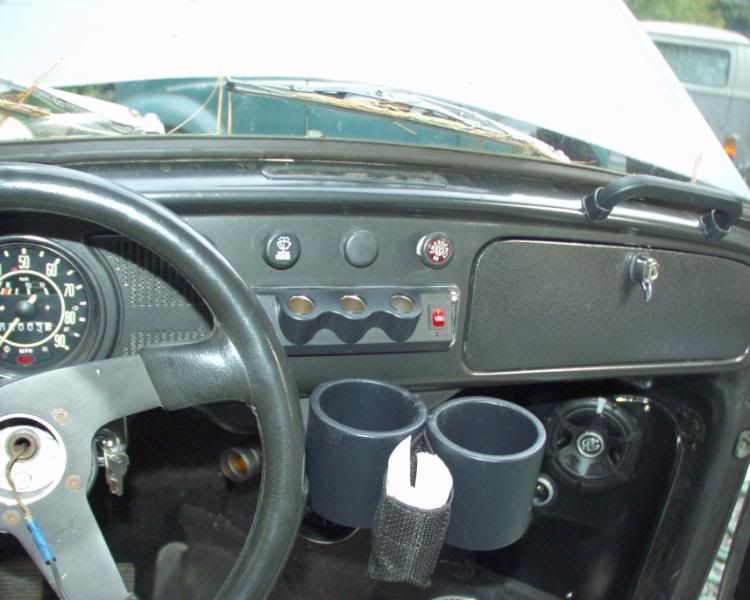
Posted: Sun Oct 11, 2009 7:52 pm
by Chris V
Posted: Sun Oct 11, 2009 8:13 pm
by Lotrat
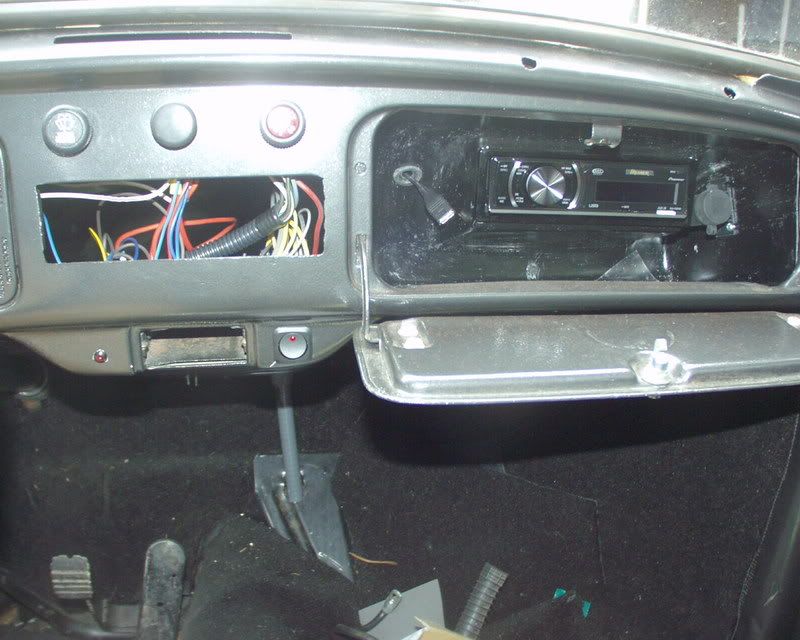
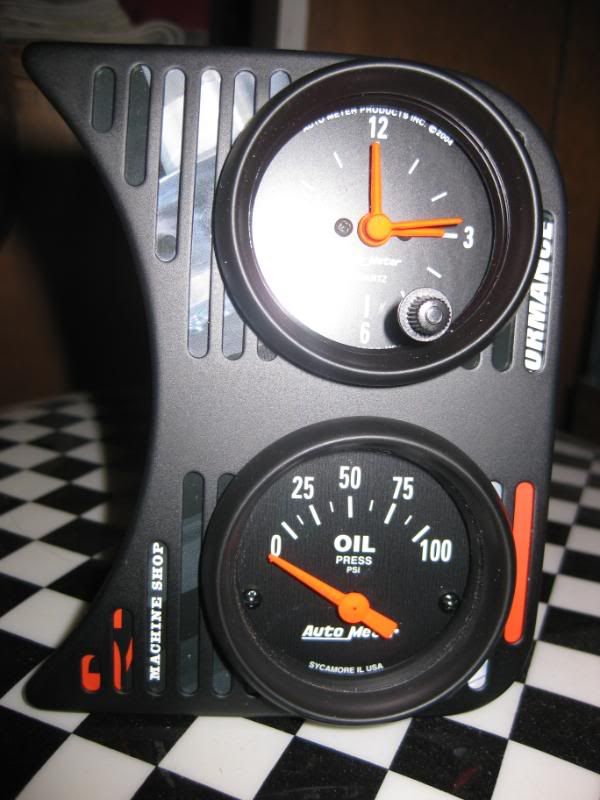
I like your cigar lighters... May be interesting when you hit a bump and a beverage spills into it. You might want to flip it over.
Posted: Sun Oct 11, 2009 8:17 pm
by Chris V
Lotrat wrote:I like your cigar lighters... May be interesting when you hit a bump and a beverage spills into it. You might want to flip it over.
There's an off switch
Really, I've got some rubber not-in-use plugs that fill the holes

Posted: Sun Oct 11, 2009 8:23 pm
by Lotrat
I have the same cup holder, but with the cut and turned front end I don't use it much. Coffee still splashes out the little hole in the lid.