My chenowth 4lwd upgrades *Now Honda swap*
-
tikotiko
- Posts: 2904
- Joined: Tue Jan 22, 2008 10:50 am
Re: My chenowth 4lwd upgrades
Oooooohhhhh great another talented fab guy with awesome welds. Ill never be able to post pics of my work again. Great job fordguy very nice stuff
I just wanna drive it that's it.
-
59Bisquik

- Posts: 468
- Joined: Wed Oct 08, 2008 12:18 am
Re: My chenowth 4lwd upgrades
-
Getrdone

- Posts: 2978
- Joined: Tue Jan 02, 2007 5:38 pm
Re: My chenowth 4lwd upgrades
Sweet, I need more ideas. Keep them flowing. I see you fabbing a fuel tank soon eh?
-
fordfreak
- Posts: 227
- Joined: Fri Jun 15, 2012 6:09 am
Re: My chenowth 4lwd upgrades
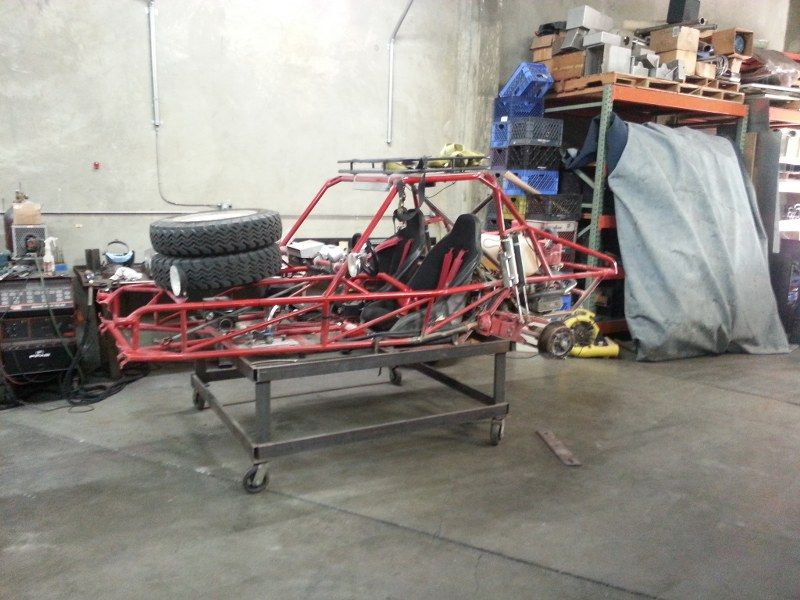
Thank you everybody! Getr I will start on a gas tank when I decide what Im going with for my power plant. I may need room for a radiator and fans! 
Here's the progress on my front suspension...
I want to post this information because I could not find the width of a stock beam ANYWHERE! and I really hate searching every forum and finding out no one really cared to post it for others.
I also didn't know what I should cut my new beam material to for a 6 in over beam. My old beam was 39 3/8" and didn't seam right to me.
So this is for anyone who wants to build their own beam.
Material to buy 2" x .120 wall DOM or 4130.
Stock VW beam length is 34 in.
6 in. over beam length is 40 in.
etc...
This is the material I am using for the front suspension-
1.5" x .188" wall 4130 for the trailing arm main tube.
1.0" x .188" wall 4130 for the shock bung tube.
1.5" x .375" wall DOM for the arm pivot tube.
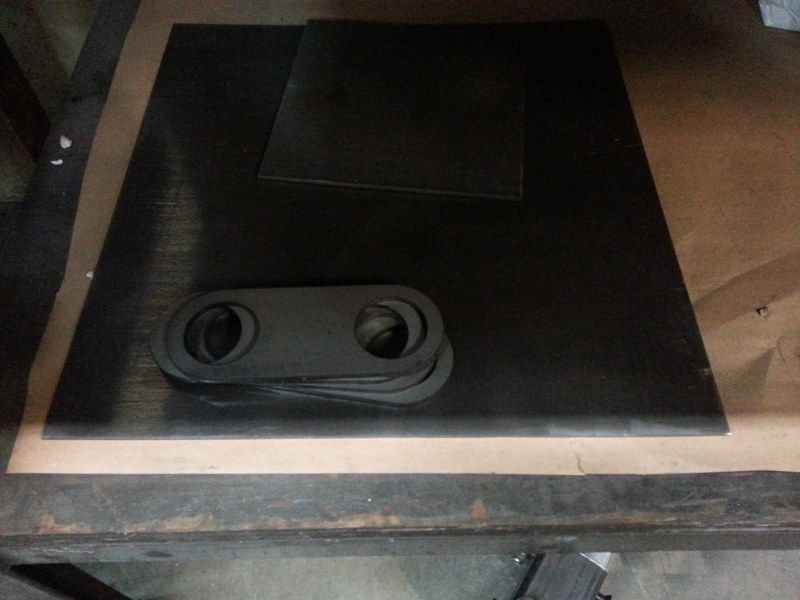
3/16" 4130 plate for the side shear gussets.
3/16" laser'd beam end plates from any buggy supply store.
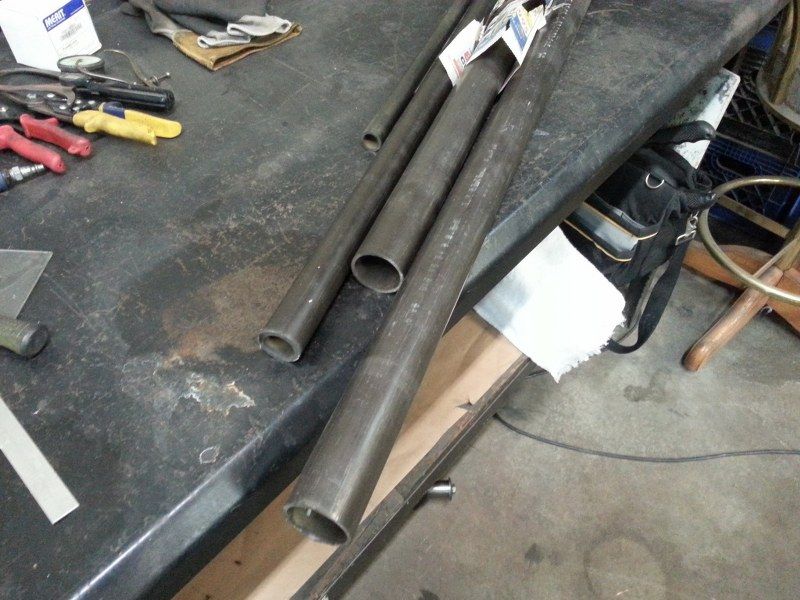
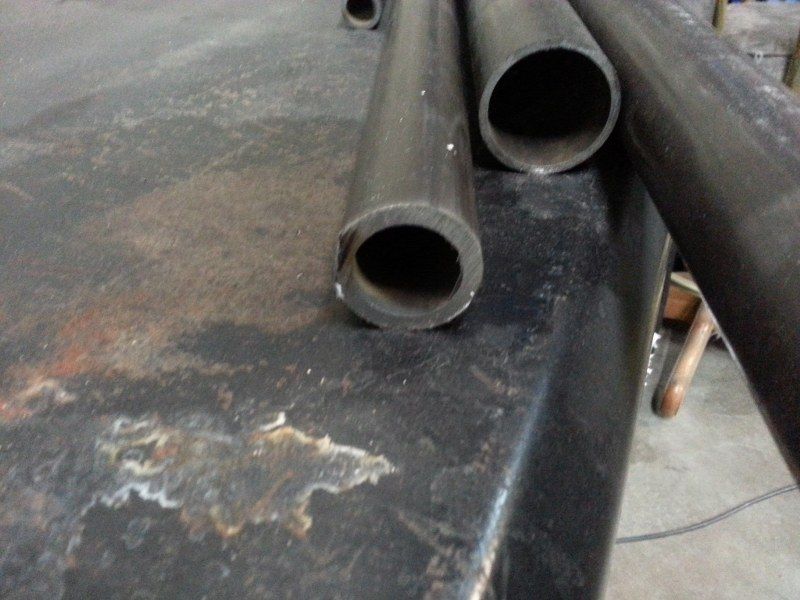
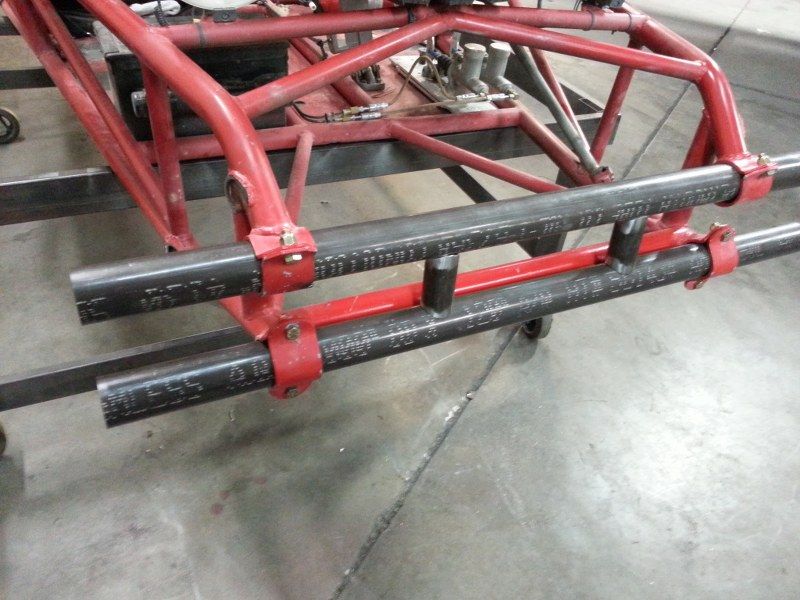
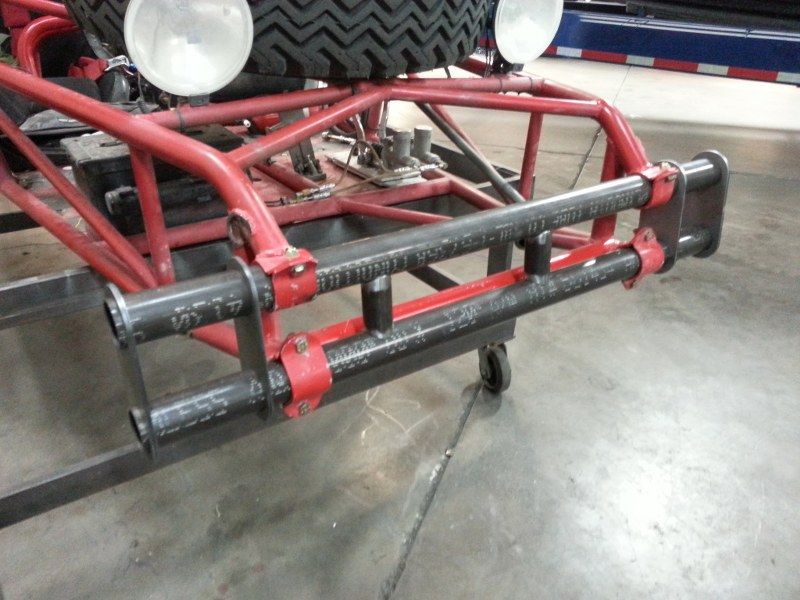
Here's my beam tube mockup...
Gonna cut off these side beam support brackets and top bumper brackets. They get in the way of my beam end plates. Plus I'm going to weld a bumper to the beam.

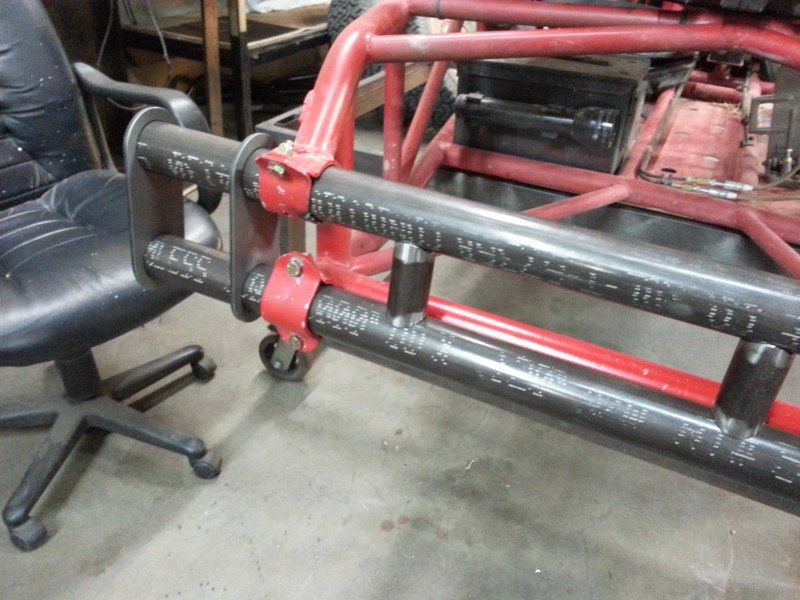
Here they are cut off...
Here's the progress on my front suspension...
I want to post this information because I could not find the width of a stock beam ANYWHERE! and I really hate searching every forum and finding out no one really cared to post it for others.
I also didn't know what I should cut my new beam material to for a 6 in over beam. My old beam was 39 3/8" and didn't seam right to me.
So this is for anyone who wants to build their own beam.
Material to buy 2" x .120 wall DOM or 4130.
Stock VW beam length is 34 in.
6 in. over beam length is 40 in.
etc...
This is the material I am using for the front suspension-
1.5" x .188" wall 4130 for the trailing arm main tube.
1.0" x .188" wall 4130 for the shock bung tube.
1.5" x .375" wall DOM for the arm pivot tube.
3/16" 4130 plate for the side shear gussets.
3/16" laser'd beam end plates from any buggy supply store.
Here's my beam tube mockup...
Gonna cut off these side beam support brackets and top bumper brackets. They get in the way of my beam end plates. Plus I'm going to weld a bumper to the beam.
Here they are cut off...
-
fordfreak
- Posts: 227
- Joined: Fri Jun 15, 2012 6:09 am
Re: My chenowth 4lwd upgrades
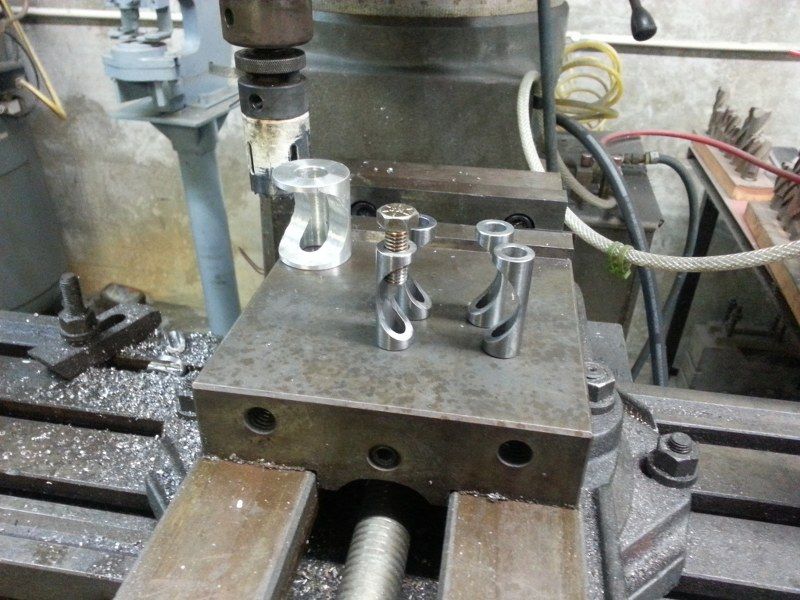
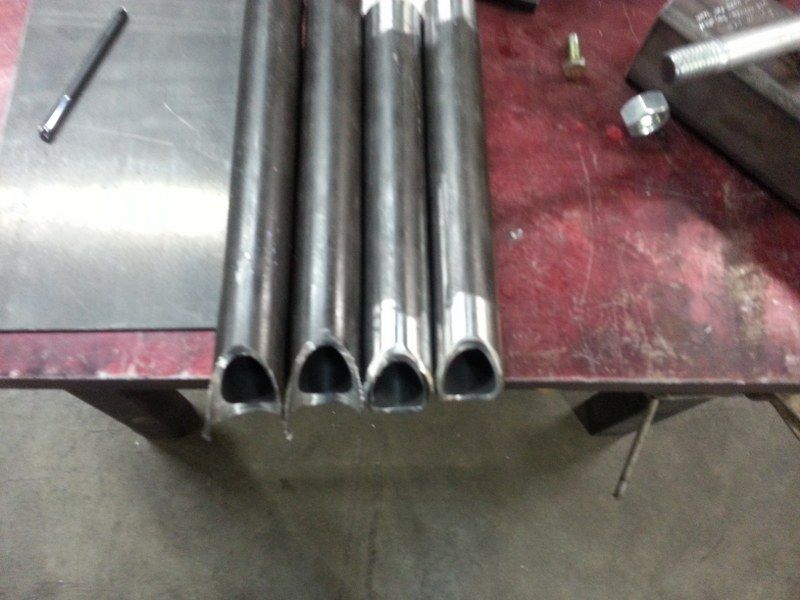
On to the front arms...
Making the fixture...
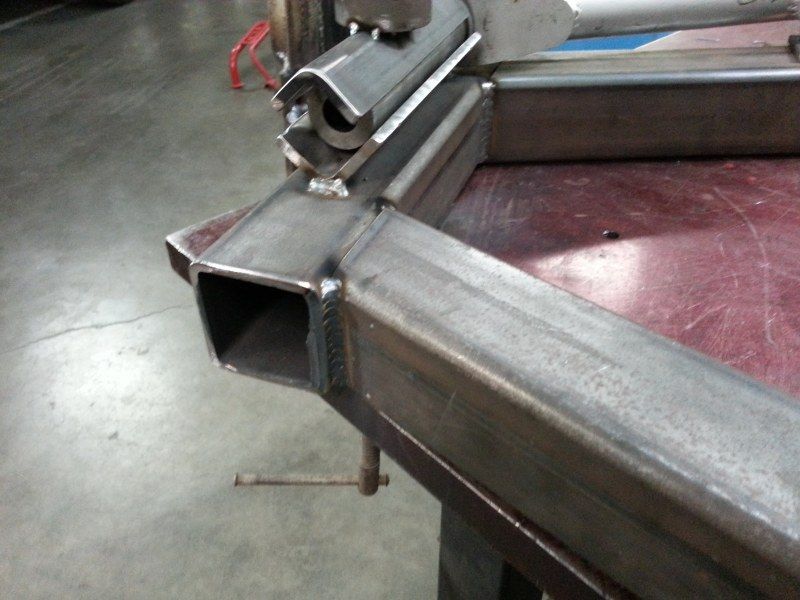
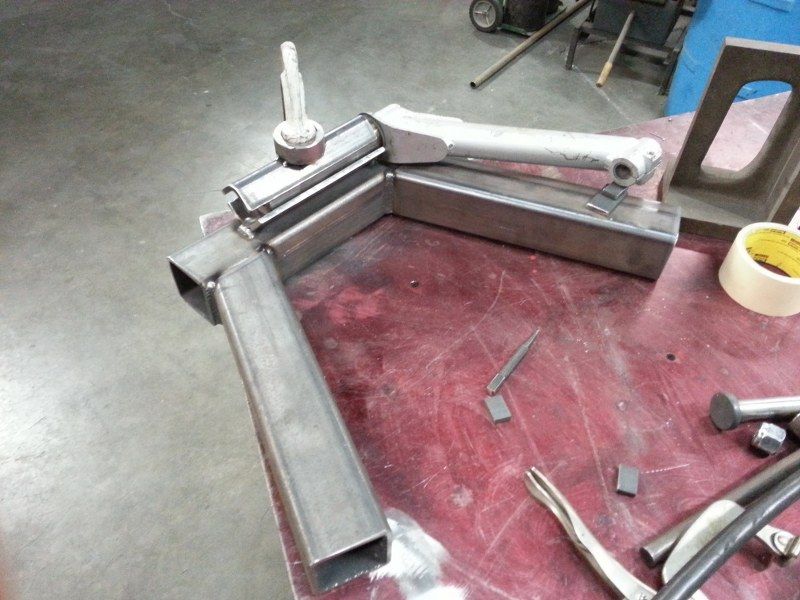

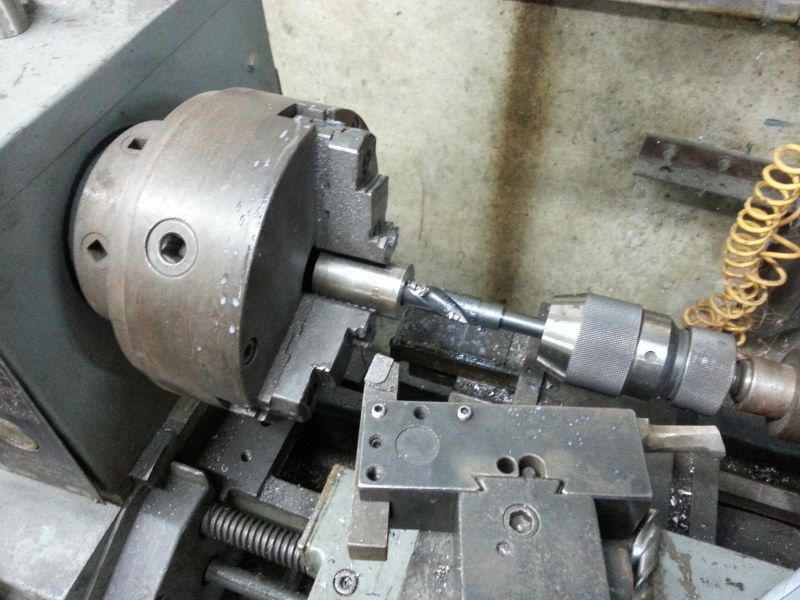
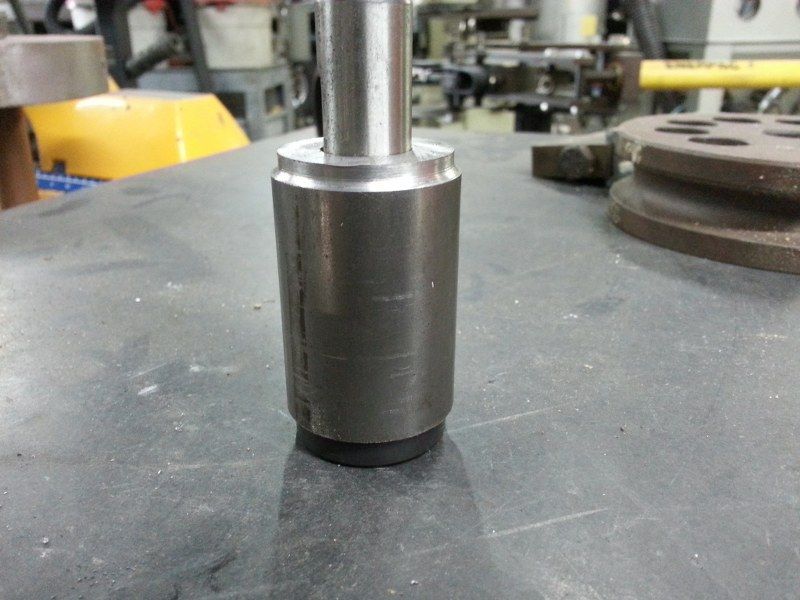
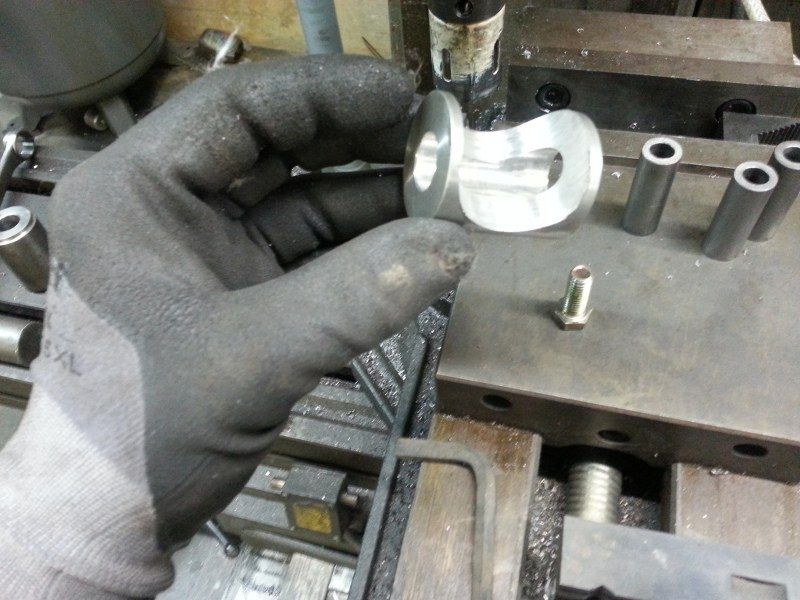
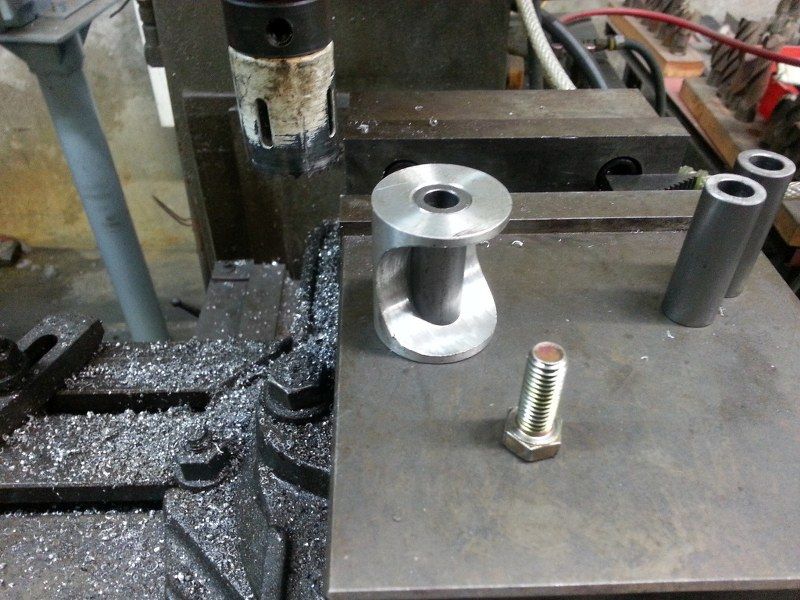
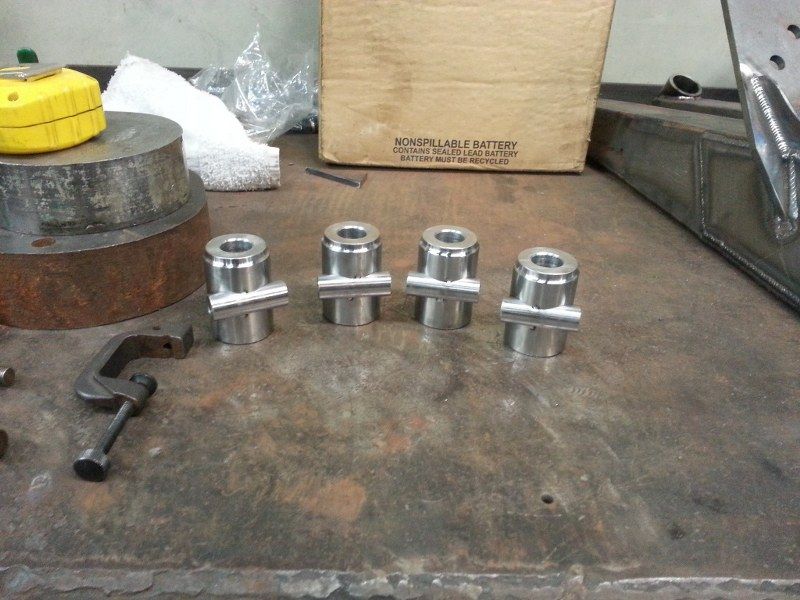
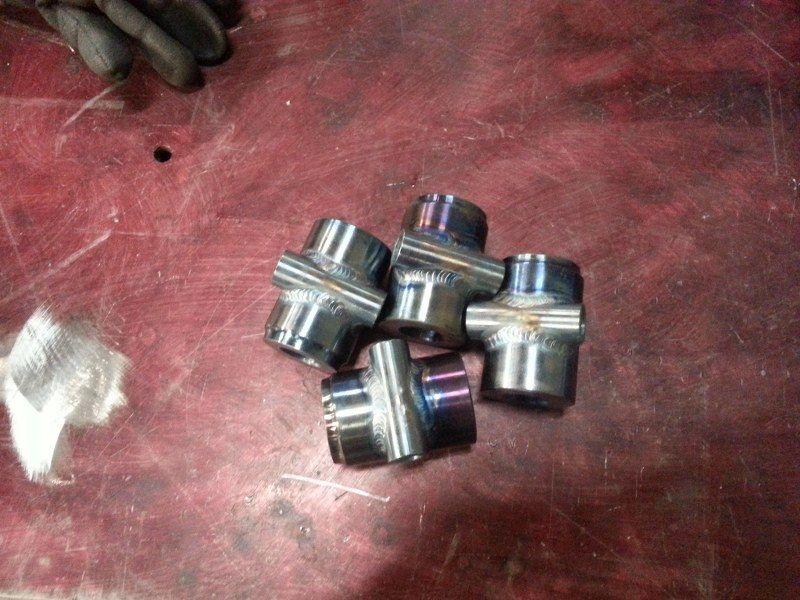
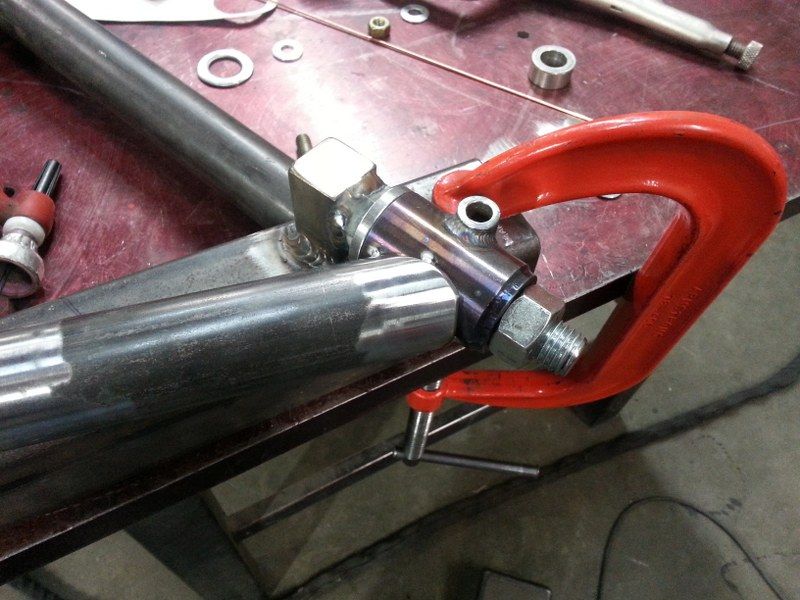
Here Im making my link pin clamps. I went .250" longer than the tweeds to get a proper weld on the angled tube that meets it.
It's cold roll solid bar. Bored to 18mm.
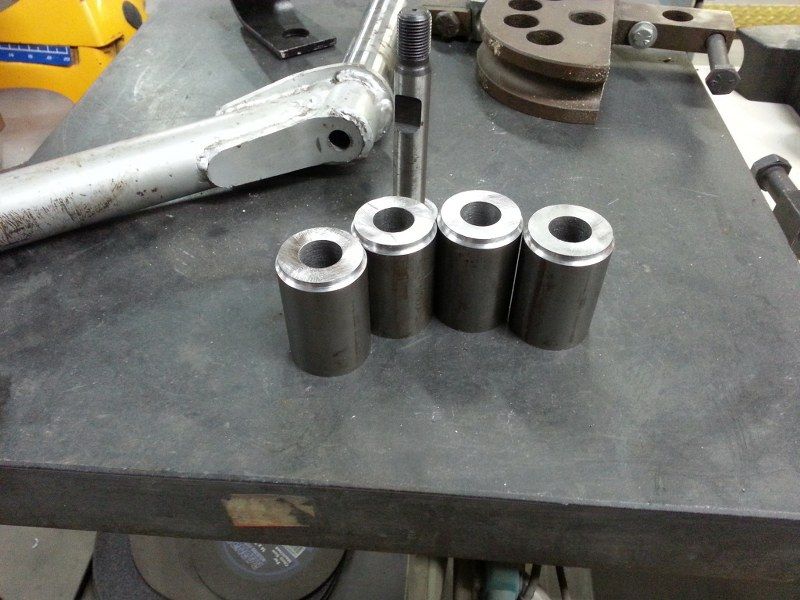
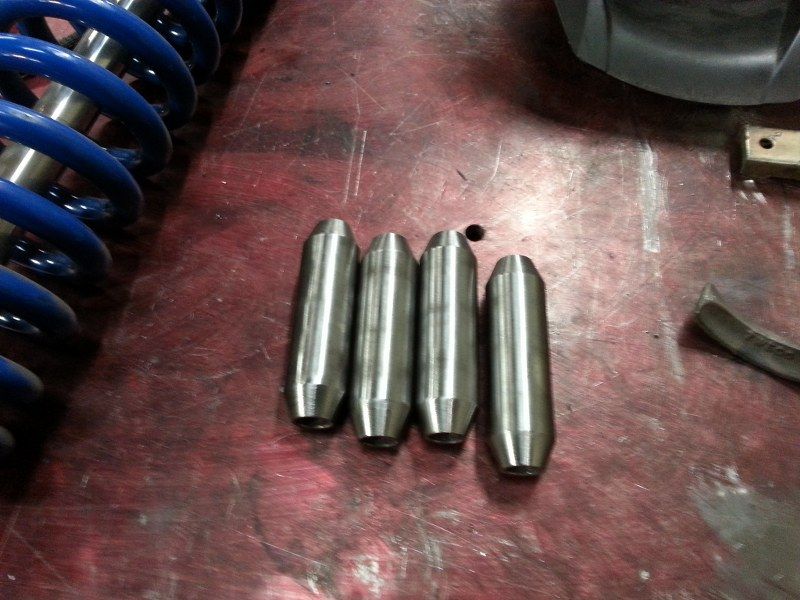
Here's the shock bungs. I cut them to 3.5" long, but it seemed to hold the two shocks too far apart. I got some info from a member on here that has a set of woods. He told me they use 3" long bungs, so I'm gonna cut .500" off.
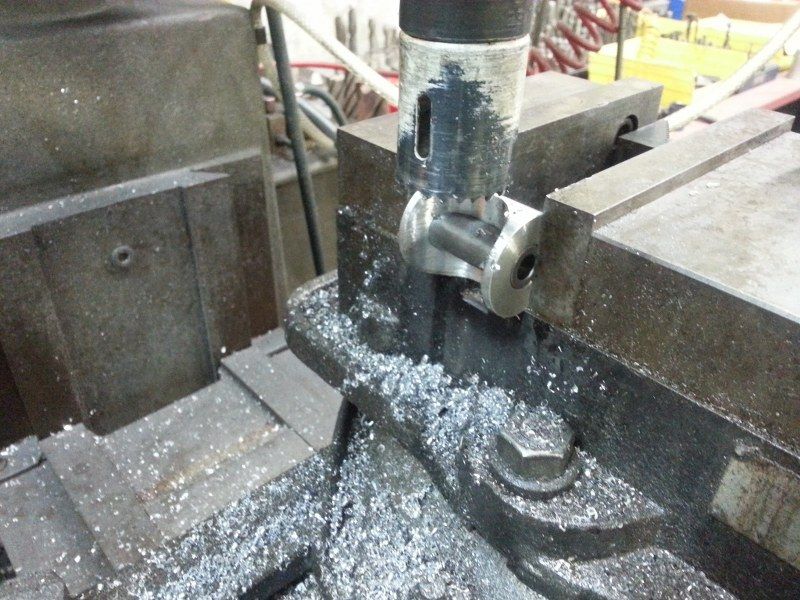
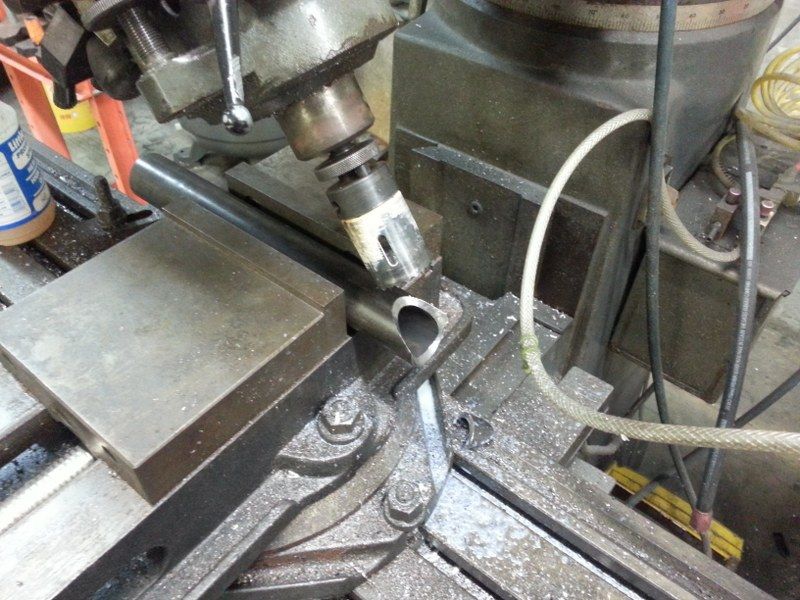
I made a little jig to cope the bolt boss's...
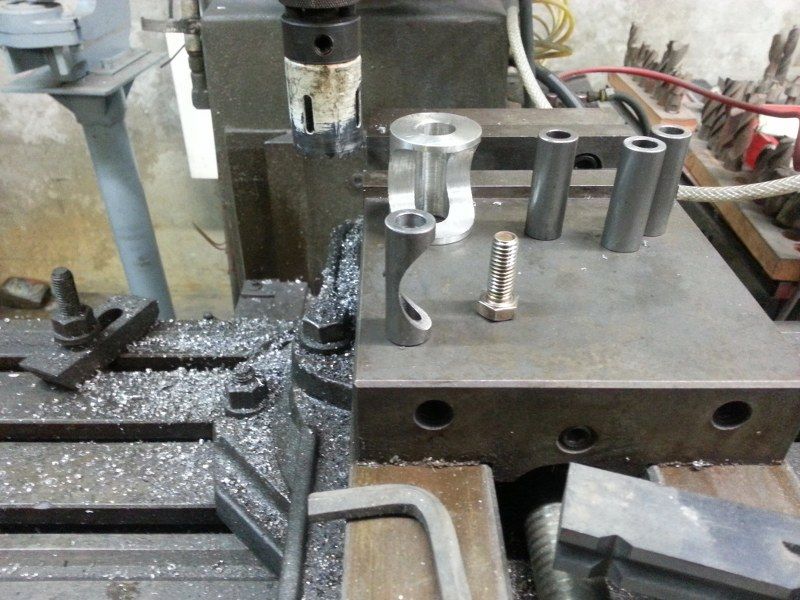

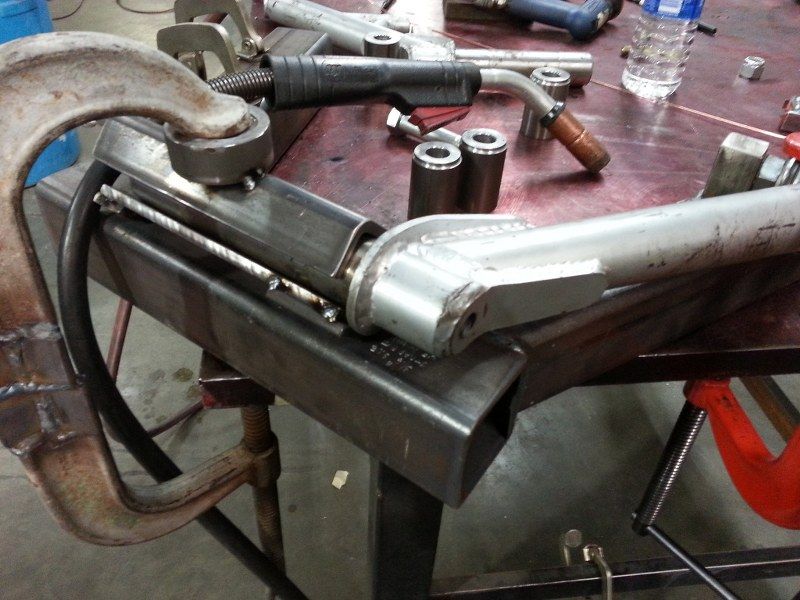
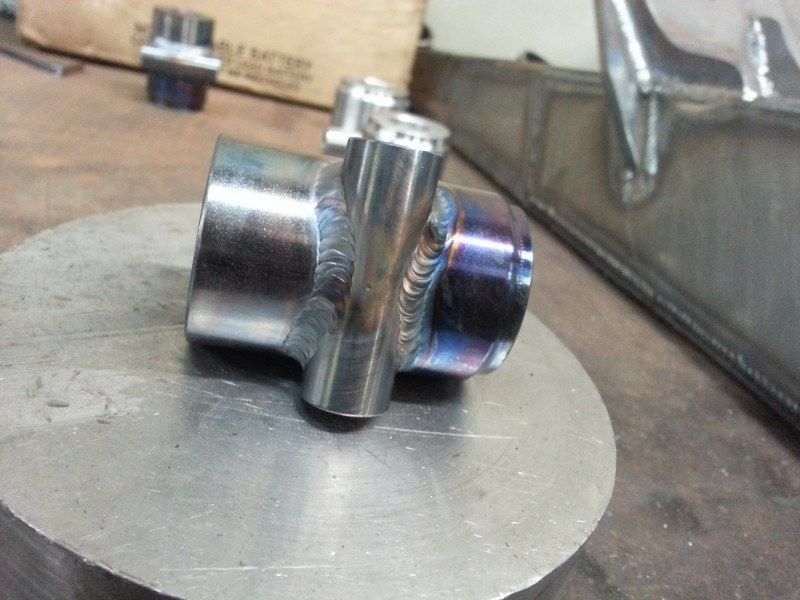
All tacked up...
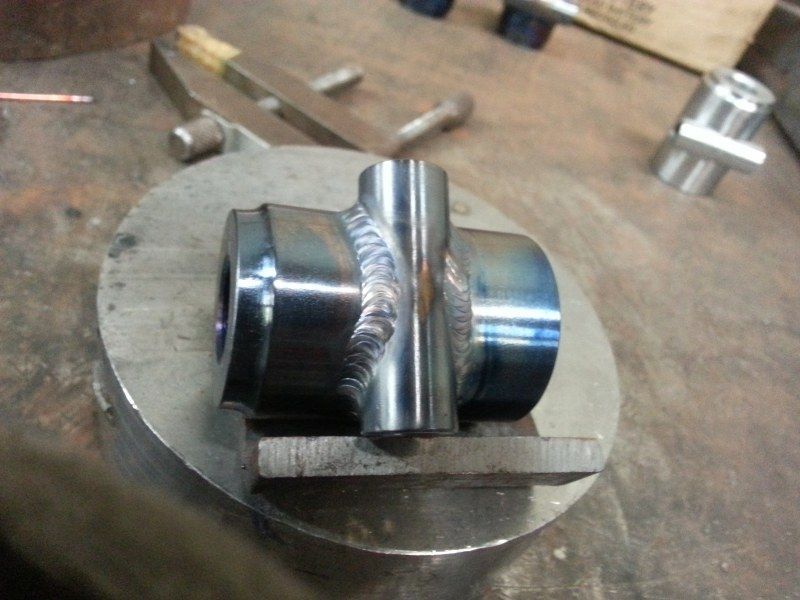
Strengthened spring plates...
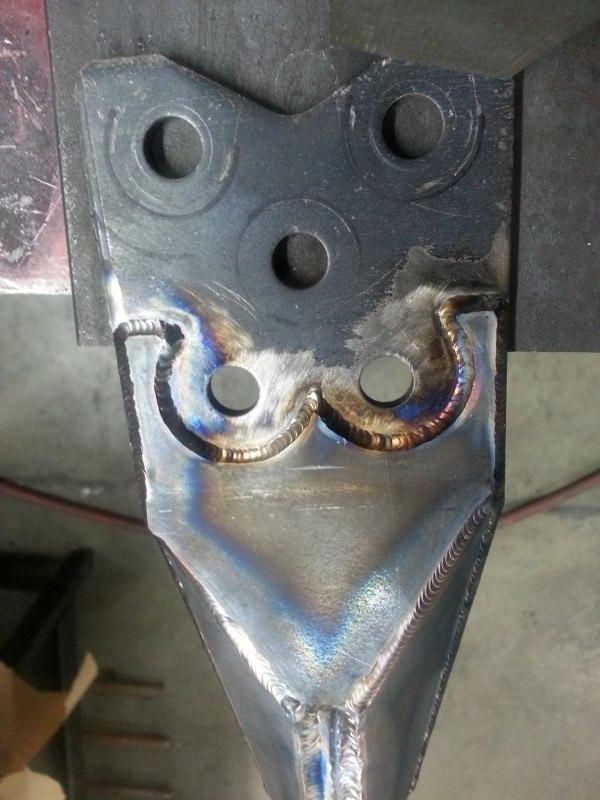
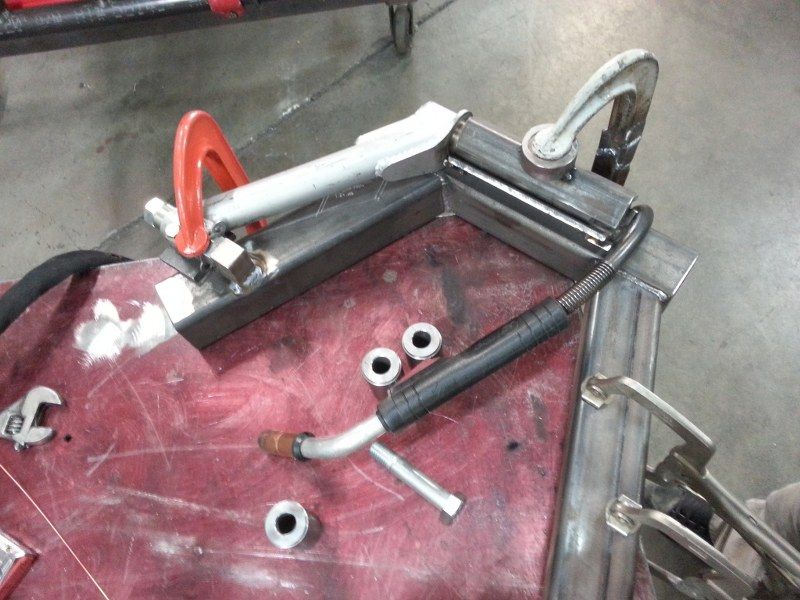
Pivot and link pin locations are done on the fixture. Now to build the arm for shock bung placement...

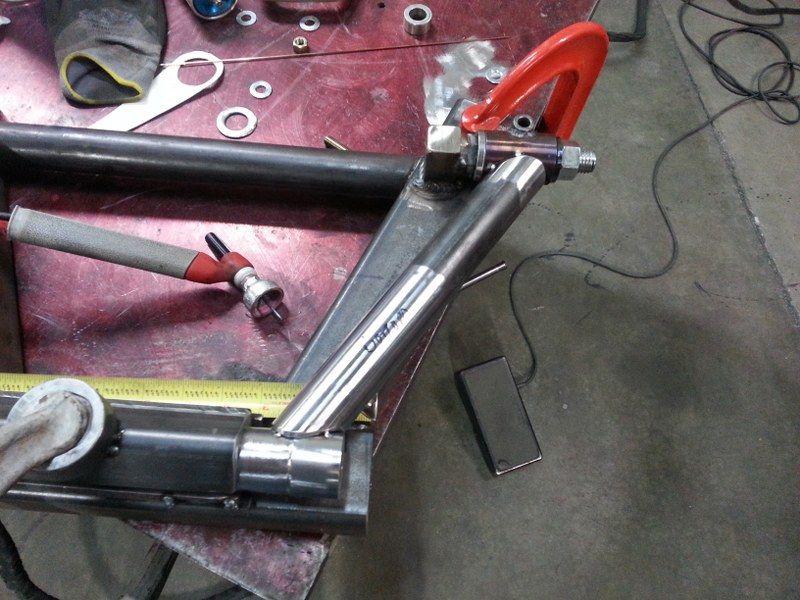

This all I have done so far. This weekend will be crazy shop hours to finish them up!
There is one thing that worries me a bit. I didn't insert the bolt boss far enough into the link pin clamp, so the bolt does not lock the link pin in place using the slot, just clamping force. I will double nut the pin, but do you guys think it will be a problem?
Making the fixture...
Here Im making my link pin clamps. I went .250" longer than the tweeds to get a proper weld on the angled tube that meets it.
It's cold roll solid bar. Bored to 18mm.
Here's the shock bungs. I cut them to 3.5" long, but it seemed to hold the two shocks too far apart. I got some info from a member on here that has a set of woods. He told me they use 3" long bungs, so I'm gonna cut .500" off.
I made a little jig to cope the bolt boss's...
All tacked up...
Strengthened spring plates...
Pivot and link pin locations are done on the fixture. Now to build the arm for shock bung placement...
This all I have done so far. This weekend will be crazy shop hours to finish them up!
There is one thing that worries me a bit. I didn't insert the bolt boss far enough into the link pin clamp, so the bolt does not lock the link pin in place using the slot, just clamping force. I will double nut the pin, but do you guys think it will be a problem?
-
motorbreath53

- Posts: 2169
- Joined: Wed May 21, 2008 5:57 pm
-
Getrdone
- Posts: 2978
- Joined: Tue Jan 02, 2007 5:38 pm
Re: My chenowth 4lwd upgrades
I think your fine. Just keep a eye on them to see if they are spinning since there is no bushing in there. Worst case, a set screw with the slot 90 to the clamp bolt. I doubt it will spin.
-
Getrdone
- Posts: 2978
- Joined: Tue Jan 02, 2007 5:38 pm
Re: My chenowth 4lwd upgrades
Oh, and feel free to ask anything before searching. Do we have a search button? J/K, but sometimes the quickest way is to ask.
And, oh my! what a big gas lens you have. And, 40" is a over beam
And, oh my! what a big gas lens you have. And, 40" is a over beam
-
fordfreak
- Posts: 227
- Joined: Fri Jun 15, 2012 6:09 am
Re: My chenowth 4lwd upgrades
If I asked every time I had a question the whole front page would be my posts! lol I'm new to this VW offroad stuff. I'm loving it though.
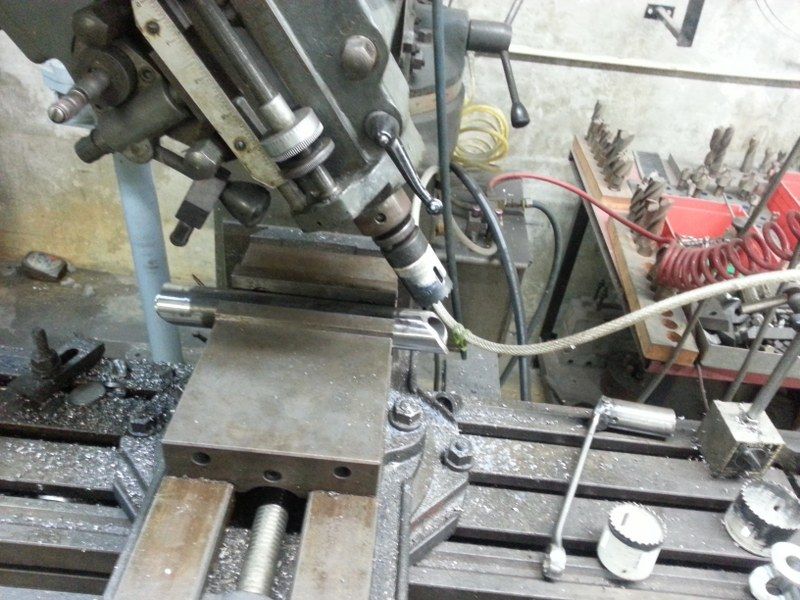
You like my gas cup getr? I smell jealousy. ha I made it years ago. I used to be an aerospace tig welder, so I used them for work. Argon was supplied in unlimited amounts! I mainly use it to tack in tight areas with 2" stick out or so.
You like my gas cup getr? I smell jealousy. ha I made it years ago. I used to be an aerospace tig welder, so I used them for work. Argon was supplied in unlimited amounts! I mainly use it to tack in tight areas with 2" stick out or so.
-
Devastator
- Posts: 3493
- Joined: Tue Nov 06, 2007 6:51 am
Re: My chenowth 4lwd upgrades
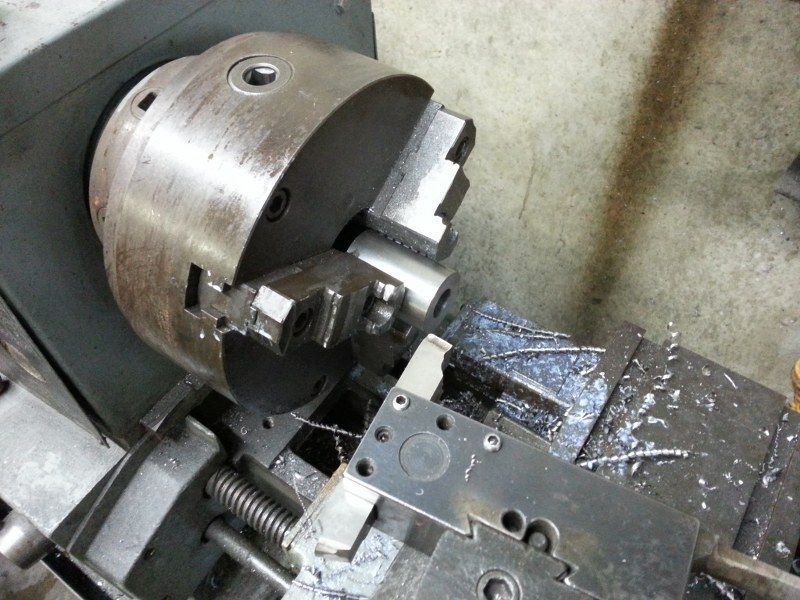
Nice work! Like the use of a milling machine, and don't think I didn't notice the cantilever block stack up on the right end of that vise to keep it clamping straight. Was the aluminum fixture the same length as the part is was holding or slightly shorter? Did you put a flat on the bottom of it first so you could relocate it?
I used a rotary table with a small vise bolted to it to notch some of my tubing as I hate to tram in the head after tilting it. There's some low quality picture in my build thread if my explanation doesn't make sense.
Keep up the good work and the pics.
I used a rotary table with a small vise bolted to it to notch some of my tubing as I hate to tram in the head after tilting it. There's some low quality picture in my build thread if my explanation doesn't make sense.
Keep up the good work and the pics.
Devastator's Build Thread
Sandrail
2.4 liter, supercharged Chevy Ecotec
"If everything seems under control, you're just not
going fast enough."
Mario Andretti
Sandrail
2.4 liter, supercharged Chevy Ecotec
"If everything seems under control, you're just not
going fast enough."
Mario Andretti
-
fordfreak
- Posts: 227
- Joined: Fri Jun 15, 2012 6:09 am
Re: My chenowth 4lwd upgrades
If you noticed my vice blocks then you sir are a sick man and a machinist! lol
The alum jig was just a hair longer. The vice was mainly holding the jig and not the tube. I didnt want to clamp on the tubing and have it bend after coping it. As the tubing got hot it expanded in the alum and held in there pretty good.
Did you stand the turn table up on its side you mean? I hate indexing the head too, should have thought about another way or just angled the tube in the vice!
I wanna get this!
-
Devastator
- Posts: 3493
- Joined: Tue Nov 06, 2007 6:51 am
Re: My chenowth 4lwd upgrades
Guilty as charged. It's a sickness.fordfreak wrote:If you noticed my vice blocks then you sir are a sick man and a machinist! lol
Yes, I stood the rotary table on it's side. Most of the time I just angle it in the vise and clamped it using taller jaws. I also made a plate with bolt holes for a long Vee block that I have, but only used it twice I think.
I made something very similar and it worked pretty well. My mill is enough of a POS, that there holes all over the table, (I bought it cheap and well used). I'd like to get a "EZ-Tram mill alignment tool", shown at the bottom of this page:fordfreak wrote:I wanna get this!
Image
http://www.usshoptools.com/NEW_WEB_2012 ... 040_44.pdf
Devastator's Build Thread
Sandrail
2.4 liter, supercharged Chevy Ecotec
"If everything seems under control, you're just not
going fast enough."
Mario Andretti
Sandrail
2.4 liter, supercharged Chevy Ecotec
"If everything seems under control, you're just not
going fast enough."
Mario Andretti
-
Getrdone
- Posts: 2978
- Joined: Tue Jan 02, 2007 5:38 pm
Re: My chenowth 4lwd upgrades
As far as number of posts! Ha! We specialize in pages and pages of chatter! Reading others questions and answers makes us all rocket scientists. This forum takes massive MB's from your brains hard drive so be forewarned.
-
Leatherneck

- Moderator
- Posts: 17104
- Joined: Sat Jul 01, 2006 6:47 pm
Re: My chenowth 4lwd upgrades
See now you are just showing off ( as you well should) Keep em coming.
-
TimS

- Posts: 5723
- Joined: Fri Apr 23, 2010 10:11 pm
Re: My chenowth 4lwd upgrades
Nice work!! Thanks for detailing the process, that helps a lot. As long as your using a link pin with a nut on it, I don't see the problem.
Don’t ever yield your gift of dream; Your knack for gumption, too. For “It’s the crazy ones that have all the fun," if dreamers yearn to do.