My ongoing Turbobaja build
-
seabeebuggy

- Posts: 3582
- Joined: Sun Mar 12, 2006 11:25 am
Show off 
www.BigMikesGuns.com oe https://www.BMGAA.com
Thomas Jefferson said It may be necessary for a country to have a revolution every 200 years to right the wrongs of a Government.
Got Lead?
Thomas Jefferson said It may be necessary for a country to have a revolution every 200 years to right the wrongs of a Government.
Got Lead?

-
Leatherneck

- Moderator
- Posts: 17104
- Joined: Sat Jul 01, 2006 6:47 pm

-
turbobaja

- Posts: 2826
- Joined: Fri Sep 14, 2007 4:56 pm
Thanks guys.
Showoff? I'll trade my spoiler for your A-Arm front suspension setup Seabee. Well it might look a little funny(er) on your buggy, but I'll still take the A-Arms .
.
Leather, your the first to call shotgun, so I guess you've got a road trip in your future. Give me another year to get it drivable. I hope it's ready in a year. Still have a long list, of course. Hopefully I can be ready for some paint by the end of this summer, wire it up and get the interior together this winter and be ready to start tuning it next summer.
Dubs, I really don't know where the hell I get some of this stuff. I'm pretty sure most of this build started life as one big pipe dream. Once I had the idea in my head, cardboard and plywood became very handy to template and fit before wasting too much alumi or steel.....or time. I do everything I can to prevent future problems and anticipate assembly and wear issues. These days I consider myself very fortunate to have a decent paying job and the time and a place to do what I do. At this point I'll just be happy to get it on the road before something major happens with fuel/oil supplies. I guess I'll just keep on grinding till she's a runner.
Thanks again guys.
Karl
Showoff? I'll trade my spoiler for your A-Arm front suspension setup Seabee. Well it might look a little funny(er) on your buggy, but I'll still take the A-Arms
Leather, your the first to call shotgun, so I guess you've got a road trip in your future. Give me another year to get it drivable. I hope it's ready in a year. Still have a long list, of course. Hopefully I can be ready for some paint by the end of this summer, wire it up and get the interior together this winter and be ready to start tuning it next summer.
Dubs, I really don't know where the hell I get some of this stuff. I'm pretty sure most of this build started life as one big pipe dream. Once I had the idea in my head, cardboard and plywood became very handy to template and fit before wasting too much alumi or steel.....or time. I do everything I can to prevent future problems and anticipate assembly and wear issues. These days I consider myself very fortunate to have a decent paying job and the time and a place to do what I do. At this point I'll just be happy to get it on the road before something major happens with fuel/oil supplies. I guess I'll just keep on grinding till she's a runner.
Thanks again guys.
Karl

-
1303wasserbug

- Posts: 175
- Joined: Tue Jul 04, 2006 10:51 am
-
turbobaja
- Posts: 2826
- Joined: Fri Sep 14, 2007 4:56 pm
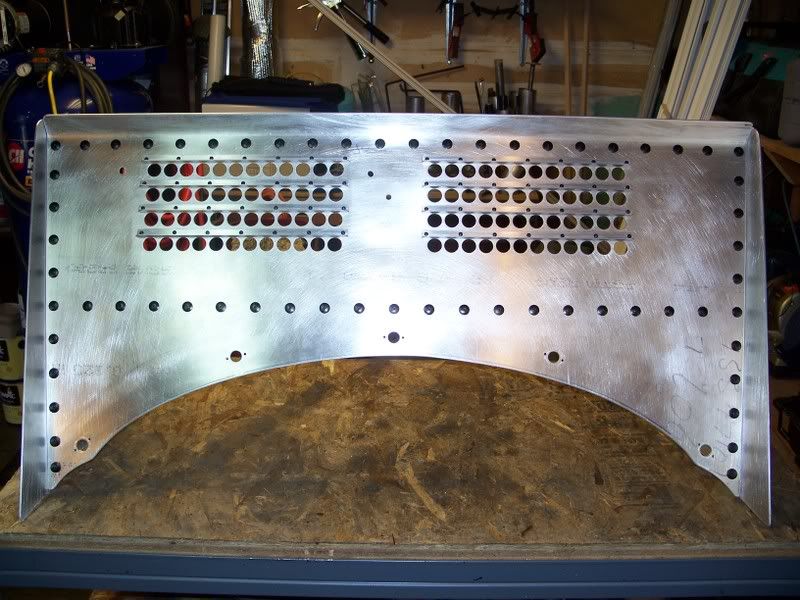
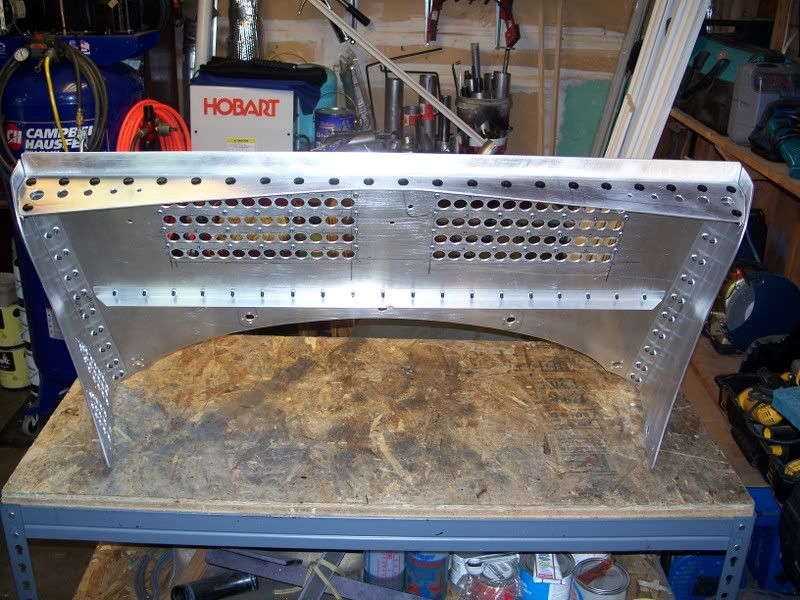
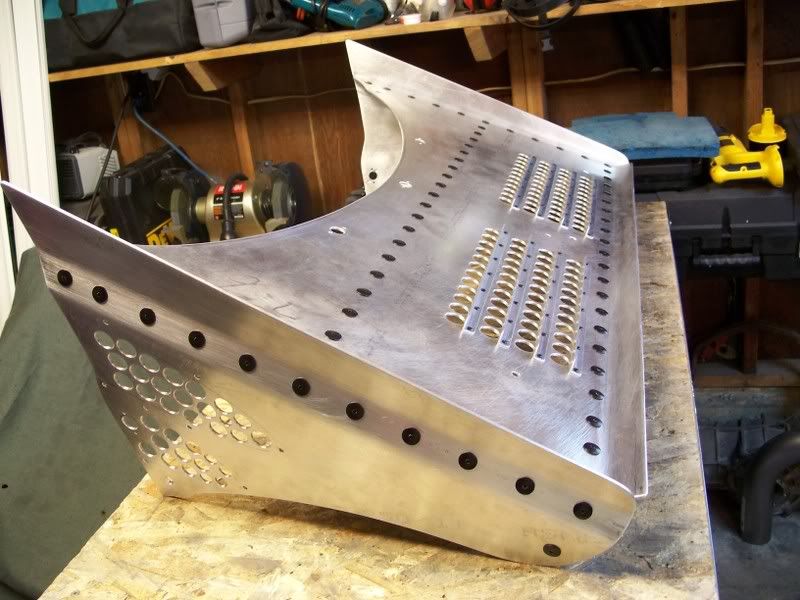
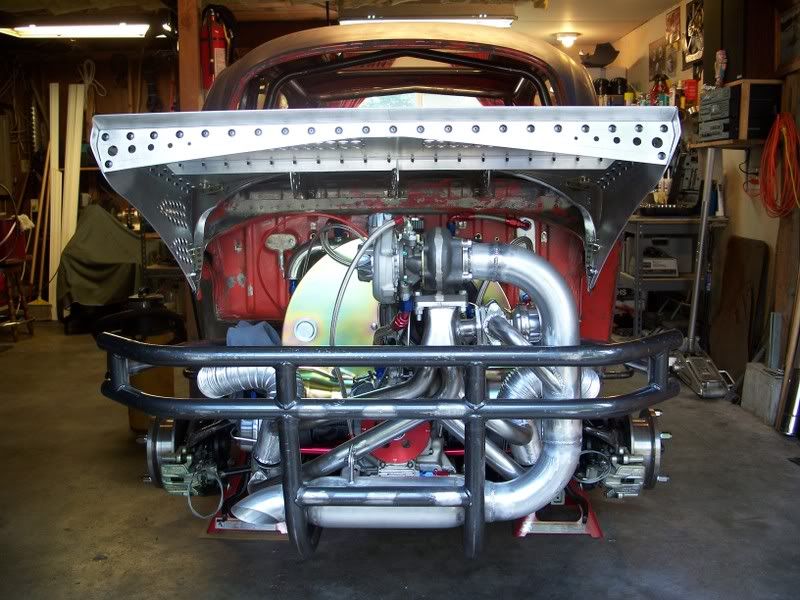
It's kinda tough to make progress when the weather is nice outside. The spoiler is done as far as fitting and making parts. I still have to do the final assembly and of course paint it eventually.
Here's all the puzzle pieces.
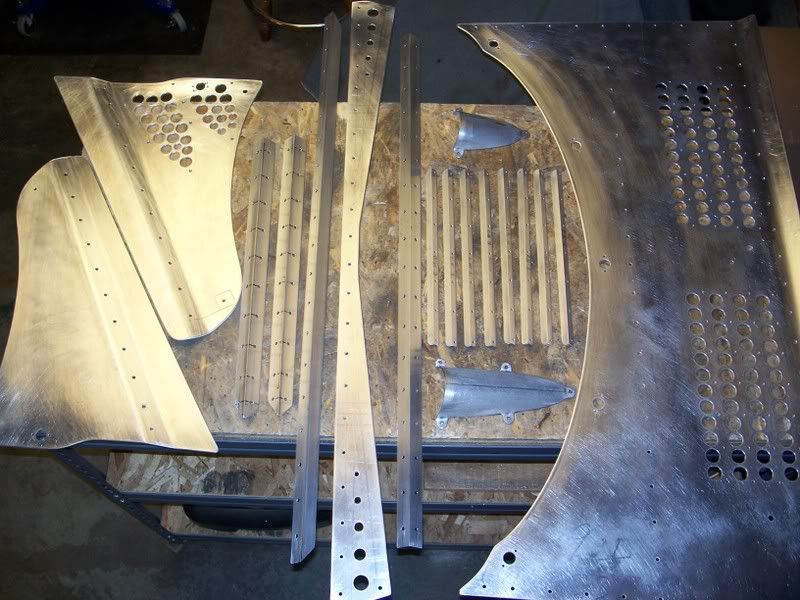
Total of 7 Dzus mounts and 2 countersunk pinch bolts to secure the lower tips good and tight. Just in case this thing makes some downforce, or just a whole bunch of vibration and drag. I don't want it falling off.
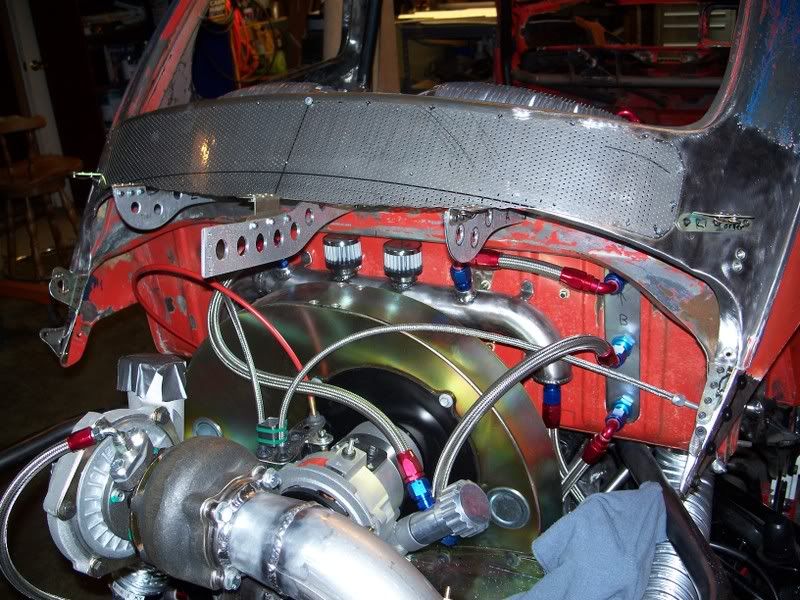
I reinforced the little horns that support a lot of the weight of the spoiler with some 18 ga exhaust tubing. I shaped it match the contour of the 'horns' and riveted them in place. I didn't want to weld them for fear of warping the narrow stretch of sheat metal and making a lot more work for me. All the riv-nuts that the mounts bolt to are riveted through both body and the reinforcement, so they're in there good. Had to keep them pretty low pro with the carbs right next to them.

I made it so all the odd shaped mounts can be unbolted from the body. Hopefully it will make doing the body work a little easier. Plus I can powder coat them this way
Just have to do some minor structural reinforcements to the cage and it's time to get the body straight enough to paint.
Steady as she goes.
Karl
Here's all the puzzle pieces.
Total of 7 Dzus mounts and 2 countersunk pinch bolts to secure the lower tips good and tight. Just in case this thing makes some downforce, or just a whole bunch of vibration and drag. I don't want it falling off.
I reinforced the little horns that support a lot of the weight of the spoiler with some 18 ga exhaust tubing. I shaped it match the contour of the 'horns' and riveted them in place. I didn't want to weld them for fear of warping the narrow stretch of sheat metal and making a lot more work for me. All the riv-nuts that the mounts bolt to are riveted through both body and the reinforcement, so they're in there good. Had to keep them pretty low pro with the carbs right next to them.
I made it so all the odd shaped mounts can be unbolted from the body. Hopefully it will make doing the body work a little easier. Plus I can powder coat them this way
Just have to do some minor structural reinforcements to the cage and it's time to get the body straight enough to paint.
Steady as she goes.
Karl
-
turbobaja
- Posts: 2826
- Joined: Fri Sep 14, 2007 4:56 pm
-
1303wasserbug
- Posts: 175
- Joined: Tue Jul 04, 2006 10:51 am
-
turbobaja
- Posts: 2826
- Joined: Fri Sep 14, 2007 4:56 pm
Here's some stuff I got done over the past few weeks.
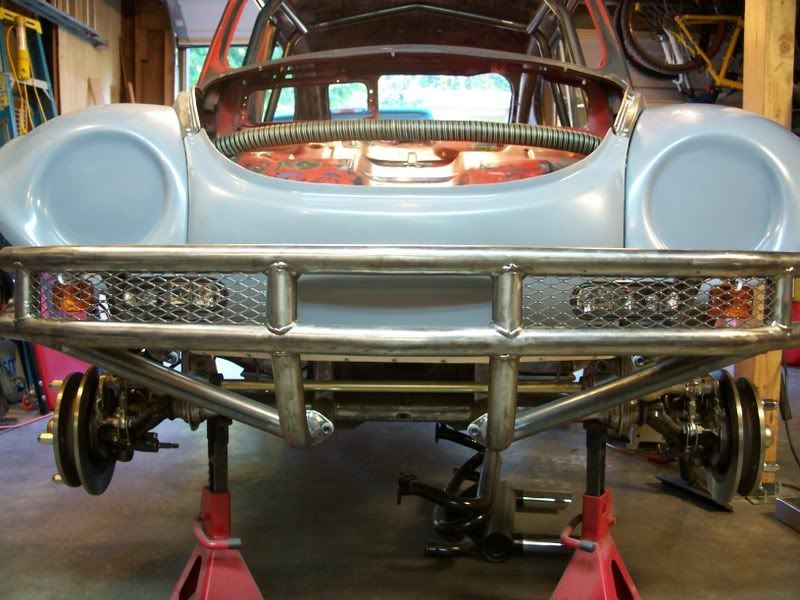
Welded tabs for driving lights and turn signals.
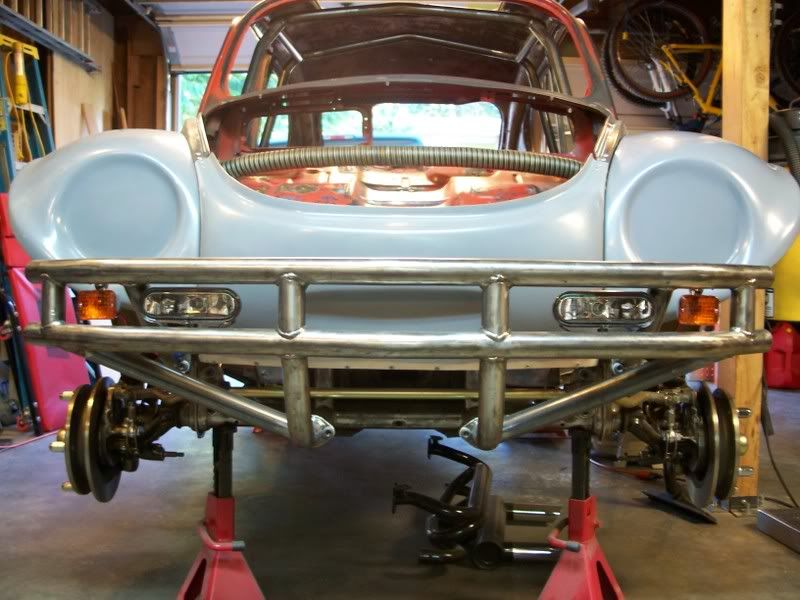
Thinking about covering them with some expanded metal for protection.
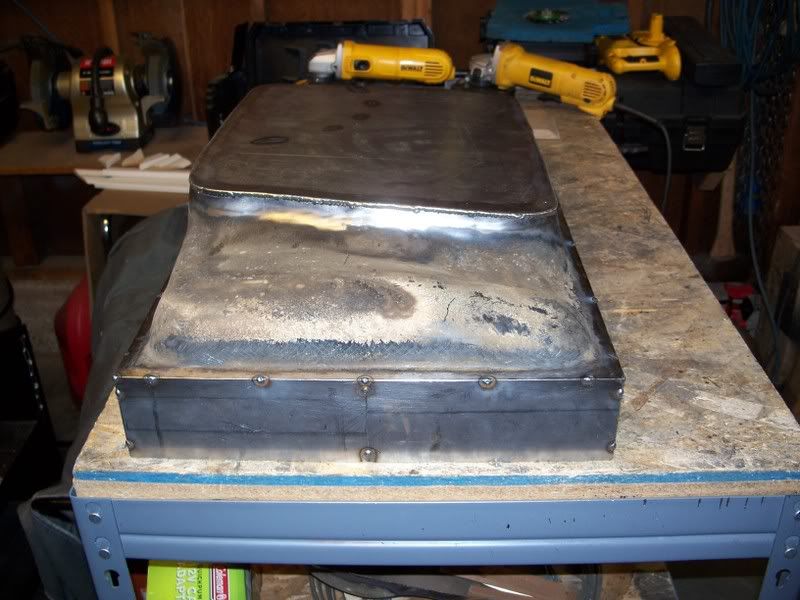
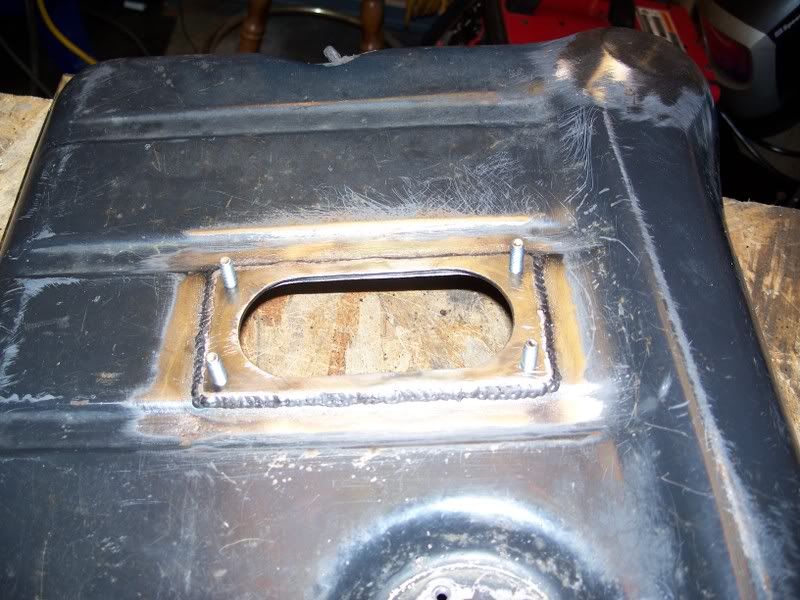
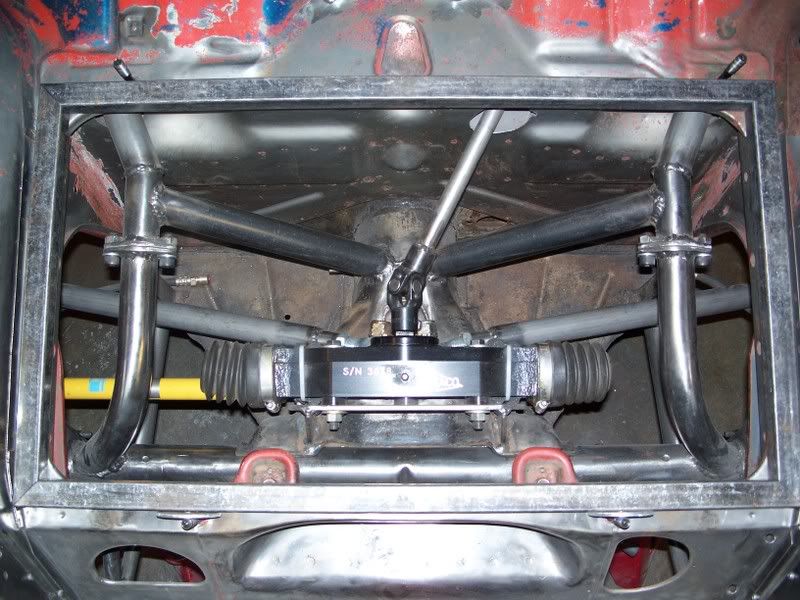
Been 'modifying' my fuel thank a bit. The steering linkage got in the way some, so I had to slice off a couple gallons of capacity from the bottom of the tank.

I need more than 10 gallons of fuel for any kind of road/wheelin trip, so I had to get some more volume in the tank. I cut it in half at the factory weld arround the perimiter and added 3" of 16 ga sheet metal. Works out to just over 5.5 gal additional volume.
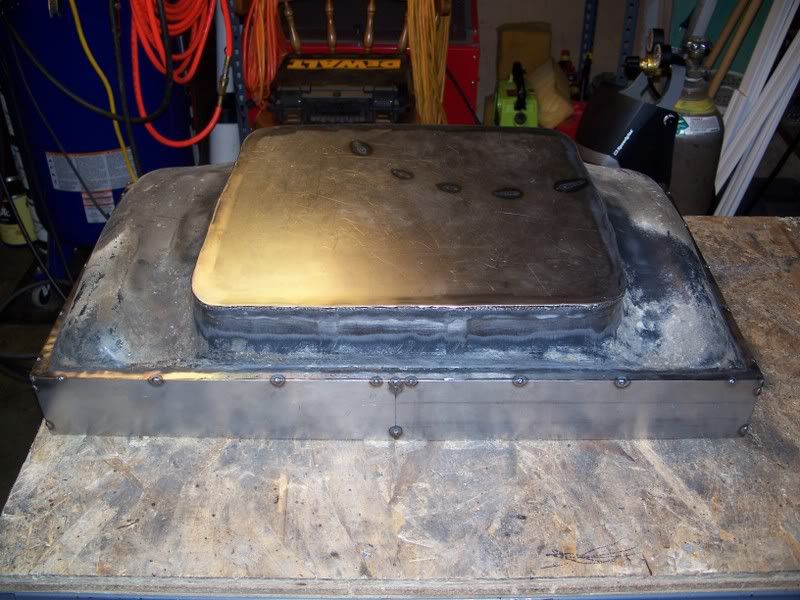
I had to fab some kind of sending unit (kinda mimicked a GM unit). I placed it down at the lowest point of the tank and put a wall behind it to keep from starving it when I'm really low on gas, and accelerating. Its a GM pump for a 3/4 ton big block vortec (port fuel injected). If this unit doesn't cut it, any aftermarket in-tank pump will mount right on to this thing.
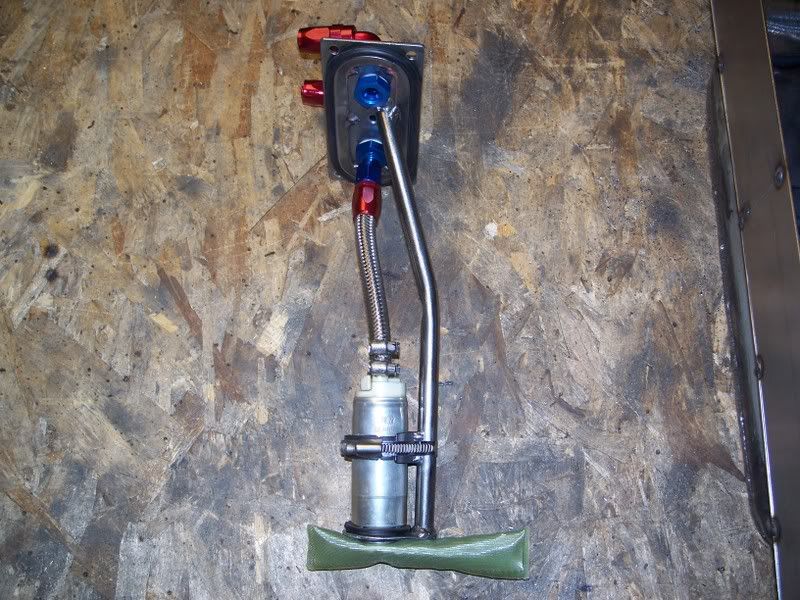
The level sender had to turn about 145 deg around to clear the fuel pump and baffle. I also reshaped to float arm to accruately measure fuel level.
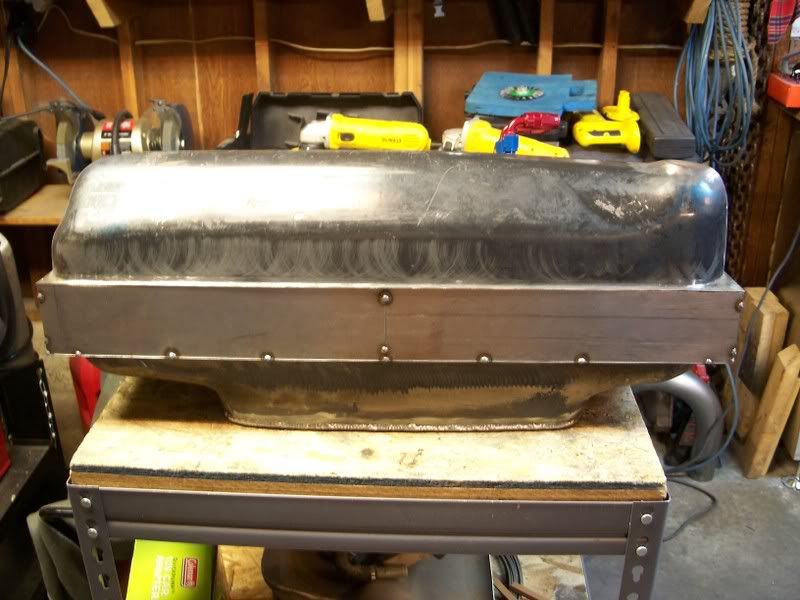
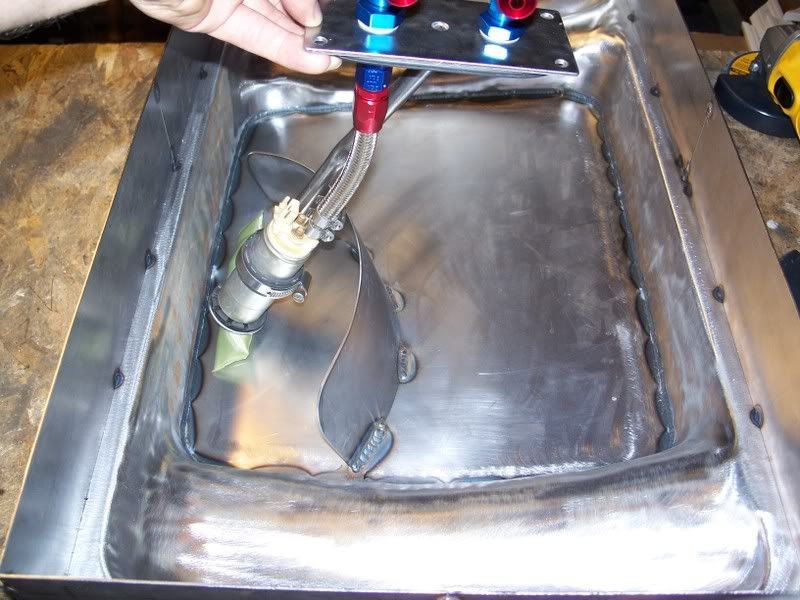
I'm bracing the lip of the tank with this 1" square tube. It will be part of the tank when it's done. Also raised the tank another inch above the factory mounting surface to help clear the under side.
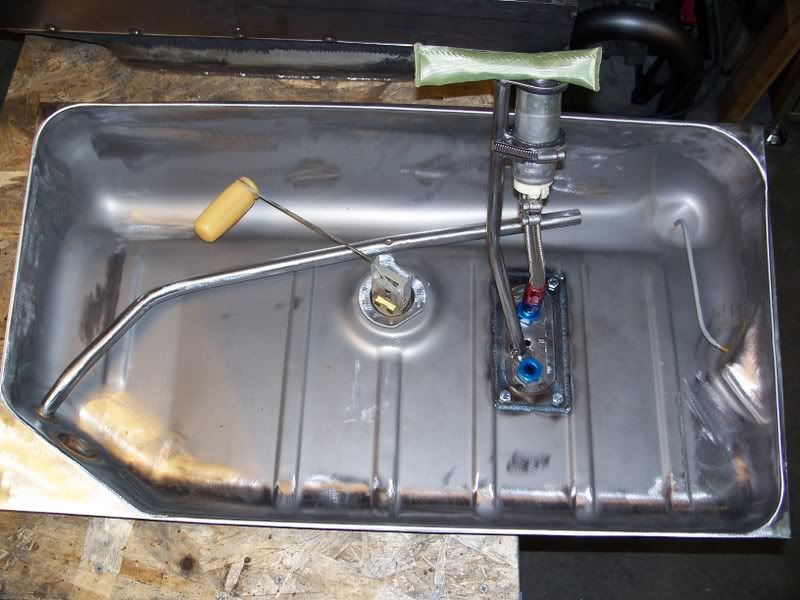
Here's the bottom half in place.
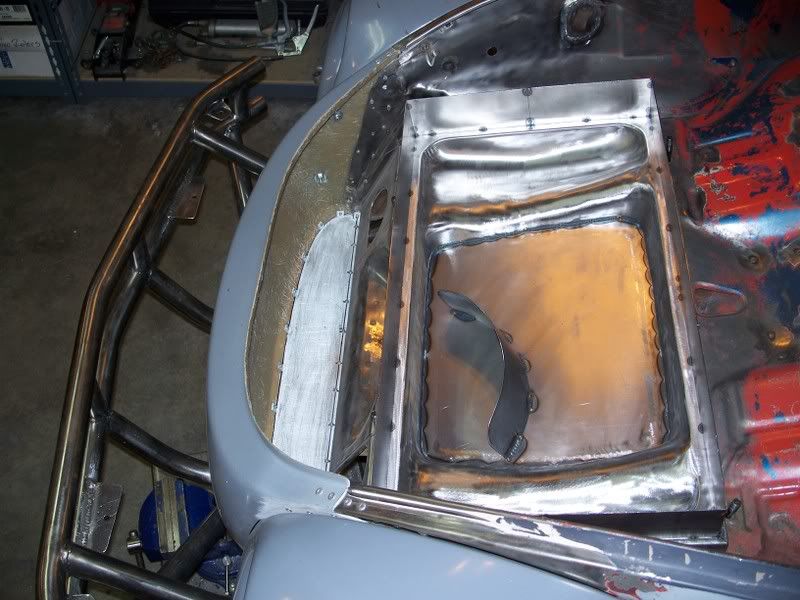
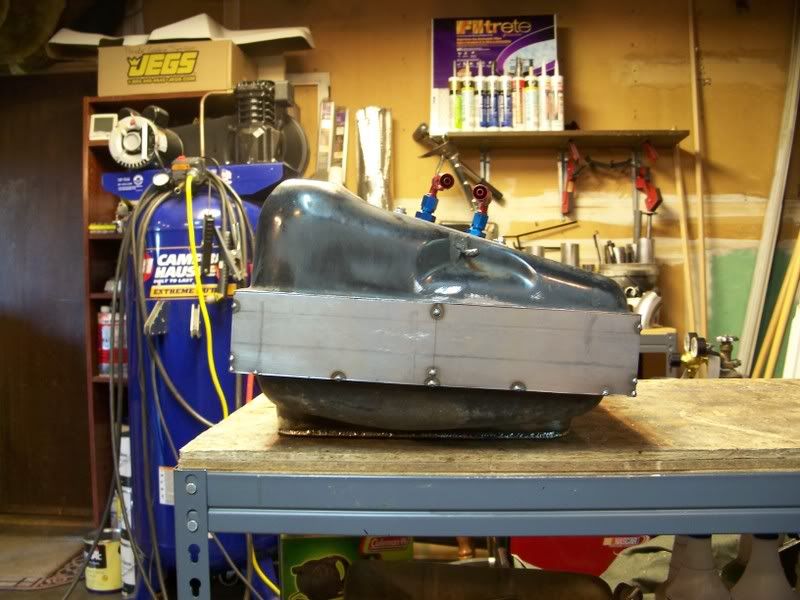
And here's the top on. Probably could have got another inch or two if I really wanted, but I didn't want to push it. Hopefully about 13.5 - 14 gal will be good.
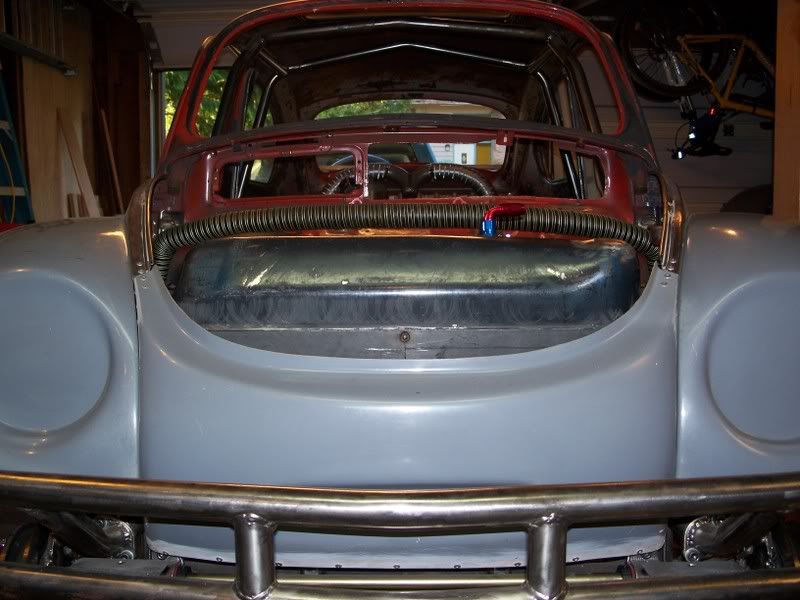
It's pretty much ready to weld shut for good, I think. Just wanted to get a couple shots along the way.
Going to try and do some camping next weekend and take a little break. Hopefully the weather will be nice.
Karl
Welded tabs for driving lights and turn signals.
Thinking about covering them with some expanded metal for protection.
Been 'modifying' my fuel thank a bit. The steering linkage got in the way some, so I had to slice off a couple gallons of capacity from the bottom of the tank.
I need more than 10 gallons of fuel for any kind of road/wheelin trip, so I had to get some more volume in the tank. I cut it in half at the factory weld arround the perimiter and added 3" of 16 ga sheet metal. Works out to just over 5.5 gal additional volume.
I had to fab some kind of sending unit (kinda mimicked a GM unit). I placed it down at the lowest point of the tank and put a wall behind it to keep from starving it when I'm really low on gas, and accelerating. Its a GM pump for a 3/4 ton big block vortec (port fuel injected). If this unit doesn't cut it, any aftermarket in-tank pump will mount right on to this thing.
The level sender had to turn about 145 deg around to clear the fuel pump and baffle. I also reshaped to float arm to accruately measure fuel level.
I'm bracing the lip of the tank with this 1" square tube. It will be part of the tank when it's done. Also raised the tank another inch above the factory mounting surface to help clear the under side.
Here's the bottom half in place.
And here's the top on. Probably could have got another inch or two if I really wanted, but I didn't want to push it. Hopefully about 13.5 - 14 gal will be good.
It's pretty much ready to weld shut for good, I think. Just wanted to get a couple shots along the way.
Going to try and do some camping next weekend and take a little break. Hopefully the weather will be nice.
Karl

-
Leatherneck
- Moderator
- Posts: 17104
- Joined: Sat Jul 01, 2006 6:47 pm