Page 1 of 2
1986 Canadian Transporter Syncro Double Cab
Posted: Sun Mar 08, 2020 9:28 am
by ajdenette
Re: 1986 Canadian Transporter Syncro Double Cab
Posted: Sun Mar 08, 2020 11:02 am
by ajdenette
Re: 1986 Canadian Transporter Syncro Double Cab
Posted: Sun Mar 08, 2020 11:31 am
by ajdenette
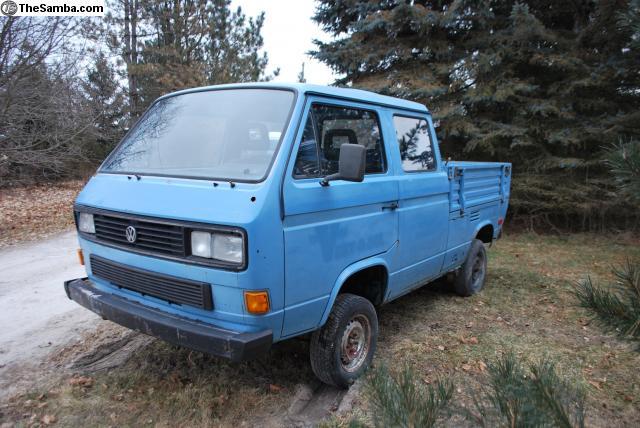
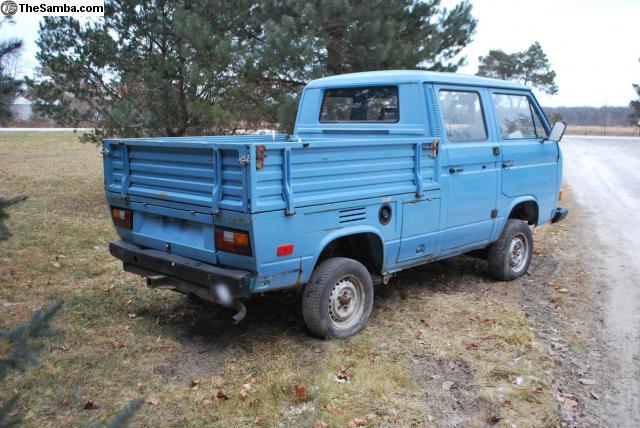
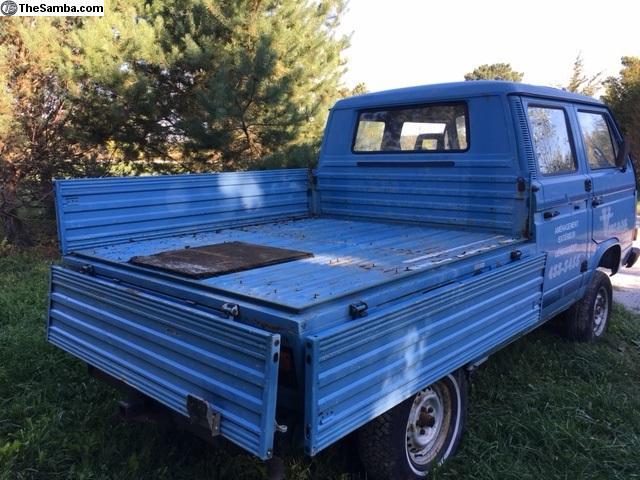
Once home I gave it a bath but first I spent a good amount of time pulling ass of the screws out of the bed that had been used to secure some plywood at some point I need to weld up the holes in the bed from the screws and the rivets that held the various wood to the bed over the years
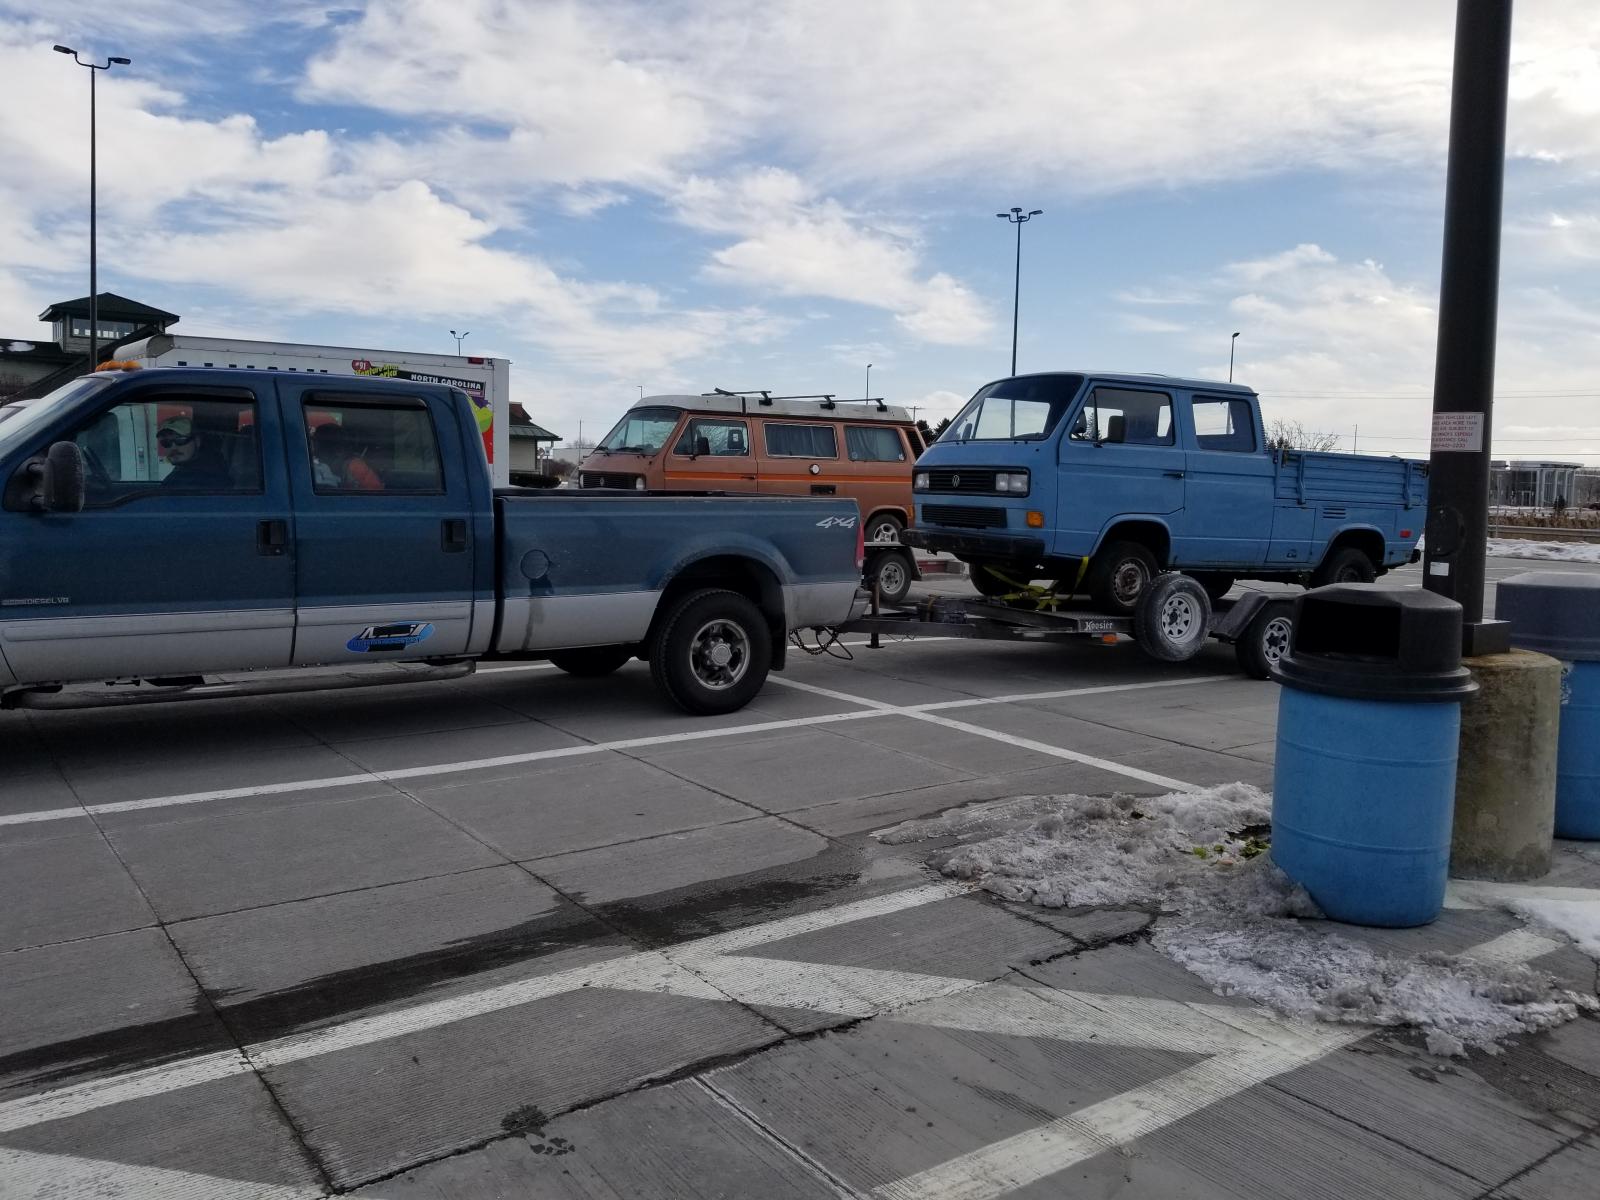
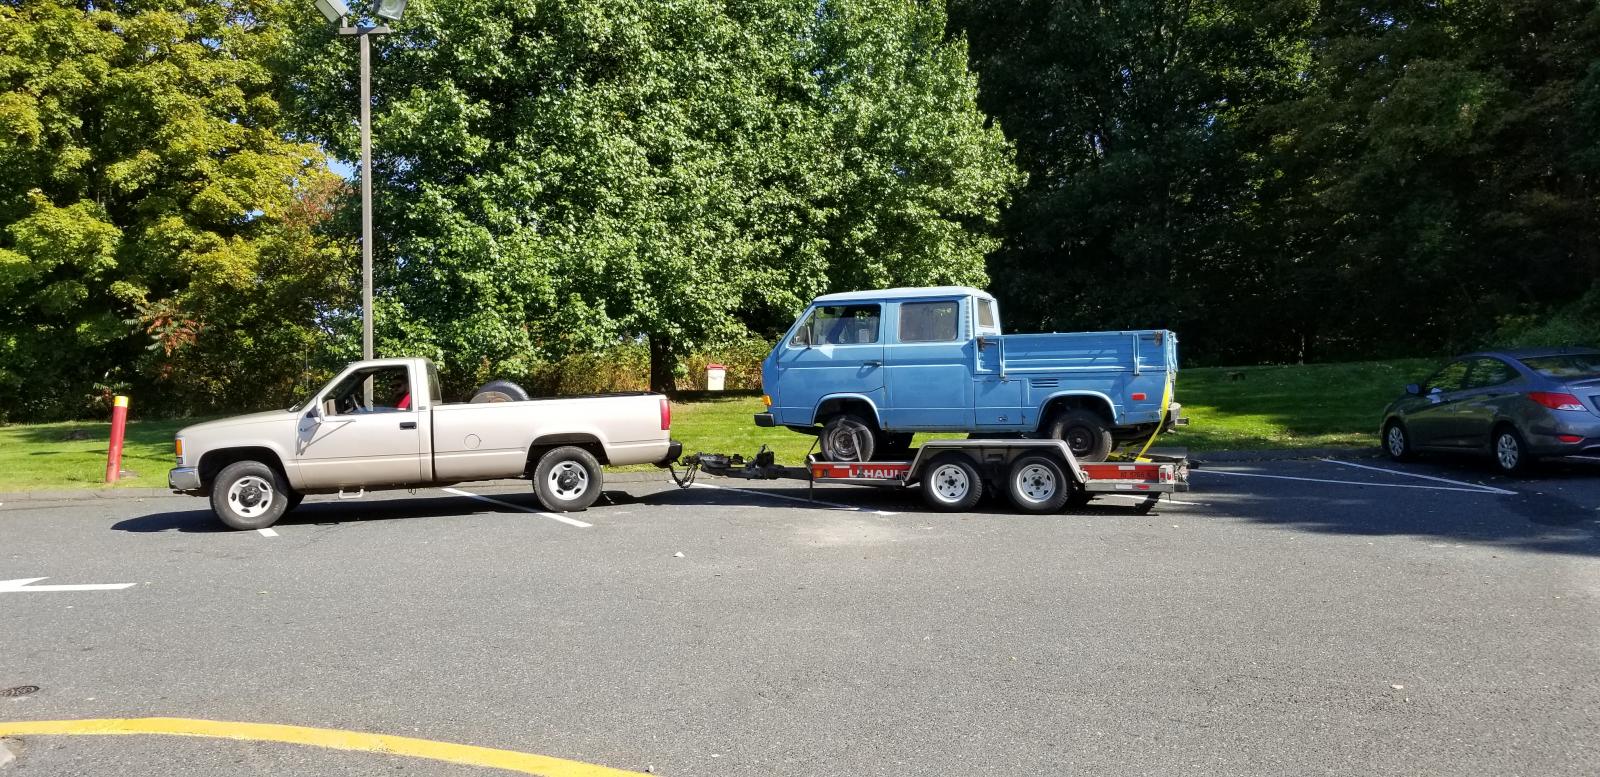
Once home and cleaned up I decided to grab a photo of my three vans before the Westy got put away for the winter:

Being a Canadian Syncro the Speedometer is in km/Hr there had been a Syncro cluster on TOS clasifieds near a Friend so I payed the seller and he picked it up it was in worse shape than it looked in photos but fortunately I had picked up some MK2 clusters for the tachometers so the two MPH speedos got sent to Specialty Gauge to get the Vanagon speedometer rebuilt and use any MK2 components needed to get it working and set the mileage to match the body when it gets rebuilt.


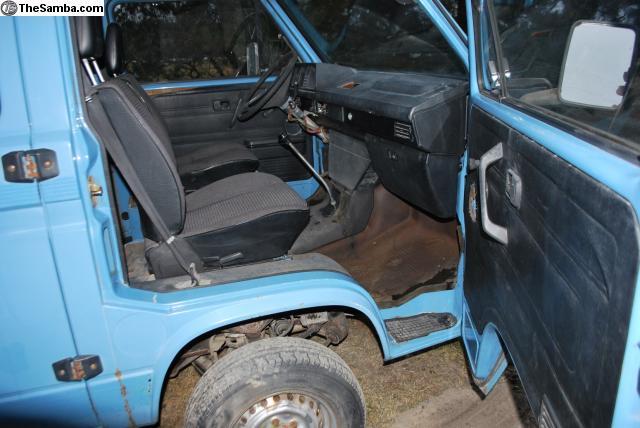
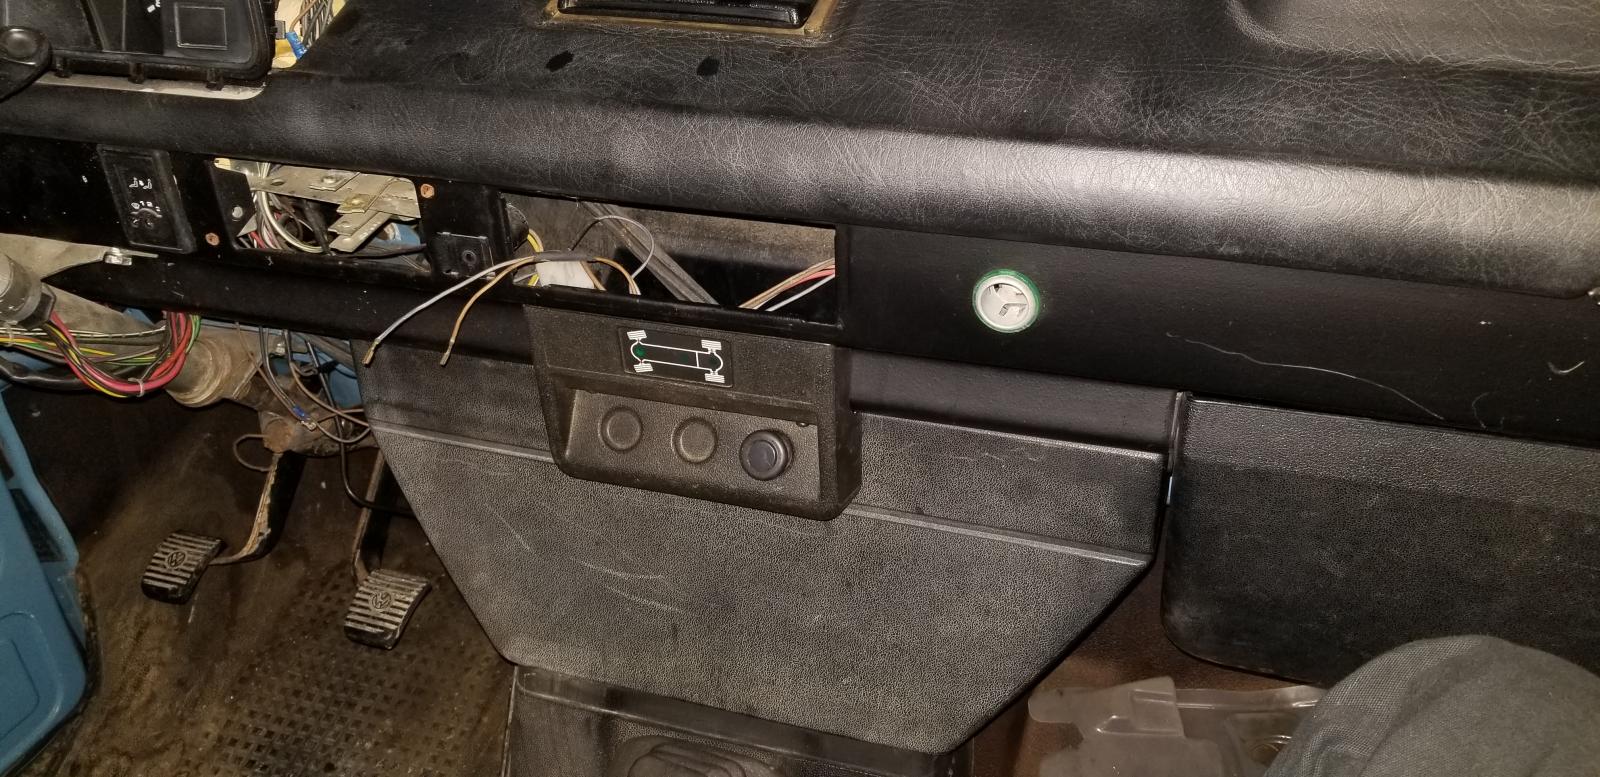
The add stated it had a rear locker but the photo in the Add showed no console the seller did pull the heater panel and show the locker knob and vacuum lines before I made the drive and I did verify the transmission had the locker when we loaded it up so that was good news. fortunately some time in the past I had picked up a locker console and had one to install. To help feel like good progress was made I took some time using the 1990 dash as a template and a for measurement reference I got the console installed.
Re: 1986 Canadian Transporter Syncro Double Cab
Posted: Sun Mar 08, 2020 2:54 pm
by ajdenette
Re: 1986 Canadian Transporter Syncro Double Cab
Posted: Sun Mar 08, 2020 3:08 pm
by ajdenette
Re: 1986 Canadian Transporter Syncro Double Cab
Posted: Sun Mar 08, 2020 3:19 pm
by ajdenette
I tried to turn the engine over but all I did was loosen the pulley bolt so I figured the bad headgasket had resulted in water in a cylinder and locked up the engine its time in Canada had not been kind to the engine, the exhaust was rusty the spark plugs were corroded and tough to get out I tried the Marvel mystery oil with no luck so decided to pull the engine
On the way out
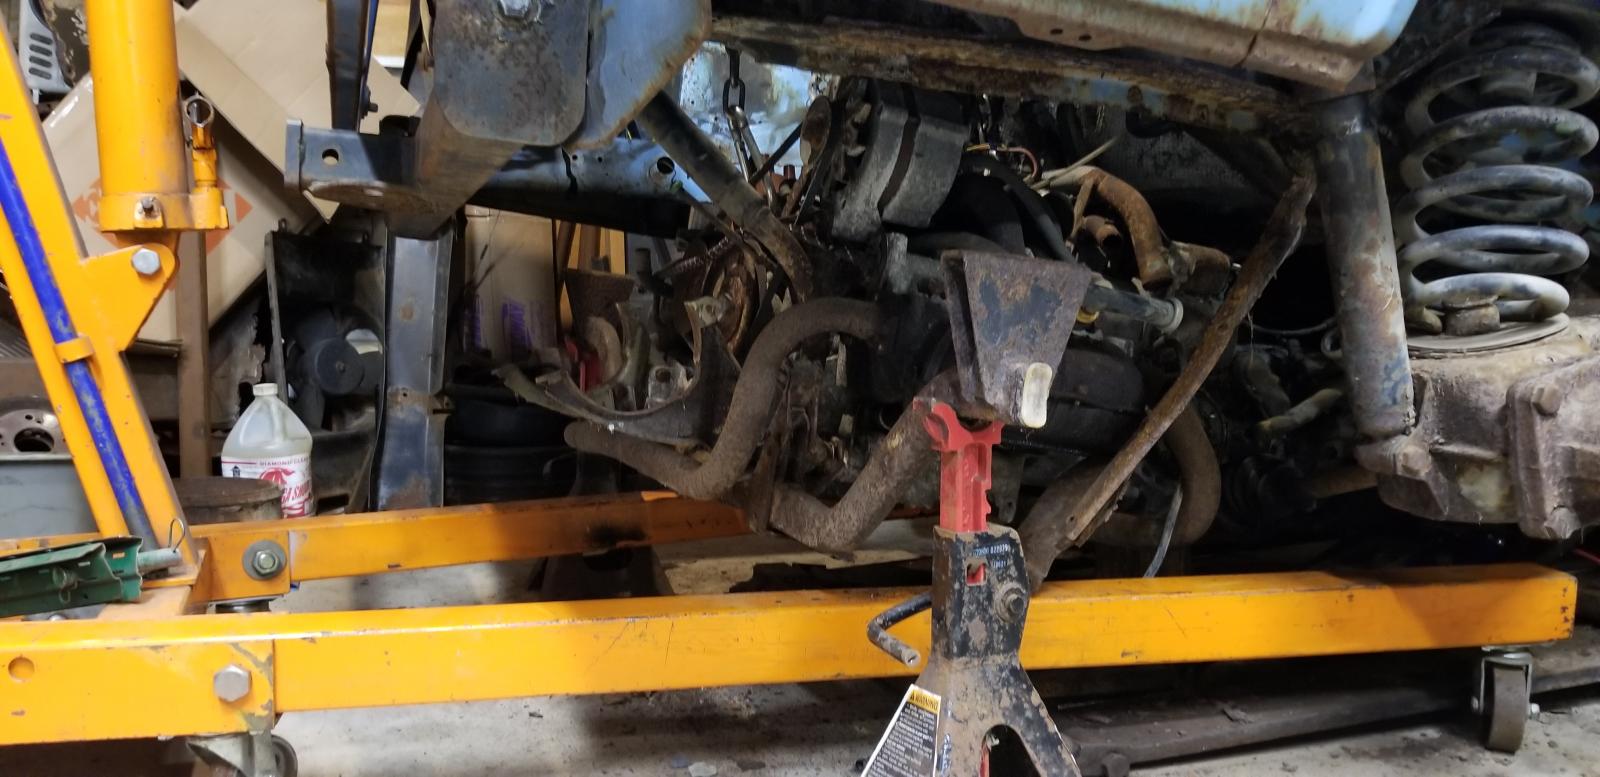
Engine out:

Parts coming off of the engine
Engine out of the engine bay felt good

as I began pulling parts off of the engine I got to the starter and that gave me a look into the bellhousing to see a lot of corosion I also removed all 4 fastners holding the two together but they stayed stuck as a unit then there was torching and lots of chisels and screwdrivers to separate the two it took a few hours just to get the gap starting and moving it around the bellhousing


in the process of fighting with rusty bits and trying to geth the engine and transmission seporate and working on the asumption that the engine was stuck I did not have a lot of hope for the block and got a bit rough with it.

Re: 1986 Canadian Transporter Syncro Double Cab
Posted: Sun Mar 08, 2020 3:35 pm
by ajdenette
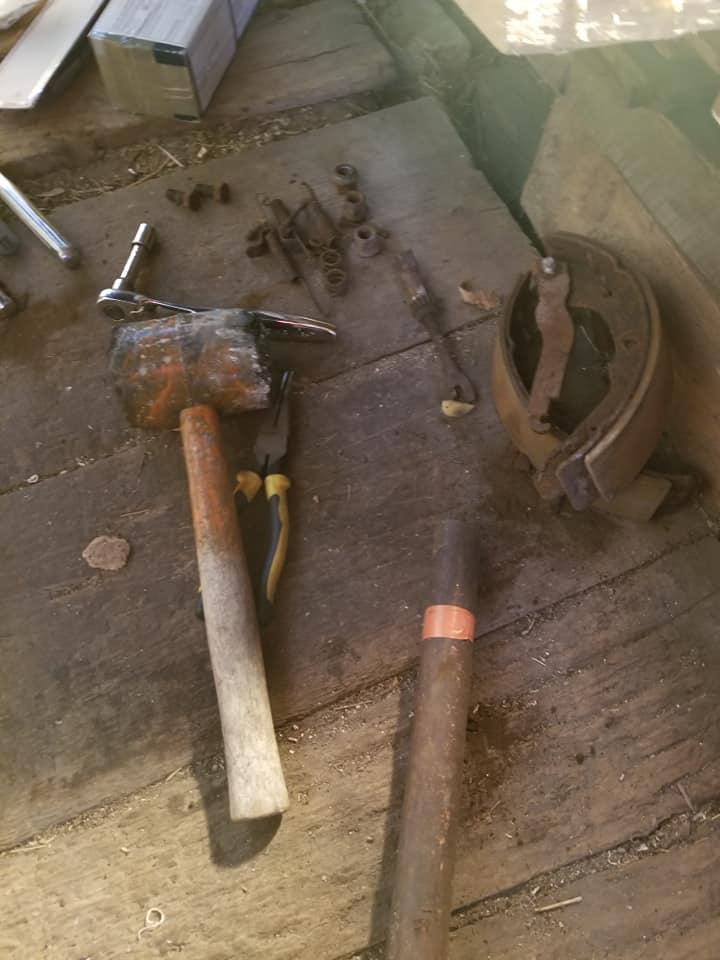
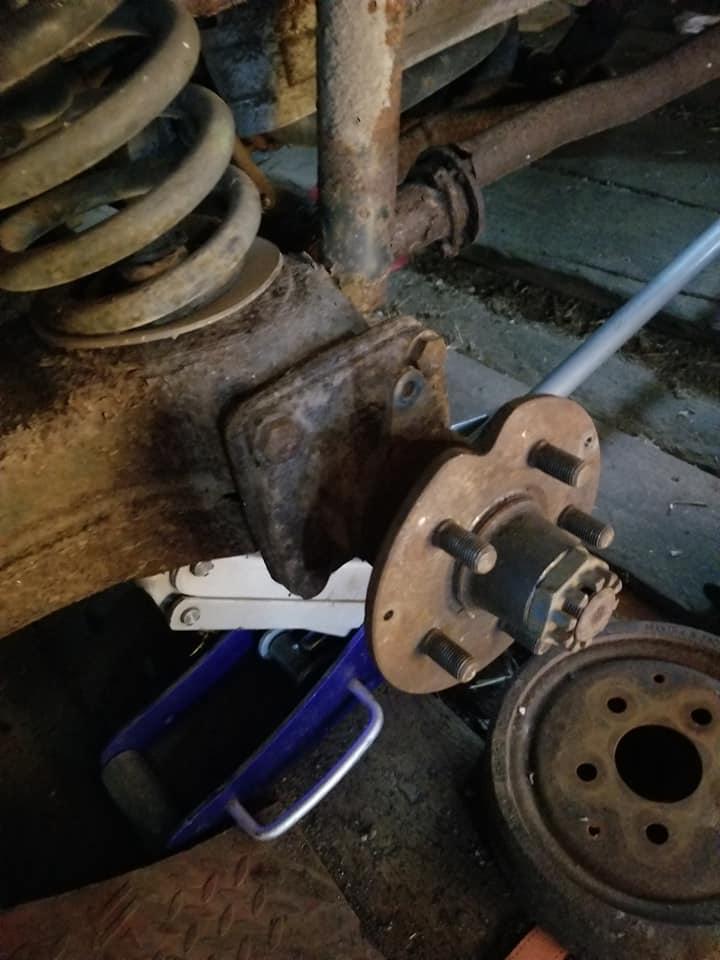
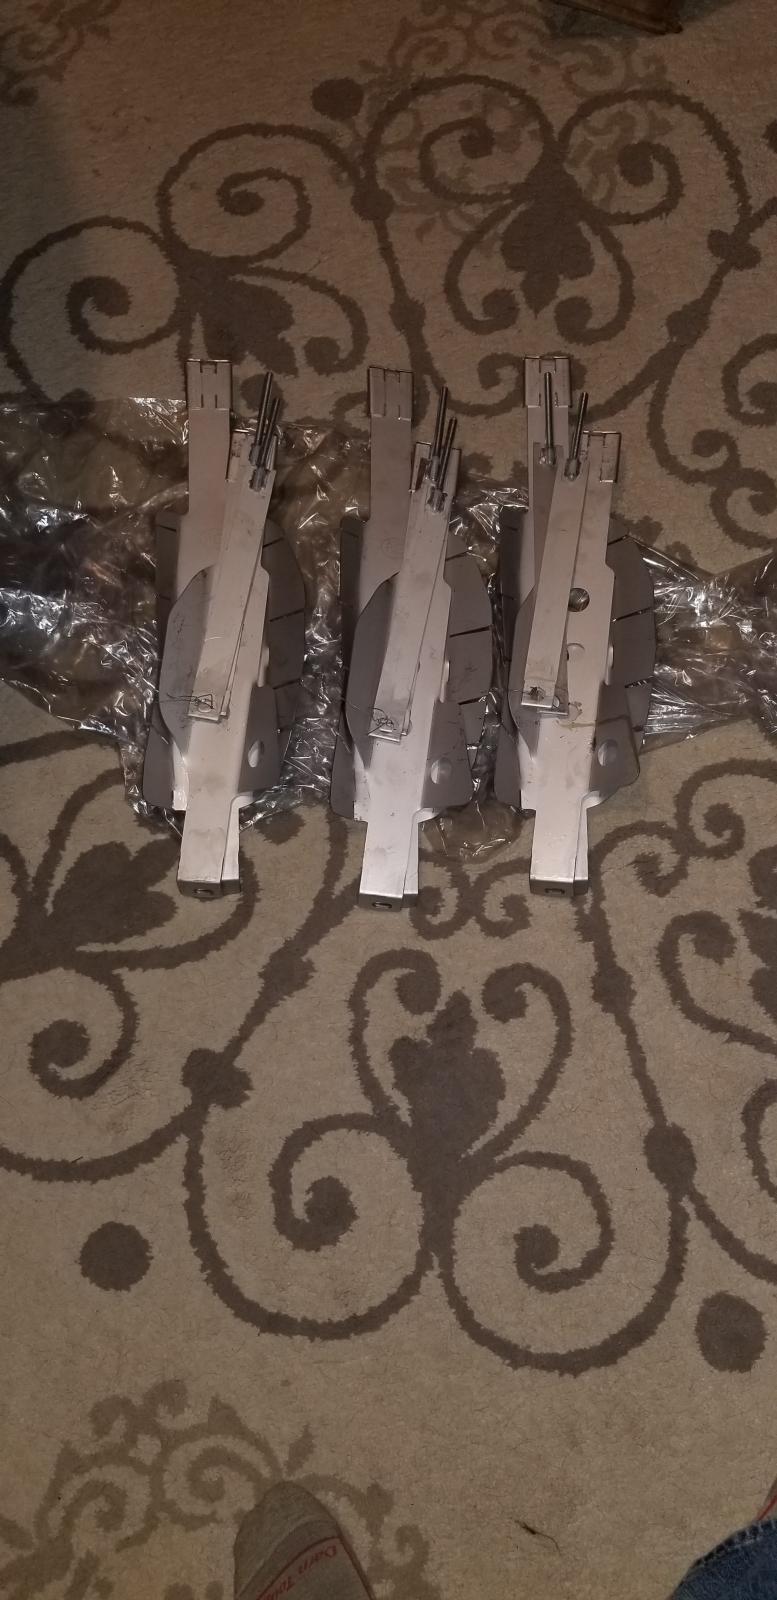
while the Doka was up on the jackstands I had pulled apart the rear brakes and had all the parts to build them back up and get the ability to roll it around and stop it while in there I also found that both rear springs had broken coils so spares out of my stash were grabbed and installed
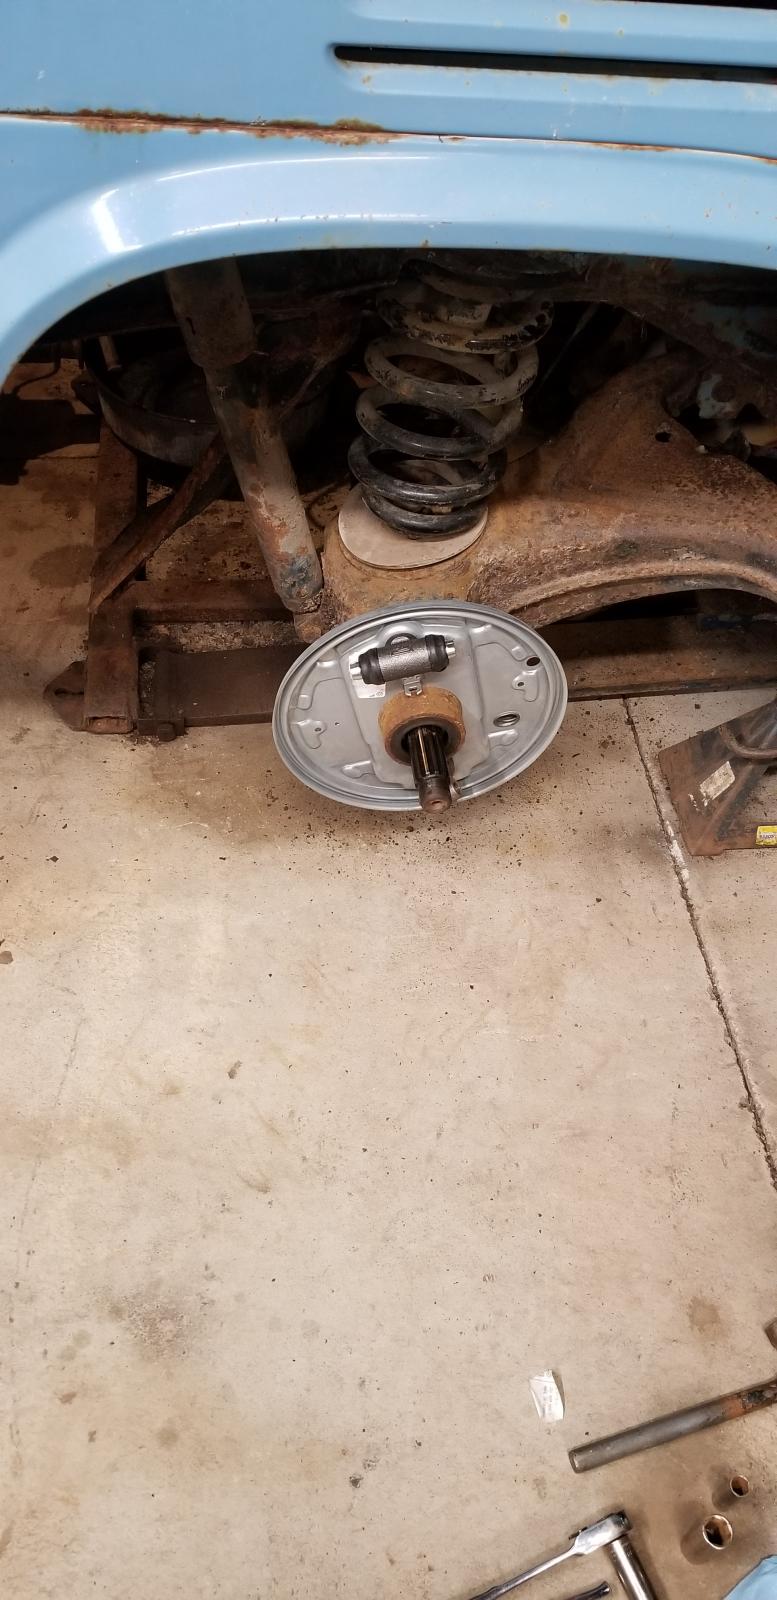

I built them up and got my best two drums turned and installed but the one I used on the drivers side kept locking up when I tried to tighten it down to the hub, while doing this I did end up finding the e brake cable was seized at the bushing under the floor on top of needing both cables the only original part to the e brake system is the handle as I used a balance bar from a spare cable so I could swap it out all at once. it turned out one of my 2 best drums was a bus drum and even though they look identical and have the same internal dimensions the outer lip on the Vanagon is bigger and the smaller lip on the bus drum kept binding on the backing plate so new drums were ordered from Napa.

now that there were drums and an E brake was done it was time for some wheels, last year a good deal on 4 Vanagon alloys with good tires came up cheaper than I could get tires for it and since I still need to deal with a driveshaft before I worry about running in Syncro (it came with 2 dismounted shafts in rough shape) these will be it for now. when I bout it it have 4 mixed very rough tires that didn't hold air well and were badly cracked in fact when we went to pick it up I brought some spares and good I did as it had one that did not hold air due to a nail. once I got it home I put it on 4 tires as old as I am that have been moving from project to project as they roll well and hold air though the crack in them are getting large.
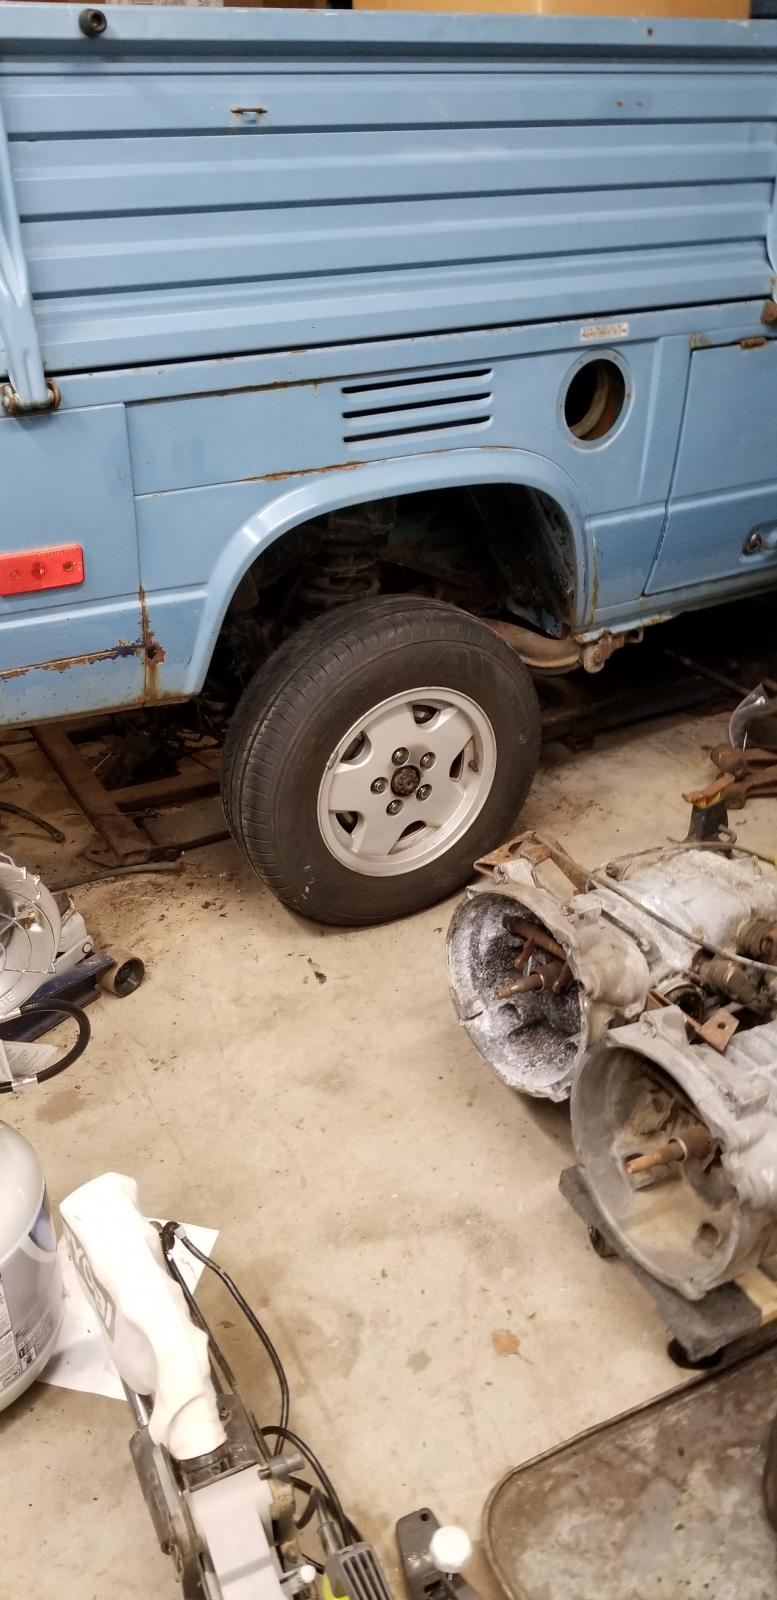
So excited that it finally had wheels and brakes onto the ground it went with the fresh tires I adjusted the brakes and torqued down the axle nuts. just in time to help a friend with a patch to his floor. this also gave me a chance to cut some metal for the 2 floor repairs I need to do on the Doka.
Re: 1986 Canadian Transporter Syncro Double Cab
Posted: Sun Mar 08, 2020 3:45 pm
by ajdenette
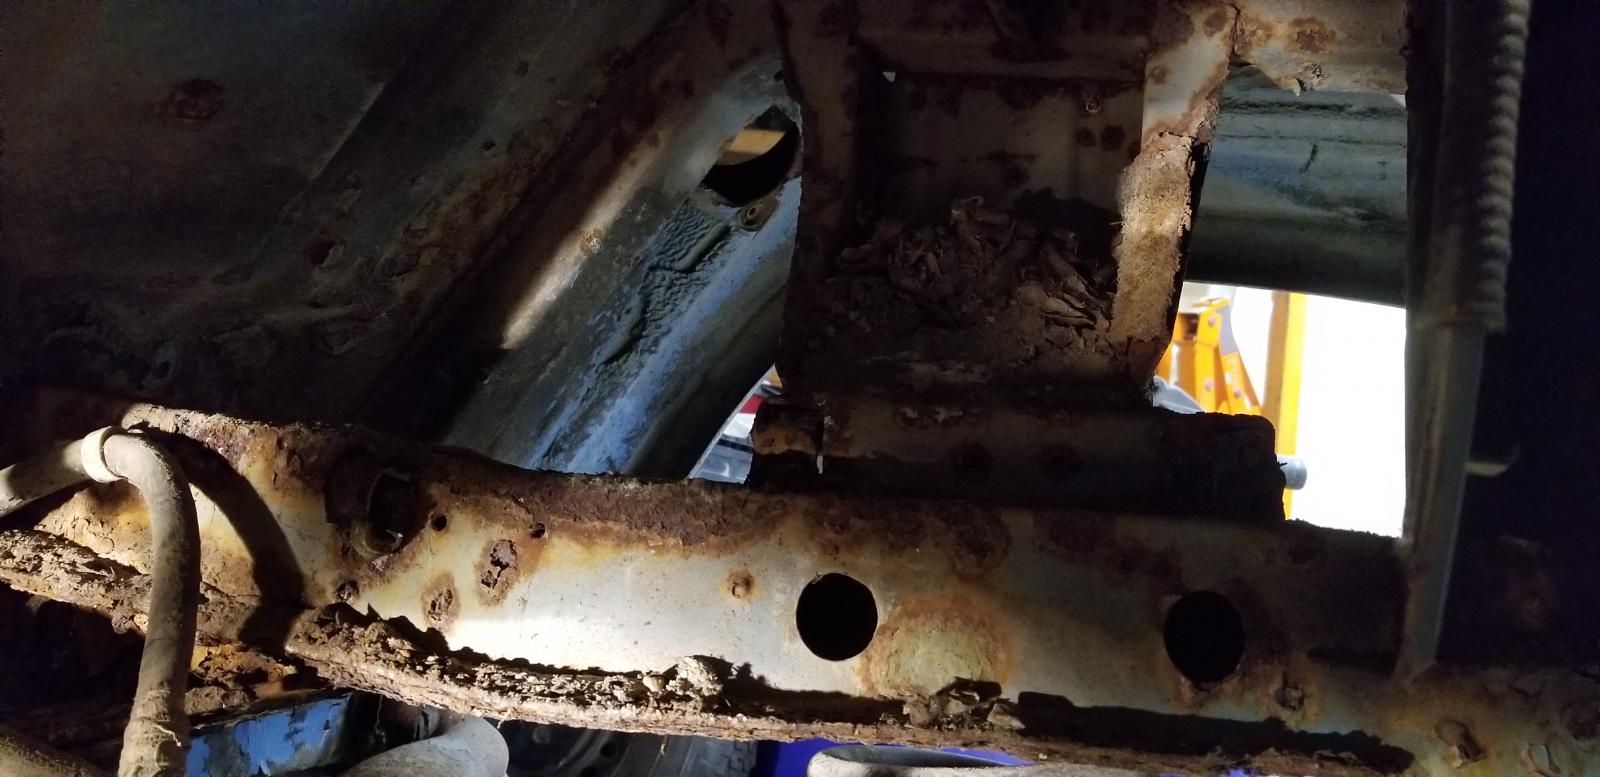
Knowing my Syncro's and especially ones from the salt zone now was the right time to pull my gas tank though I have removed one other from my parts van this will be my first time re installing the Syncro gas tank, I know I have a lot of clean up to do but I was happy to find solid metal behind tha tank and not Swiss cheese though the tank straps did come out with no tools.


one of the next projects will be removing the bellhousing from a spare bad 2WD transmission I had picked up to install on my spare 2WD transmission but think it will be better off on the Syncro transmission I did just pick up a bus bellhousing in good shape to rebuild with the clutch arm from the Syncro bellhousing to be able to finally fix that

new fuel tank straps for this one pair I need to get to a friend who needed them and one set for another project we will see what happens with that.
and the pile of parts I have been gathering and pulling out of my spares to build up this Doka man there is a lot of work ahead of me.

Re: 1986 Canadian Transporter Syncro Double Cab
Posted: Sun Mar 08, 2020 4:00 pm
by ajdenette
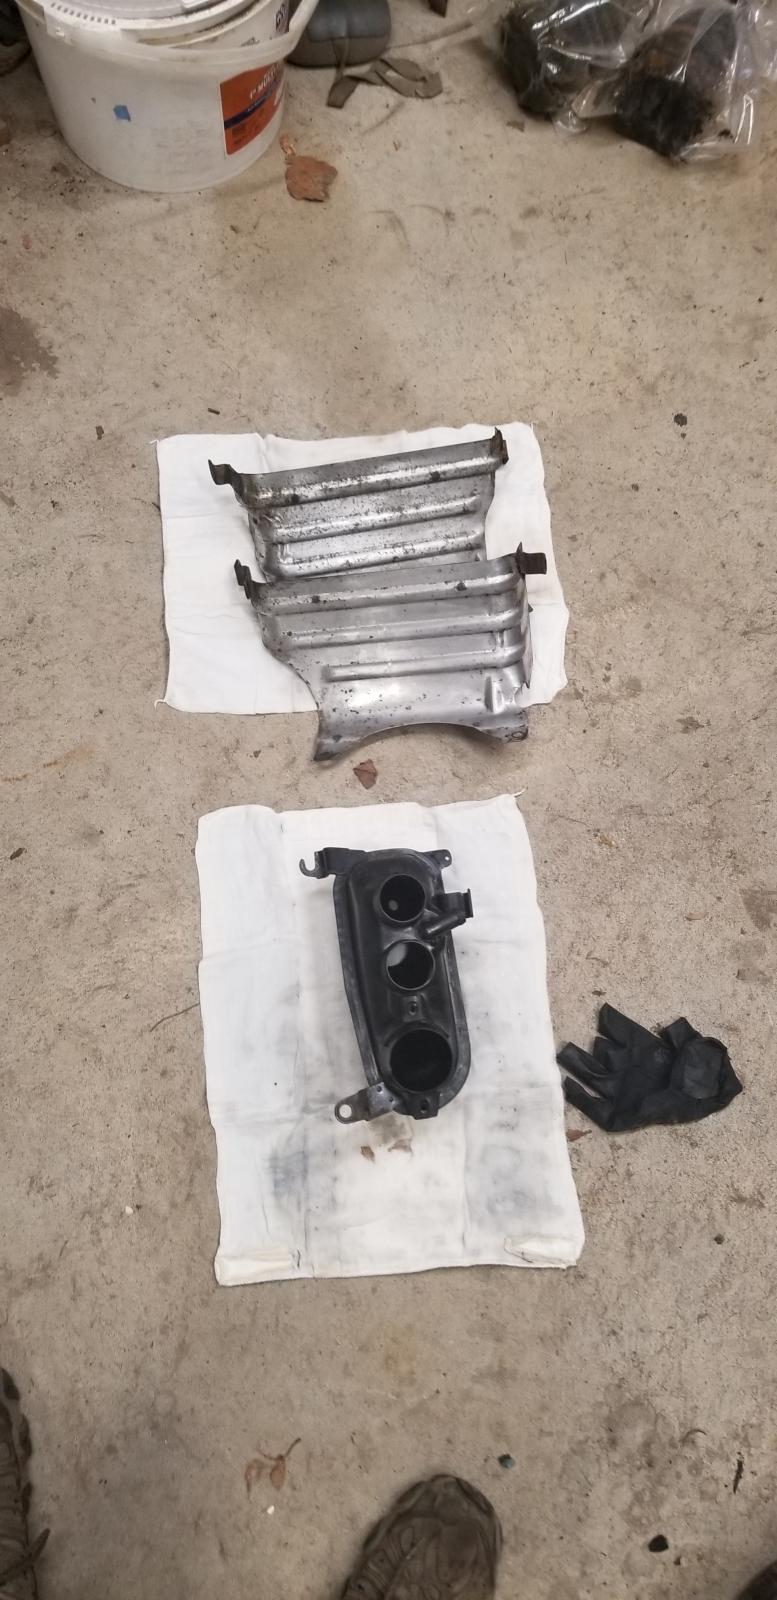
So this came up on the book of faces the other day so while I have everything apart and access to everything some one asked about the Syncro doka breather system so I thought I would include a post with that same specific info. This set up is for a north american 2.1 MV engine in a Doka, this set up uses the same stock air box coupling and I believe dust collector

from other photos I have seen there is an added piece in the box section for the bed that sucks from behind the cab there is also a mounting tab for the elbow that is in the lower corner I sill need to get the bolt out but broke the elbow removing it.

I was able to find a new elbow on Ebay from OE245 unfortunately the tube that connects the box section to the elbow broke from handling due to its condition so I will need to try to find a new one of those


Re: 1986 Canadian Transporter Syncro Double Cab
Posted: Sat May 02, 2020 8:45 am
by ajdenette
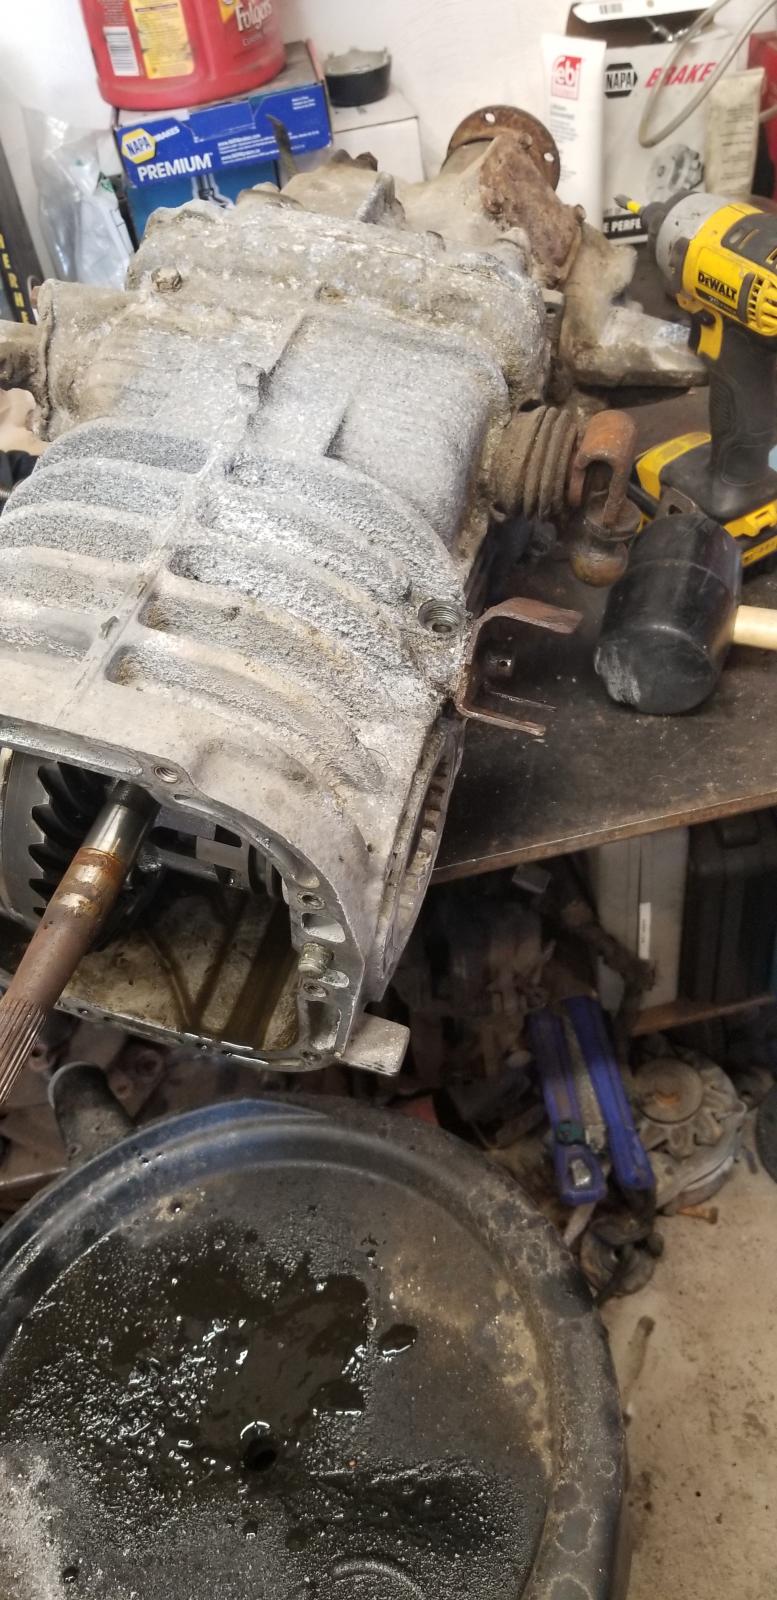
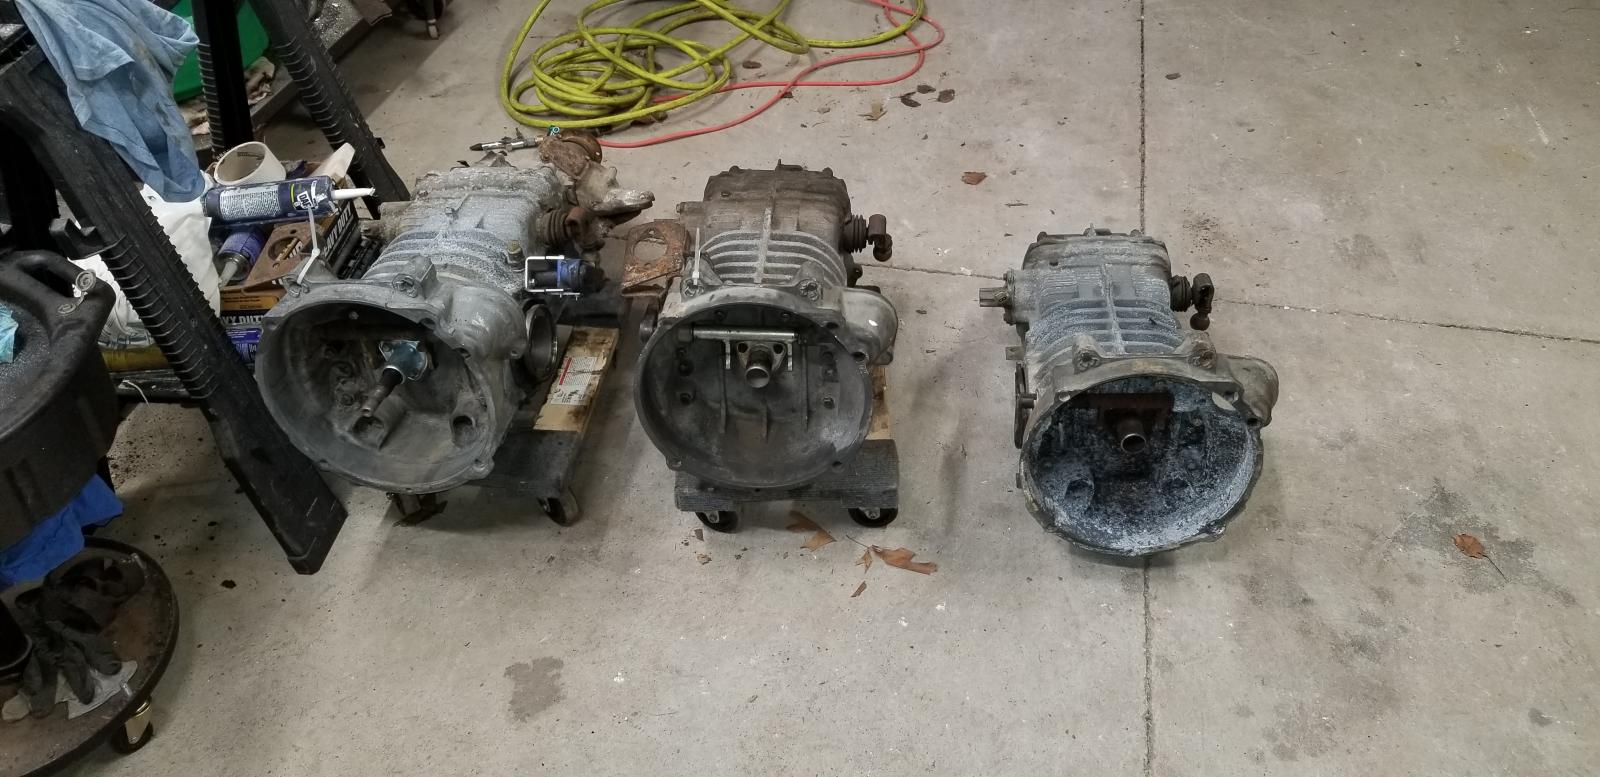
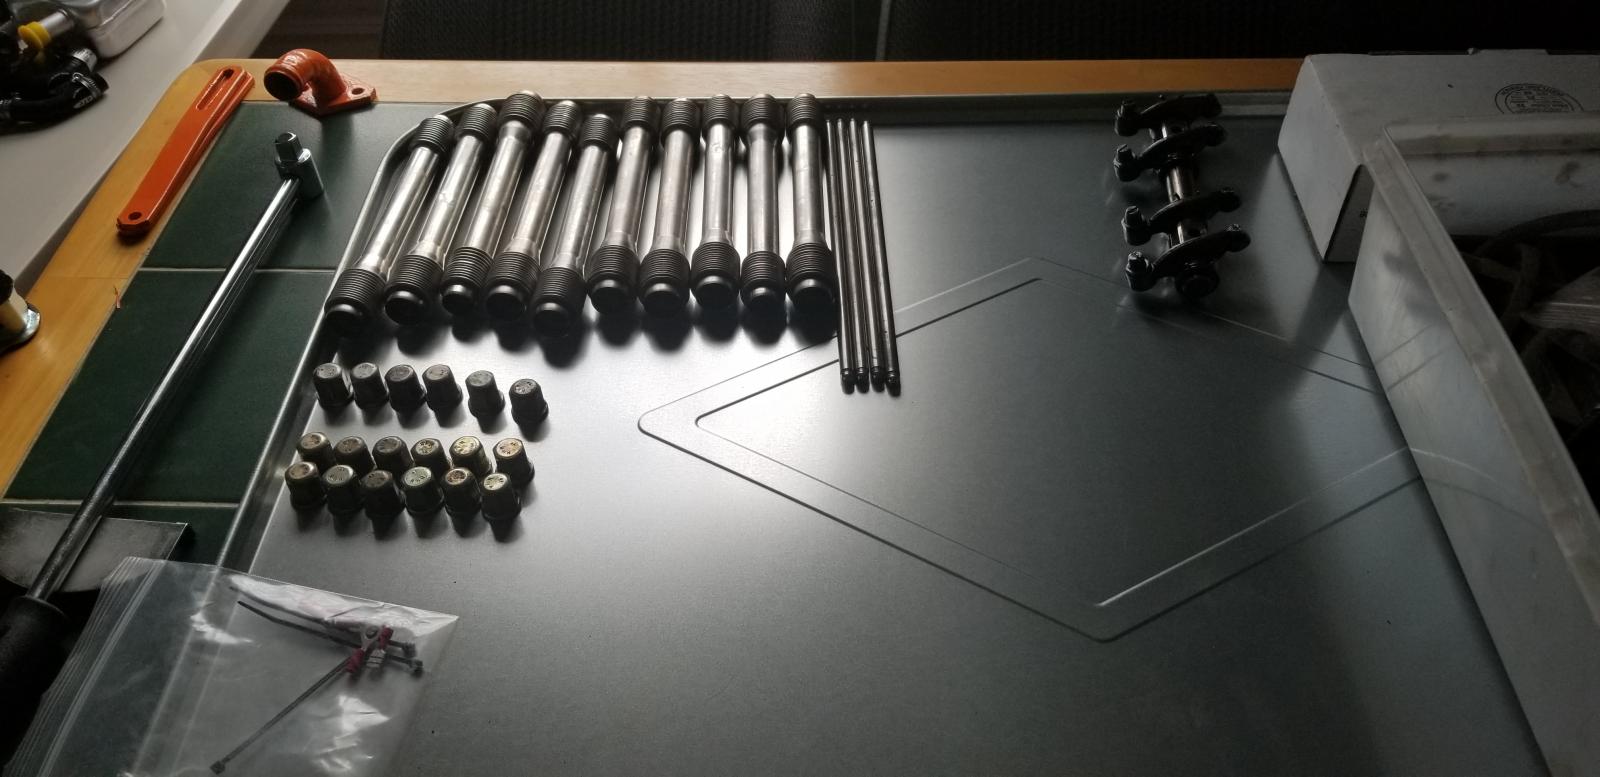
So with lots of Shut downs Due to Covid19 I had 2 weeks off, Unfortunately I chose to store my Westy at my Brother in laws house for the winter and with a shelter in place order and demand for Self quarantine if I go get it I have time to dig deep into the Doka. With some nice days on hand I decided it was time to take the Bus bell housing, the parts transmission, the spare transmission without a bell housing and the Doka transmission and attempt to make 2 usable Vanagon transmissions. The Doka transmission had heavy corrosion on the inside of the bell housing and the clutch arm would not move, but the parts transmission moved easily so the primary goal was to put the good bell housing on the Doka transmission and while I was in there I also re built the locker actuator and got that back in working condition.
Bell housing off and starting to disassemble the differential lock actuator fortunately the piece of hose installed at the factory was still in place and sealed the vacuum actuator well and all of that came apart easily I did have to grind off the through bolts to get it apart.
All of the hardware that was not re usable:
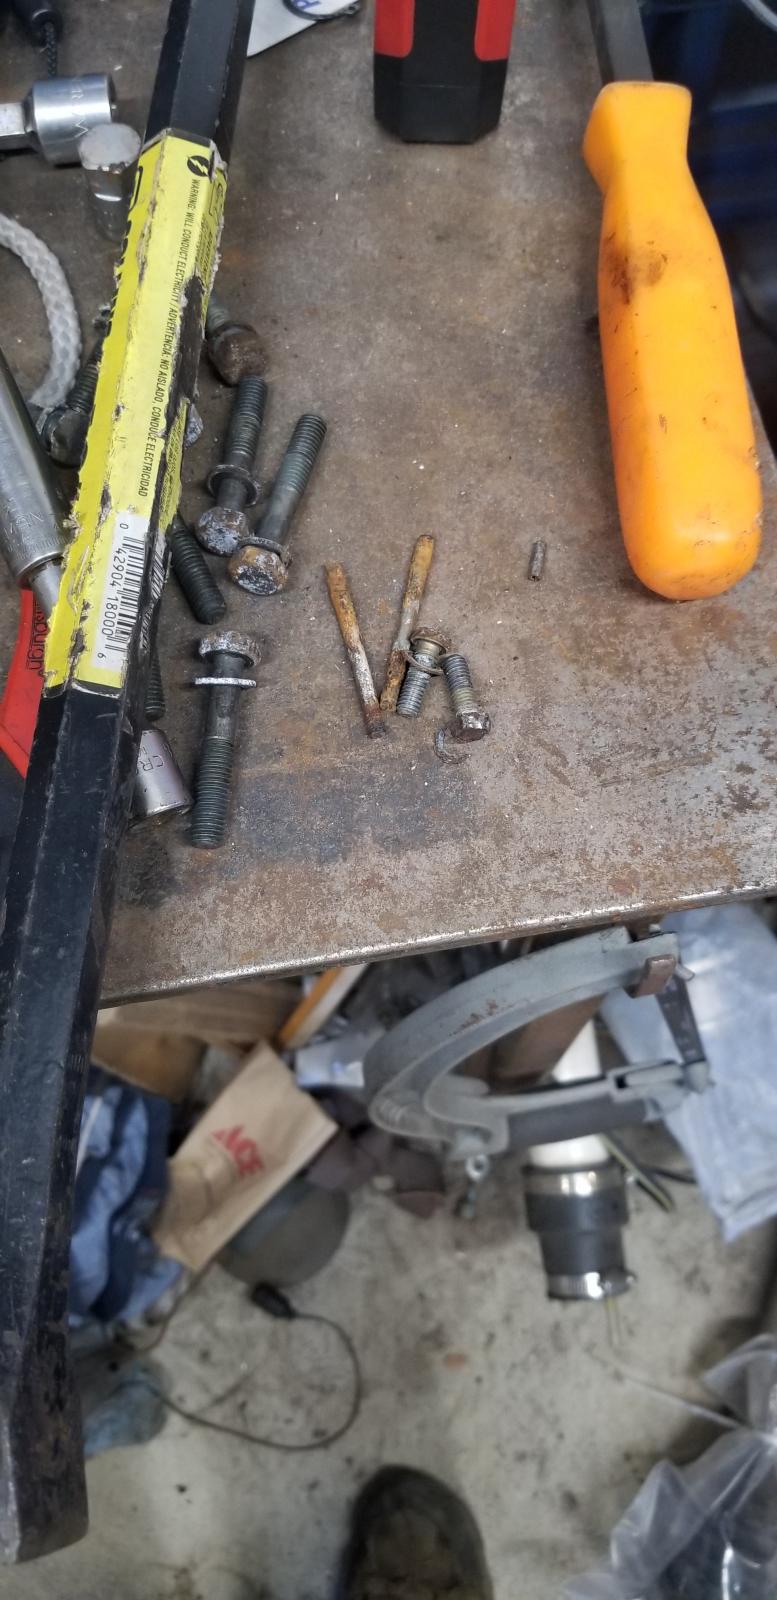
I did eventually disassemble all of these pieces the bracket and sleeve are not reusable in my opinion but the shaft and the spacer were the spacer was re used but a new SS shaft was installed.

Here is the locker actuator going back together with the new parts, I did not find the seals in Van Cafe when I ordered the parts so I went the the hardware store to get standard o-rings, I have since learned where the proper X seal is I do need to decide if I should replace the shaft seal with the proper one or leave the O-ring. I lubricated the O ring when installed and the shaft moves in and out with the actuator using my vacuum pump for brake bleeding and it only takes about 13 to 15 inches of vacuum to actuate it.

I did not want to remove the differential so I was unable to replace the input shaft with my best one but I did clean it up well and put grease in the seal for the bell housing on re assembly.
Here was a funny shot of the parts I was working with, the parts transmission with a bad pinion (heavily pitted) and the three bell housings being utilized.

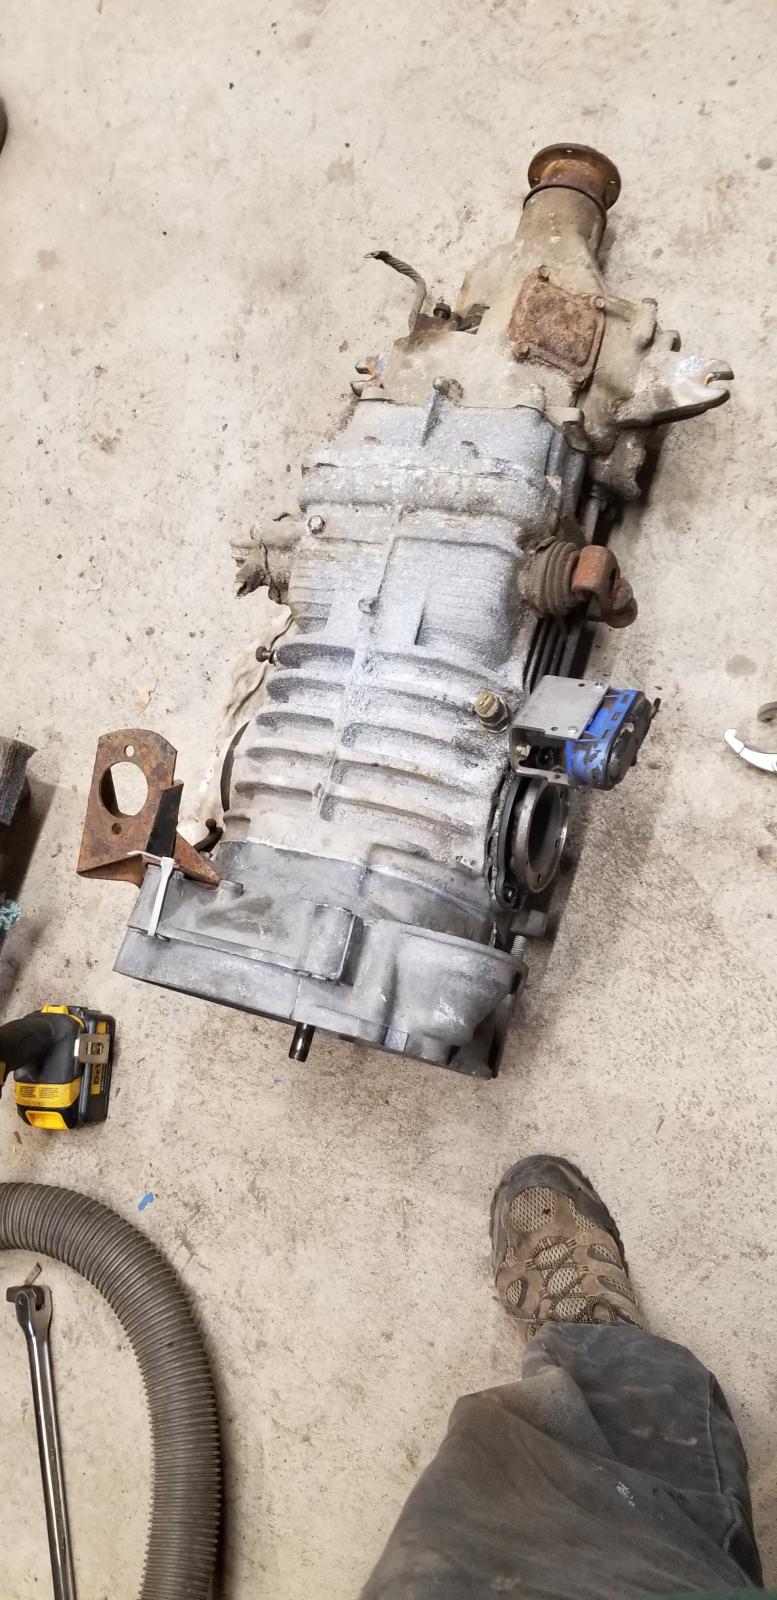
This is the transmission all put back together and sitting waiting for everything else to be ready to go back together.
I though I was done working on the transmissions, the Doka Transmission on the left, the parts transmission in the middle and the now usable transmission on the floor. Feeling accomplished I headed in for the night cleaned up and climbed in bed. While lying in bed it struck me I forgot the input shaft in spare transmission it was sitting off to the side where I put it out of the way and did not make it back into the box. The next day I put it back on the bench opened it back up and installed the input shaft, it is now set off to the side should I or some one I know need it. I do have another spare transmission that is currently on loan to chojinchef as his trans needed some love but he wanted to keep the van mobile.
Re: 1986 Canadian Transporter Syncro Double Cab
Posted: Sat May 02, 2020 9:44 am
by doc
Very cool project!
Re: 1986 Canadian Transporter Syncro Double Cab
Posted: Mon May 04, 2020 8:38 am
by ajdenette
Thank you Doc I am really looking forward to driving this but have a long way to go, with RI shut down due to Covid19 it is giving me a lot of time to work on it that I probably wouldn't dedicate to it otherwise.
Re: 1986 Canadian Transporter Syncro Double Cab
Posted: Thu May 07, 2020 8:07 am
by ajdenette
Next up I decided to clean up the gas tank and get it ready to re install, the plug for the gauge sender was broken off and the entire plate was very rusty so time for replacement. upon removal of the sender I found everything inside very rusty so the level sender needed to be replaced along with the split ring I had one broken vent nipple as well. Once the sender was removed I found gasoline varnish that is tar like, to clean everything I found online that Acetone would break up the varnish so I pulled the swirl pot and the in tank filter to clean it up and get better access.


Here is the Sludge that the acetone broke up and came out of the gas tank
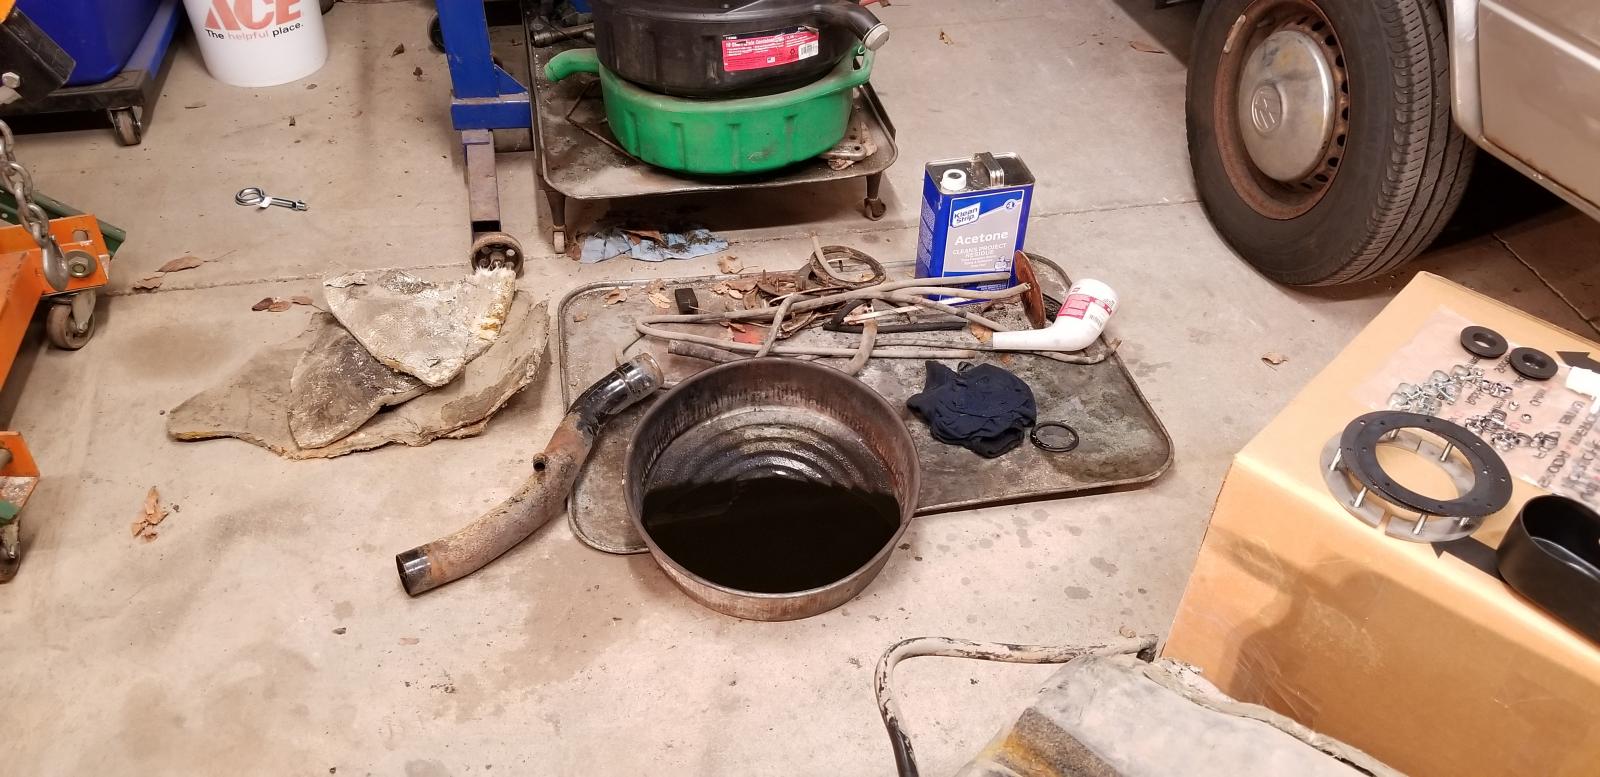
Here is everything I used to refresh the tank

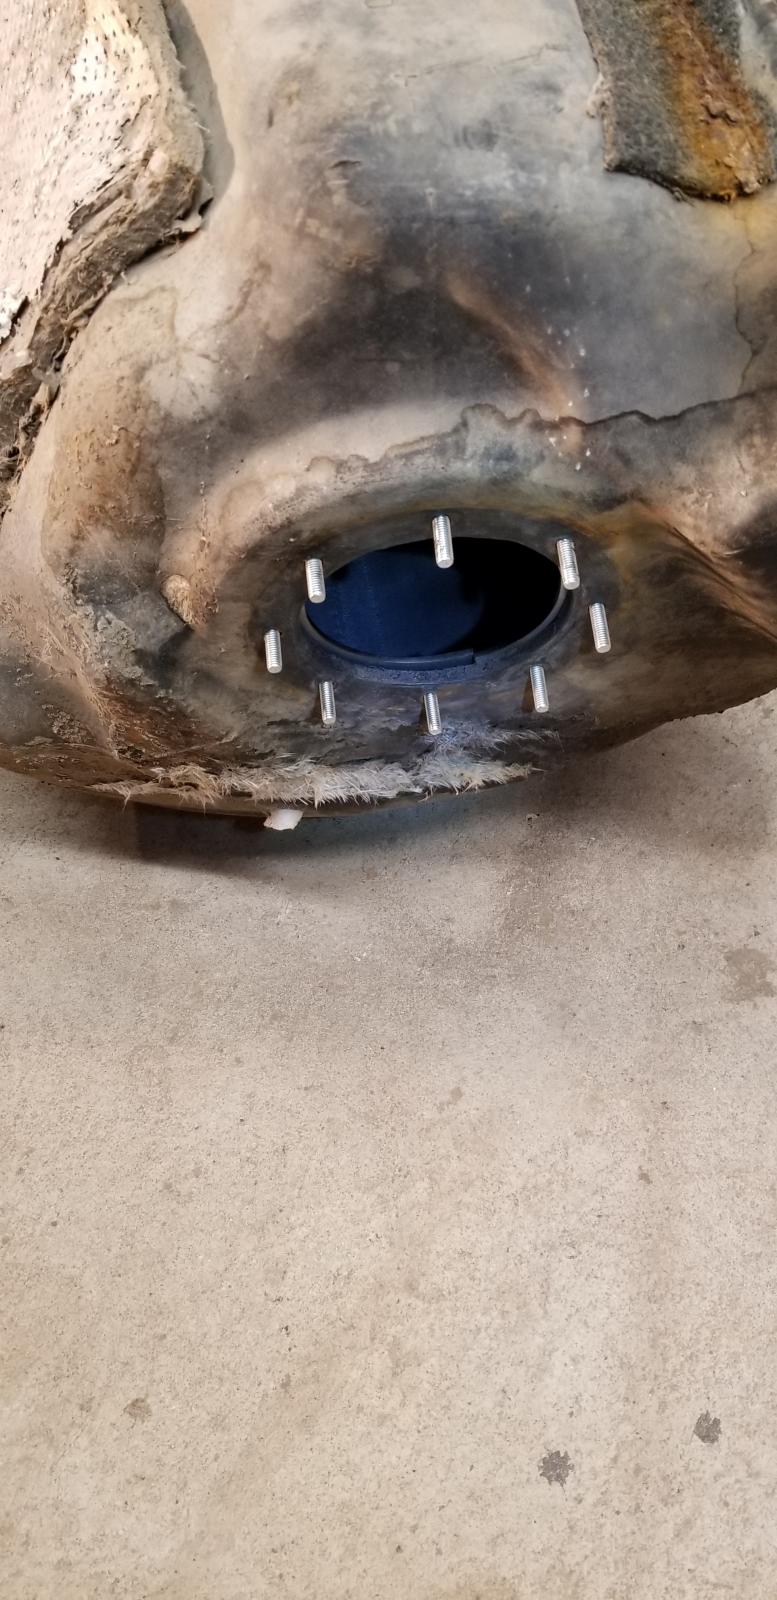
Here is the split ring as installed straight out of the package one of my studs snapped and the inside was rusty so I am replacing them. I learned when installing the last set in my 1990 Syncro the studs didn't line up well with the tank or the sender this shows how they overlap a bit so before final install I ground down the ends so they fit right
Using a new sender from Bus depot looks like the VW symbol was removed from the sender

and here is running all of the lines on the top

Re: 1986 Canadian Transporter Syncro Double Cab
Posted: Thu May 07, 2020 9:27 am
by ajdenette
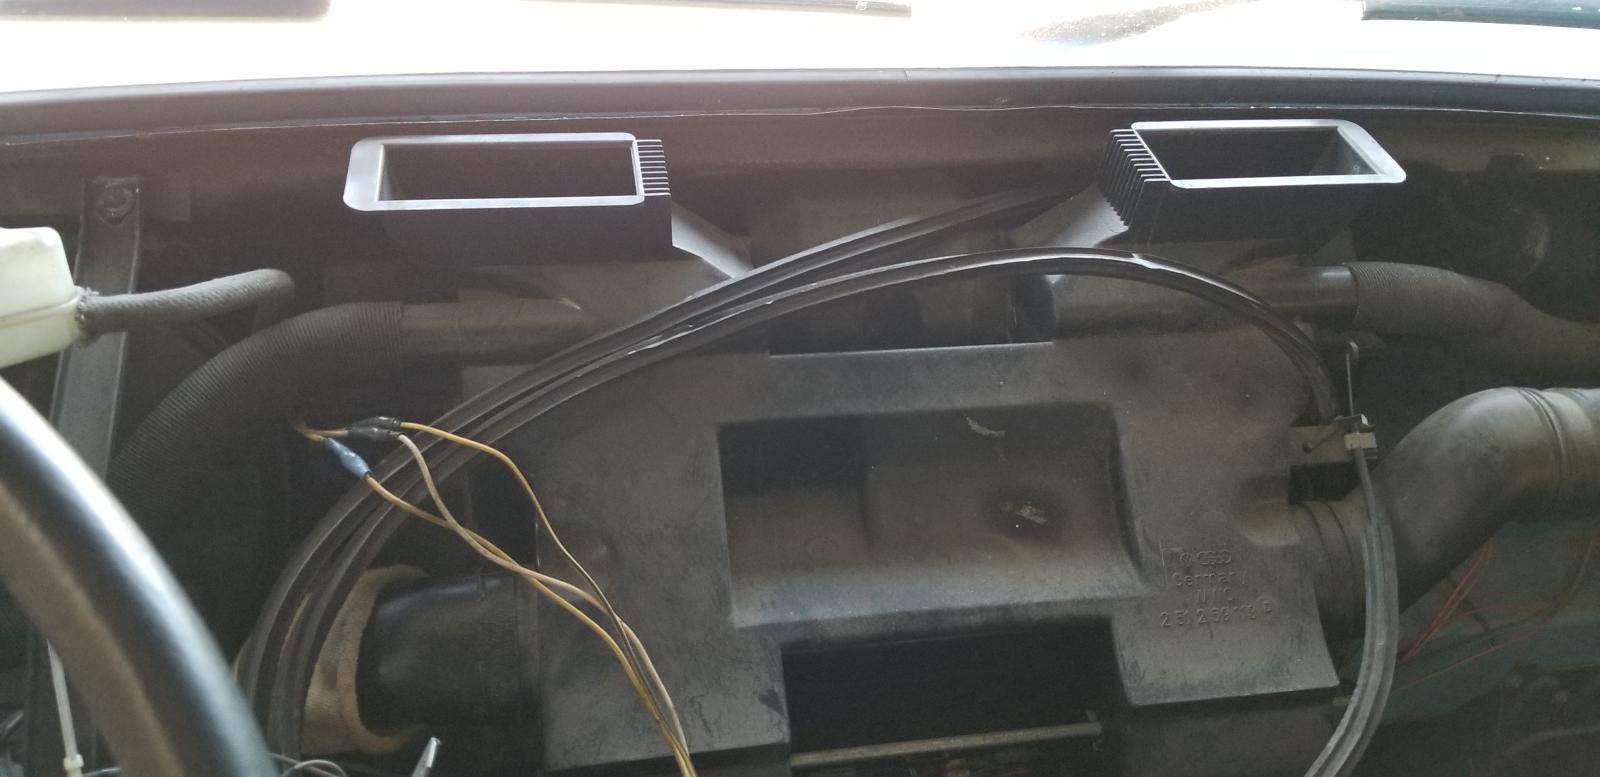
I spent a lot of time wiring cleaning up under the dash some one has fixed it all up enough to get it running and driving but there were some things that still needed to be cleaned up. While I was working on all of the under dash wiring and checking things out I added headlight relays and added all the wiring for future a future fog light install with relay fuse and switch installed and wired up and a positive wire waiting to be energized. I had to fix and add much of the radio wiring, there was some installed but much of it in very rough shape and with a lot of it cut out. I had to re built the diff lock wiring as the end wash chopped off after the dash fire and the switch was just tucked up behind the heater duct, I decided to buy the small car interface board as I did not have a connector even though I had a factory board and console. I also added the wiring needed for the map light in GL dash that was installed after the fire.
While I was in there I chose to add the wiring for a seat belt warning light from my parts van and updated the simple brake light that it had before to go along with the US light setup. I don't have any photos but I took the components from one harness and moved them over to the Doka and now have a working door chime relay for the key in the ignition door open and switch in the seat belt warning light as came in US vans.
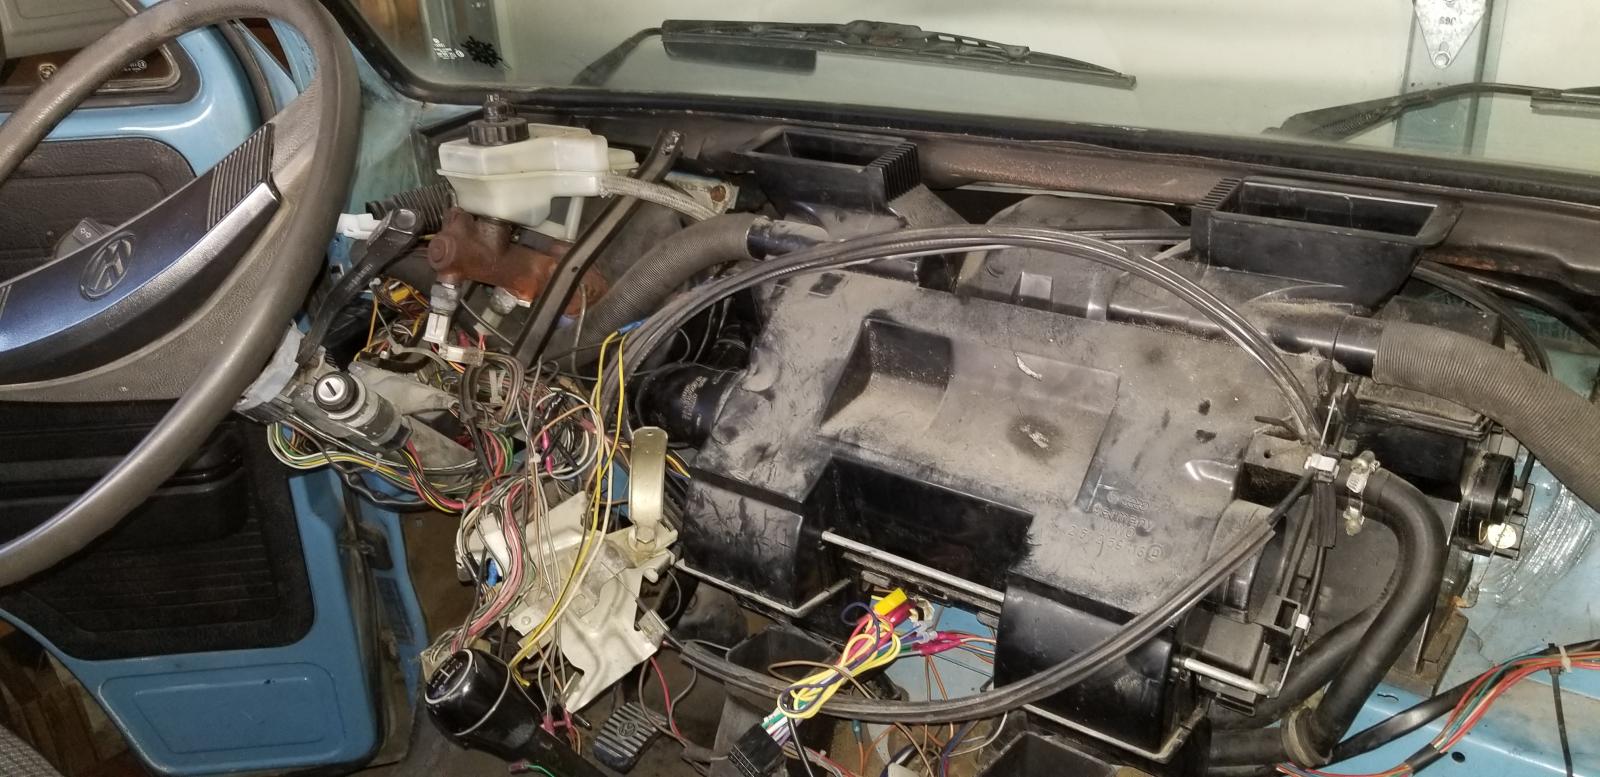


Also while the Dash was out after trying the wipers I chose to pull the wiper linkage and clean and grease the pivots that freed it up a bit and should make them work better as well.
Re: 1986 Canadian Transporter Syncro Double Cab
Posted: Thu May 07, 2020 9:42 am
by ajdenette
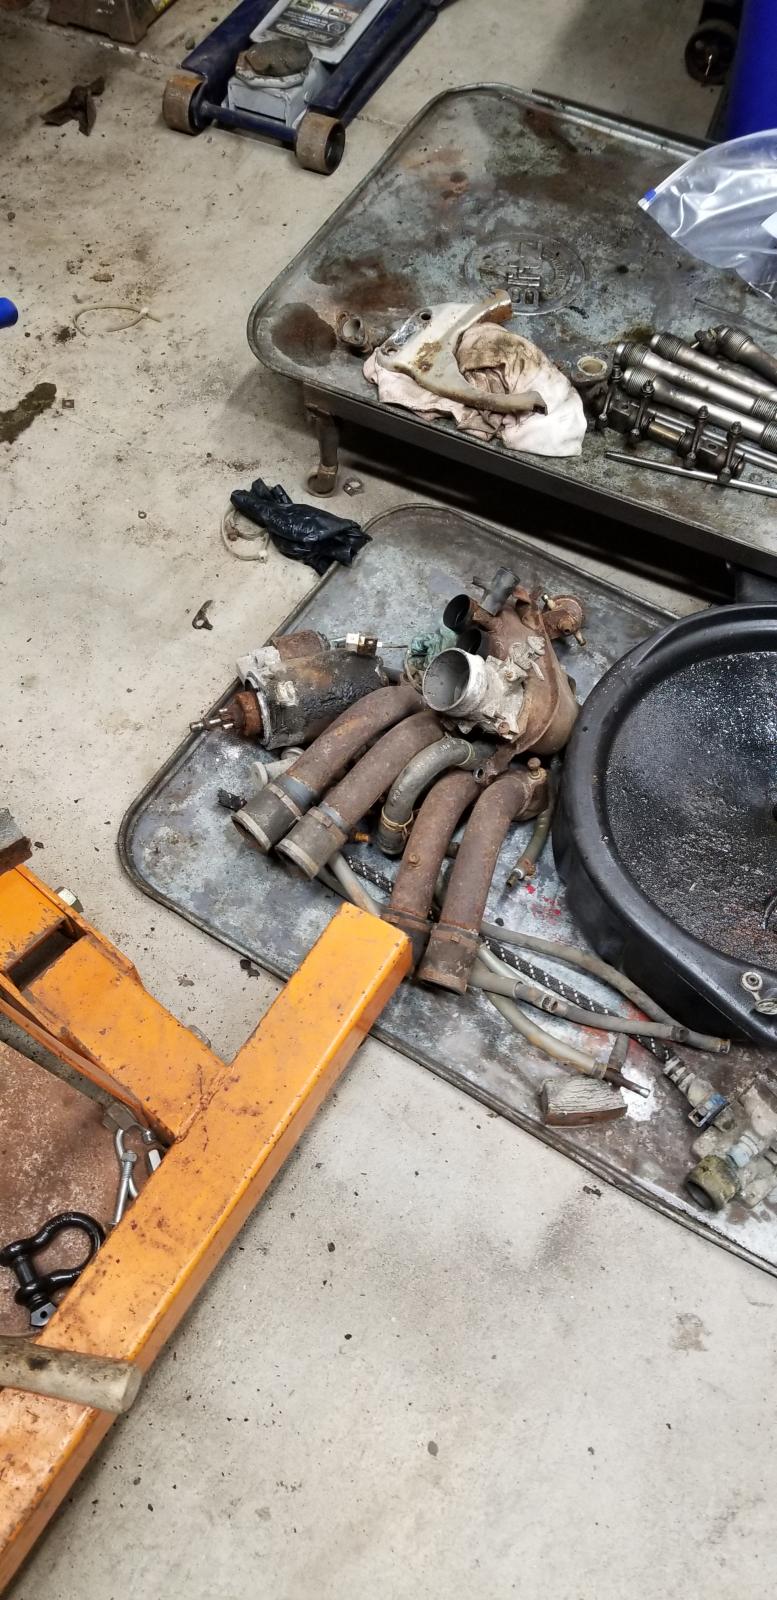
With the condition of the Engine that came out of the Doka and even more so the condition of the parts of the engine that came out of the Doka are in rather rough shape lots of rust to try and clean up I opted not to use those parts at this time. I went through all of my spare parts and took a spare Syncro block I picked up a while ago and am preparing to build that up for use in the Doka.
The engine that came out of the Doka:
cleaning up rusty parts first a coat of Cold Galvanizing spray to try and protect the base metal after wire wheeling the rust off, after that dries painting with some fresh Orange paint:

Cleaned the layers of Grease and grime off of these parts the Intake will get painted orange:
New parts and some cleaned parts gathering for building and assembling the engine.


 .
.