That's what I had in mind, so at the track, I remove the filters, and I can pretend it is one of these:Steve Arndt wrote:The sprint car Hilborn injection that Autocraft used were setup just like that. Go for it!
Another ITB build thread
-
grelland

- Posts: 990
- Joined: Fri May 13, 2005 2:47 am
Re: Another ITB build thread
You do not have the required permissions to view the files attached to this post.
-
grelland
- Posts: 990
- Joined: Fri May 13, 2005 2:47 am
Re: Another ITB build thread
Sort of slow progress here lately, due to holiday season and a bunch of kids 
But this week I have spent a couple of hours in the garage, and started with pulling the engine:
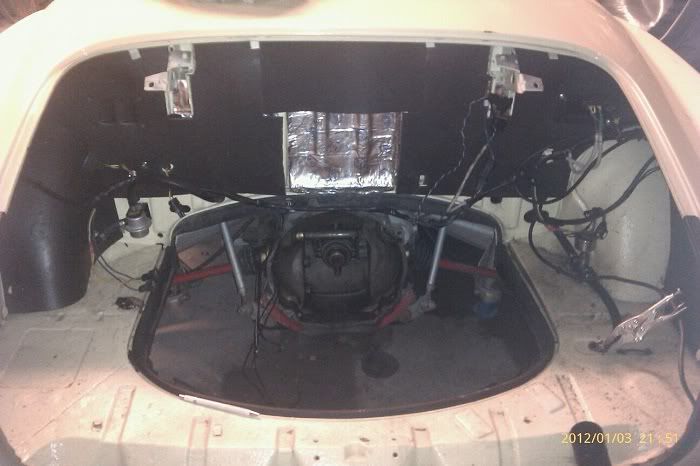
Now the engine bay is prepared for some freshening up. I will make a few new fuel lines and generally clean up a bit.
Then I placed the engine on my somewhat cluttered workbench and mocked up the cooling tin again, and discovered a few issues that need some attention.
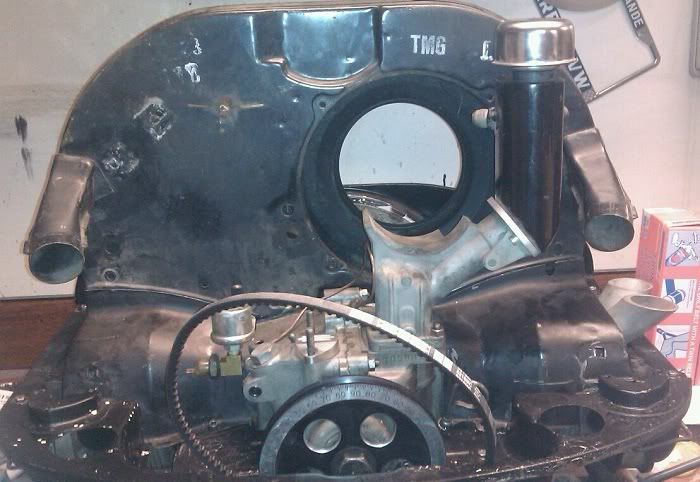
Then I looked at the manifolds and intake angles a bit more, and ended up with something like this:
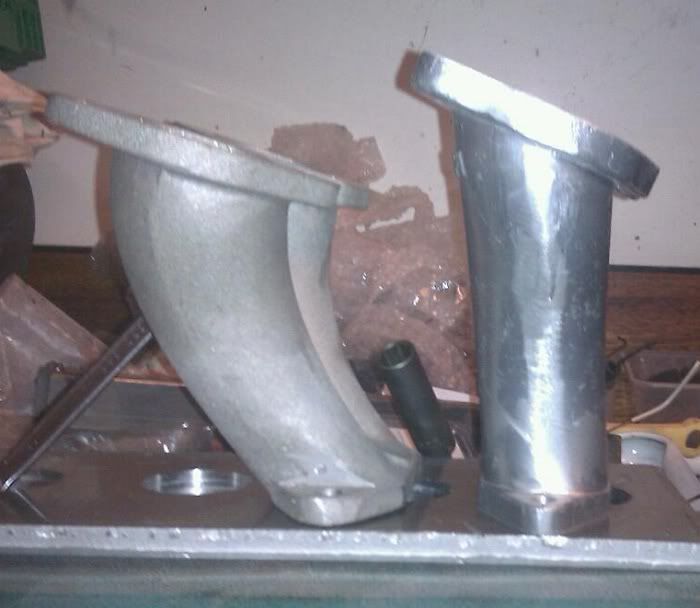
Then I received a pair of EMPI intake manifolds in the mail, and it struck me that they were quite different from the ones I had. The EMPI ones are a lot straighter, compared to the ones I had, so it should be no big issue to cut them straight off at the point where the c-c spacing is correct:
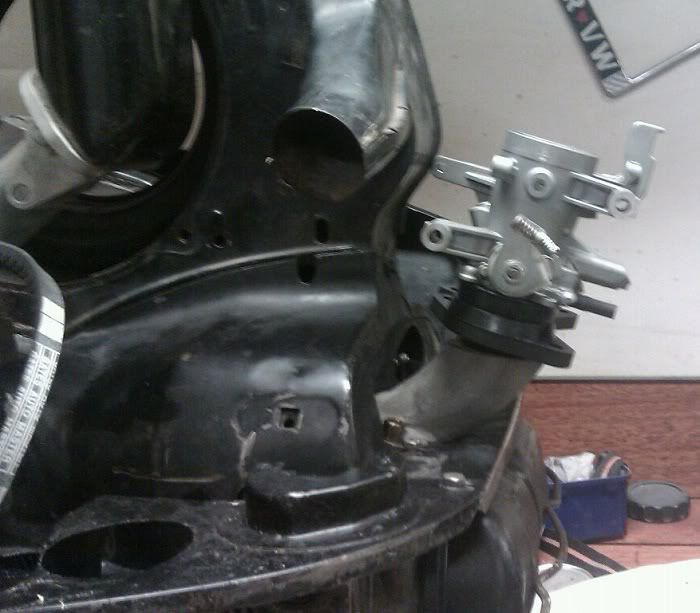
I also looked a bit more at the location of the butterflies, and it seems it will be quite straight forward to use a CSP bellcrank style linkages. I will get hold of a set, to check the clearance to the generator.
So finally some progress
But this week I have spent a couple of hours in the garage, and started with pulling the engine:
Now the engine bay is prepared for some freshening up. I will make a few new fuel lines and generally clean up a bit.
Then I placed the engine on my somewhat cluttered workbench and mocked up the cooling tin again, and discovered a few issues that need some attention.
Then I looked at the manifolds and intake angles a bit more, and ended up with something like this:
Then I received a pair of EMPI intake manifolds in the mail, and it struck me that they were quite different from the ones I had. The EMPI ones are a lot straighter, compared to the ones I had, so it should be no big issue to cut them straight off at the point where the c-c spacing is correct:
I also looked a bit more at the location of the butterflies, and it seems it will be quite straight forward to use a CSP bellcrank style linkages. I will get hold of a set, to check the clearance to the generator.
So finally some progress
-
grelland
- Posts: 990
- Joined: Fri May 13, 2005 2:47 am
Re: Another ITB build thread
no updates in a while, but there has actually been some progress
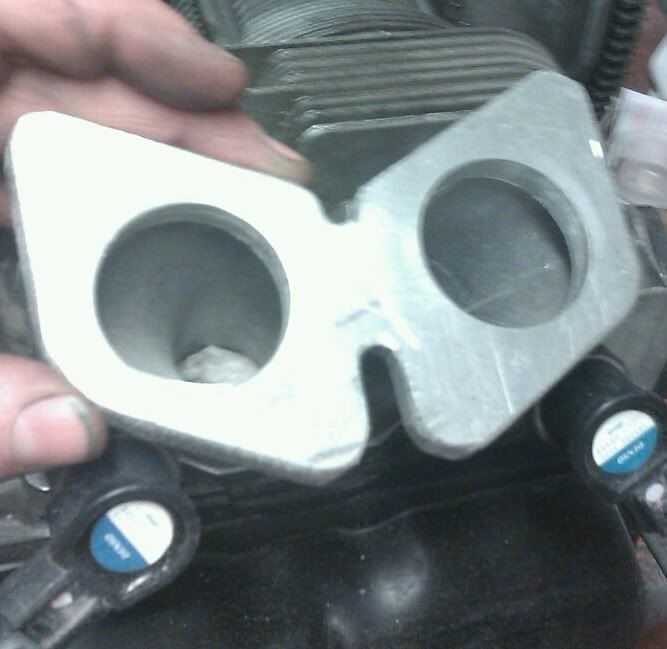
I have cut the EMPI manifolds, and with these, my COPs actually fit also:
I also have not yet decided whether I will use the double-day injector holder, or the more traditional fuel rails, but I have sort of concluded that I will go for the d-d holders, and make a setup with fuel rails close to the holders, so that I have the fuel circulating as in a normal fuel rail setup.
However the outside of the short manifolds will be quite busy...
I will have the flanges cut, and a friend with a TIG will help me weld them, so things are falling in place.
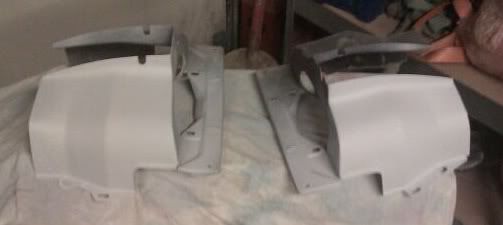
My oldest son (12) joined me in the garage tonight, and his little project is the fan shround and engine tin. So far he has sanded down two rounds of "pudding" and we put a layer of filler on it tonight. The plan is to paint it using hammerite black/gray paint.
I have cut the EMPI manifolds, and with these, my COPs actually fit also:
I also have not yet decided whether I will use the double-day injector holder, or the more traditional fuel rails, but I have sort of concluded that I will go for the d-d holders, and make a setup with fuel rails close to the holders, so that I have the fuel circulating as in a normal fuel rail setup.
However the outside of the short manifolds will be quite busy...
I will have the flanges cut, and a friend with a TIG will help me weld them, so things are falling in place.
My oldest son (12) joined me in the garage tonight, and his little project is the fan shround and engine tin. So far he has sanded down two rounds of "pudding" and we put a layer of filler on it tonight. The plan is to paint it using hammerite black/gray paint.
-
grelland
- Posts: 990
- Joined: Fri May 13, 2005 2:47 am
Re: Another ITB build thread
slowly moving forward. Since I have no fancy machinery available, I pulled out my angle grinder, and cut these flanges:
Now I need to get them welded to the cut manifolds.
Thankfully spring is still a few months away...
Now I need to get them welded to the cut manifolds.
Thankfully spring is still a few months away...
-
Max Welton

- Posts: 3025
- Joined: Mon Jun 03, 2002 12:01 am
Re: Another ITB build thread
Not bad work with the angle-grinder!
Max
Max
-
Steve Arndt
- Posts: 7419
- Joined: Sat Mar 10, 2001 12:01 am
Re: Another ITB build thread
Nice job.
-
grelland
- Posts: 990
- Joined: Fri May 13, 2005 2:47 am
Re: Another ITB build thread
Thanks,
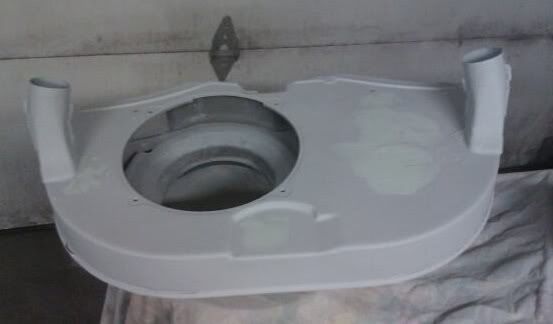
Slow progress, but some paint has been applied.
Soon I will dig into the nitti-gritti details in fixing the TBs and the throttle cable, then more interesting pictures will come
Slow progress, but some paint has been applied.
Soon I will dig into the nitti-gritti details in fixing the TBs and the throttle cable, then more interesting pictures will come
You do not have the required permissions to view the files attached to this post.
-
grelland
- Posts: 990
- Joined: Fri May 13, 2005 2:47 am
Re: Another ITB build thread
So I started the fun part; namely to modify the TBs
I will have the throttle cable run from the accelerator pedal to the RHS TB, then a separate cable from the RHS to the LHS TB.
Since the LHS TB was the easiest one, I started on that side...
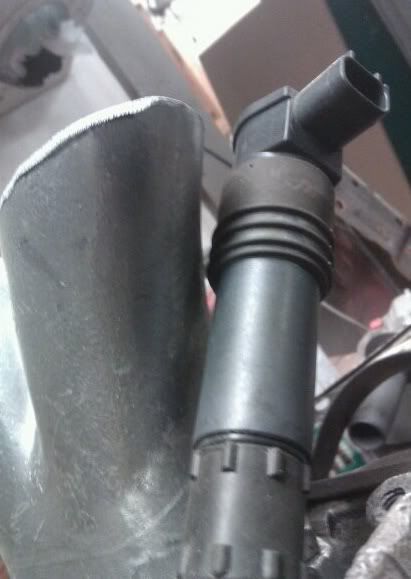
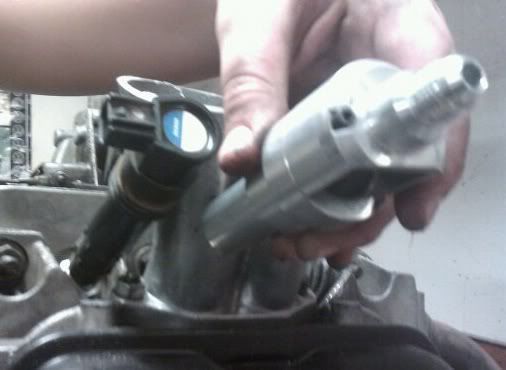
I bought a pulley from Devastator here on the forum, and made myself a little bracket that I fixed to one of the many fixing "thingeys" on the TB: It will be a little tight against the air outlet from the fan shroud, once the flange is welded on the intake, but I should clear with a mm or two...
The TPS sits nicely on the other side of the RHS TB: On the other side, however, the situation is a bit different, as it is quite tight towards the doghouse outlet: I will also have to route the cable through the fan shroud, and I think I will have to run the cable through the outlet of the doghouse, but I guess that will not affect the air flow at all...
The TBs have a couple of holes from the butterfly axle and injectors I will not use: Anyone has a suggestion as to how to fill these? Weld? JB weld? any other epoxy-based stuff?
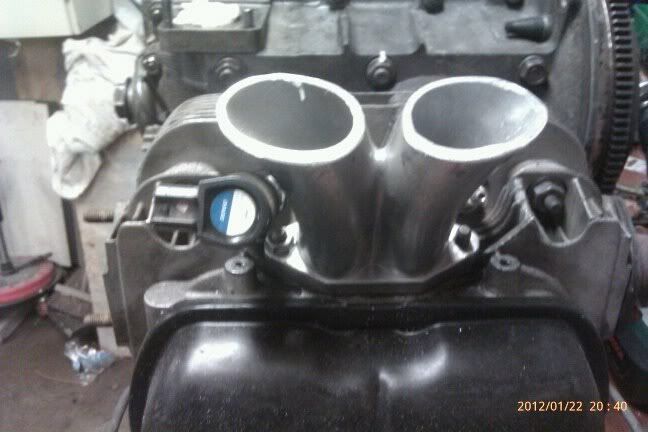
Lastly an overview picture again, this time with a somewhat better quality than the last:
I will have the throttle cable run from the accelerator pedal to the RHS TB, then a separate cable from the RHS to the LHS TB.
Since the LHS TB was the easiest one, I started on that side...
I bought a pulley from Devastator here on the forum, and made myself a little bracket that I fixed to one of the many fixing "thingeys" on the TB: It will be a little tight against the air outlet from the fan shroud, once the flange is welded on the intake, but I should clear with a mm or two...
The TPS sits nicely on the other side of the RHS TB: On the other side, however, the situation is a bit different, as it is quite tight towards the doghouse outlet: I will also have to route the cable through the fan shroud, and I think I will have to run the cable through the outlet of the doghouse, but I guess that will not affect the air flow at all...
The TBs have a couple of holes from the butterfly axle and injectors I will not use: Anyone has a suggestion as to how to fill these? Weld? JB weld? any other epoxy-based stuff?
Lastly an overview picture again, this time with a somewhat better quality than the last:
You do not have the required permissions to view the files attached to this post.
-
supaninja

- Posts: 1658
- Joined: Tue Sep 14, 2010 12:48 pm
Re: Another ITB build thread
I have seen fancy machined with oring injector plugs but they are all kinda pricey. You could epoxy in a piece of aluminum rod.

'65 notch w/ a squirted type 4
http://supaninjanick.wordpress.com/
'68 "Zombie Response Vehicle" Westy
viewtopic.php?f=14&t=140387
-
grelland
- Posts: 990
- Joined: Fri May 13, 2005 2:47 am
Re: Another ITB build thread
That's what I was thinking. Any particular type of epoxy, or would the "regular" 2-component type from the HW store do (Araldit) ?supaninja wrote:I have seen fancy machined with oring injector plugs but they are all kinda pricey. You could epoxy in a piece of aluminum rod.
Roy
-
supaninja
- Posts: 1658
- Joined: Tue Sep 14, 2010 12:48 pm
Re: Another ITB build thread
Any quality epoxy should work fine, it doesn't get hot right there.
'65 notch w/ a squirted type 4
http://supaninjanick.wordpress.com/
'68 "Zombie Response Vehicle" Westy
viewtopic.php?f=14&t=140387
-
grelland
- Posts: 990
- Joined: Fri May 13, 2005 2:47 am
Re: Another ITB build thread
have you ever seen me drive 
-
grelland
- Posts: 990
- Joined: Fri May 13, 2005 2:47 am
Re: Another ITB build thread
have you ever seen me drive
-
supaninja
- Posts: 1658
- Joined: Tue Sep 14, 2010 12:48 pm
Re: Another ITB build thread
'65 notch w/ a squirted type 4
http://supaninjanick.wordpress.com/
'68 "Zombie Response Vehicle" Westy
viewtopic.php?f=14&t=140387
-
MarioVelotta

- Posts: 4086
- Joined: Wed Mar 12, 2003 12:01 am
Re: Another ITB build thread
That last engine pic looks really good!
The Dub Shop
Mario@thedubshop.net
1600 ITB NA - 18sec
1600 Supercharged - 13psi - 15.40 @ 84.66mph
1600 Turbo - 185hp 250tq!! Going for 200
2276 Turbo - 15psi - 11.537 @ 115.74mph
Facebook-Tech-Store
Mario@thedubshop.net
1600 ITB NA - 18sec
1600 Supercharged - 13psi - 15.40 @ 84.66mph
1600 Turbo - 185hp 250tq!! Going for 200
2276 Turbo - 15psi - 11.537 @ 115.74mph
Facebook-Tech-Store