Prelude:
5 years ago I got given my beetle from a lawyer in Palo Alto. For the longest time I have been wanting to do a proper resto of her. Being a California car she is the perfect candidate.
In the winter of 2003/2004 I tore her apart mechanically and interior wise to do a resto. I managed to finish my beetle for my grad and then put her into storage for year while I moved to Switzerland. It was a hard push but I managed to get her done in time. When I returned in 2005 I didn't actually get to drive her at all that summer. So into Doubledoor she went for a good lowering. Spring 2006 was looking to be an excellent season. Then on my way to a cruise she got rearended. Cosmetically it was only a flesh wound but after friends and family convinced me to do the full monty the game was on....
In this topic it will show basically a blog of the restoration of my beetle. First step will be dismembering her body. Which has already commenced. Tommorow is interior tear down time...
Pre-Hit
http://i9.photobucket.com/albums/a58/BM ... Btl60e.jpg
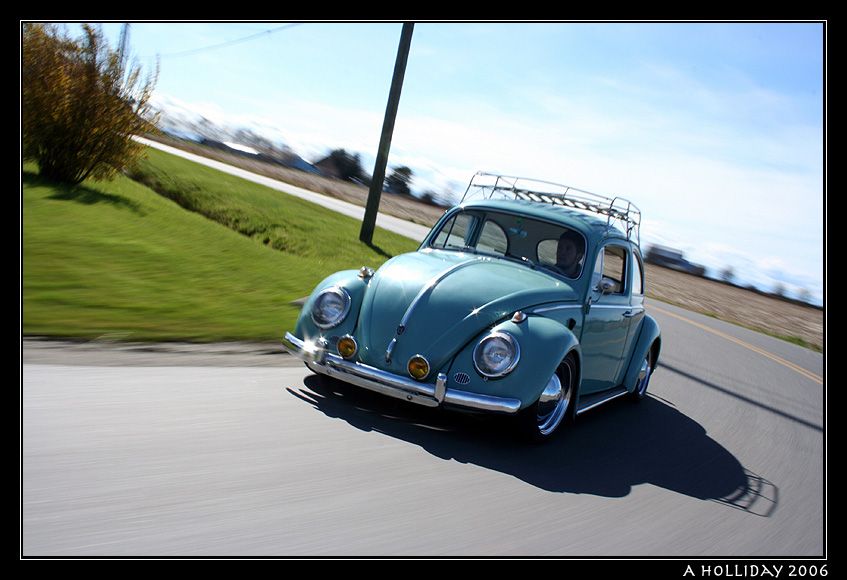
Still looking good

And why we are here now..

It does also help that I got a 2012.20 dollar incentive from ICBC
So the project began... With the teardown...
Okay.
Day 1 of full tear down mode. We started dismembering her body.. theres no turning back now
What we started with.


Seats out

When it started raining

Gutted interior


gutted headliner

doors down


Thats how I left her at the end of day one...
Day two!
Okay Mid week update.
Actually pics are from the weekend not much has changed.
Dropping off some panels at the body shop tommorow.
Car is coming apart nicely. All that is left is gas tank, front and rear window and yank the engine and and... :wacko:


And then to the body shop she went!
All you need to think is.
She will be rebuilt bigger, badder and stronger!


Rest well young beetle!
Doing the old body off the pan trick.
http://slash.ouelong.com/albums/album47 ... om_pan.jpg
Then she went in for some sandblasting therapy


First idea for wheels ..


And the pan getting massaged..
IMG]http://slash.ouelong.com/albums/album60 ... .sized.jpg[/IMG]
I think it came out pretty well. Plans are to clean up some of the welding slag. Make it look a bit more"Finished" And then give it a really nice coat of glossy black!
Cut out the old one...

Can anyone tell me if the drivers side is raised up to much? It was pretty dented...

Nother shot of the pan. That tool in the foreground is called a "Monkey bar" Or something like that. Good for striaghtening things and such. Pretty cool tool!

Finally anybody got framehead?

Which brings us to now. The pans been massaged back into shape the best we can. Right now we are cutting in a Swayaway torsion bar adjuster. And then its getting painted...
Stay tuned..
