I have yet to attempt this, and it is probably not an original idea...but it occurred to me the T3 lower arms on the torsion bars could be spaced out for more camber simply by installing a spacer at the inner end.(the end that gets the bolt on the opposite side of the car)
You would have to keep it in the sane range of the ball joints travel, and perhaps a longer bolt, but it looks like that would be plenty for ~any use.
Thoughts?
Type 3 front end additional camber
-
Piledriver

- Moderator
- Posts: 22753
- Joined: Sat Feb 16, 2002 12:01 am
Type 3 front end additional camber
Addendum to Newtons first law:
zero vehicles on jackstands, square gets a fresh 090 and 1911, cabby gets a blower.
EZ3.6 Vanagon after that.(mounted, needs everything finished) then Creamsicle.
zero vehicles on jackstands, square gets a fresh 090 and 1911, cabby gets a blower.
EZ3.6 Vanagon after that.(mounted, needs everything finished) then Creamsicle.
-
aircooledtechguy

- Posts: 1709
- Joined: Sun Oct 28, 2001 1:01 am
Re: Type 3 front end additional camber
That sounds reasonable. Be the first!!
-
Piledriver
- Moderator
- Posts: 22753
- Joined: Sat Feb 16, 2002 12:01 am
Re: Type 3 front end additional camber
Coming from you, I'll take that as an insanity check 
My fronts are wearing perfectly as stock, but they look funny sticking straight up and down...
(Looked at too many FWD and AX setups)
Just though it might help anyone AX ing their T3.
I have a spare front end, I might try it on that.
My fronts are wearing perfectly as stock, but they look funny sticking straight up and down...
(Looked at too many FWD and AX setups)
Just though it might help anyone AX ing their T3.
I have a spare front end, I might try it on that.
Addendum to Newtons first law:
zero vehicles on jackstands, square gets a fresh 090 and 1911, cabby gets a blower.
EZ3.6 Vanagon after that.(mounted, needs everything finished) then Creamsicle.
zero vehicles on jackstands, square gets a fresh 090 and 1911, cabby gets a blower.
EZ3.6 Vanagon after that.(mounted, needs everything finished) then Creamsicle.
-
Slow 1200
- Posts: 556
- Joined: Mon Jun 17, 2002 12:01 am
Re: Type 3 front end additional camber
Couldn't you just adjust the lower balljoint? Which you're not supposed to, but...
-
aircooledtechguy
- Posts: 1709
- Joined: Sun Oct 28, 2001 1:01 am
Re: Type 3 front end additional camber
Thank you very much. I've worked hard to earn that one.Piledriver wrote:Coming from you, I'll take that as an insanity check
My fronts are wearing perfectly as stock, but they look funny sticking straight up and down...
(Looked at too many FWD and AX setups)
Just though it might help anyone AX ing their T3.
I have a spare front end, I might try it on that.
It'll be interesting to see how much you can safely get out of this method.
-
Ol'fogasaurus
- Posts: 17881
- Joined: Mon Nov 13, 2006 10:17 pm
Re: Type 3 front end additional camber
What, if any, affect would the spacer have on the grub screw into the dimple in the spring pack? Just curious.
Lee
Lee
-
Piledriver
- Moderator
- Posts: 22753
- Joined: Sat Feb 16, 2002 12:01 am
Re: Type 3 front end additional camber
The ball joints have very limited adjustment range.Ol'fogasaurus wrote:What, if any, affect would the spacer have on the grub screw into the dimple in the spring pack? Just curious.
Lee
T3s have torsion bars with splined ends on the lower arms, each goes fully across the beam and secures with a bolt. (They cross) The upper bar is a sway bar.
There is a locating dimple in the outer splines for the bolt in the arm, it would be moved out allong with the bar, but the bearings etc are very wide, a new seal setup would probably be useful.
Based soley on spline width 1/2" or more should be doable, which would be a really stupid camber angle.
1/4" should actually be plenty for most setups.
Addendum to Newtons first law:
zero vehicles on jackstands, square gets a fresh 090 and 1911, cabby gets a blower.
EZ3.6 Vanagon after that.(mounted, needs everything finished) then Creamsicle.
zero vehicles on jackstands, square gets a fresh 090 and 1911, cabby gets a blower.
EZ3.6 Vanagon after that.(mounted, needs everything finished) then Creamsicle.
-
Ol'fogasaurus
- Posts: 17881
- Joined: Mon Nov 13, 2006 10:17 pm
Re: Type 3 front end additional camber
Thanks, very interesting. Scrub radius still fine?
Lee
Lee
-
Kai4130
- Posts: 19
- Joined: Sun Sep 22, 2013 3:04 am
Re: Type 3 front end additional camber
Any progress with this?
Last week I lowered the front of my car. After I had it all apart I kinda worked out what you where talking about. My thoughts are.
Remove the torsion bar,
use threaded bar and screw that onto the inner end of the bar,
Create a 5-6mm spacer that fits over the threaded bar, thus pushing the lower arm out by 5-6mm.
I'm thinking threaded bar as to allow a means of getting it inside the inner part of the splined area.
To sort the seal out perhaps another OE seal could be placed next to the original seal doubling them up or create a 5-6 mm spacer to fill that gap.
If I find I have the spare time ill do this myself but currently I have more pressing issues suck as repairing my front wings and rolling the archs.
-
Piledriver
- Moderator
- Posts: 22753
- Joined: Sat Feb 16, 2002 12:01 am
Re: Type 3 front end additional camber
Ol'fogasaurus wrote:Thanks, very interesting. Scrub radius still fine?
Lee
Won't change significantly, everything moves out, and 1/4" isn't really going to be significant, might need even less...could even be easier to turn at a stop with a bit more camber
Addendum to Newtons first law:
zero vehicles on jackstands, square gets a fresh 090 and 1911, cabby gets a blower.
EZ3.6 Vanagon after that.(mounted, needs everything finished) then Creamsicle.
zero vehicles on jackstands, square gets a fresh 090 and 1911, cabby gets a blower.
EZ3.6 Vanagon after that.(mounted, needs everything finished) then Creamsicle.
-
VWPORSCHEGT3
- Posts: 2
- Joined: Wed Sep 28, 2011 2:59 pm
Re: Type 3 front end additional camber
Pile, I had been contemplating doing the same thing, grub screw in the other end long enough to add up to a 1/2 inch spacer, which no knowledge if it could handle more I personally don't want to push it. it will be years before I can test it out but I would love to see what your results are when you try it out
-
Piledriver
- Moderator
- Posts: 22753
- Joined: Sat Feb 16, 2002 12:01 am
Re: Type 3 front end additional camber
My square has developed play in the upper pass side trailing arm or its bearings, so I will either be swapping a 40K mile barn find front end on it, or going dual wishbone with reversed 914 lower arms/springs and fabricated upper arms.
Given the stock setup comes ~out only removing 6 bolts and 2 tie rod ends, and it is supposed to start raining it will probably be the former, or the next weekend.
Assuming I do put the 69 front end on it I may also swap the bars out, and will have a look at this.
We'll see when it starts raining, I really don't want to be forced to drive the TDi or Cabriolet all week.
(great cars, just not my preferred rides, although the cabby handled ~decent with the Corrado seats now in the square and Bilstiens etc)
Addendum to Newtons first law:
zero vehicles on jackstands, square gets a fresh 090 and 1911, cabby gets a blower.
EZ3.6 Vanagon after that.(mounted, needs everything finished) then Creamsicle.
zero vehicles on jackstands, square gets a fresh 090 and 1911, cabby gets a blower.
EZ3.6 Vanagon after that.(mounted, needs everything finished) then Creamsicle.
-
Kai4130
- Posts: 19
- Joined: Sun Sep 22, 2013 3:04 am
Re: Type 3 front end additional camber
Righting, I did this the other day. I can't post my pictures up as the forum won't let me as they're too big. Can't and won't change them.
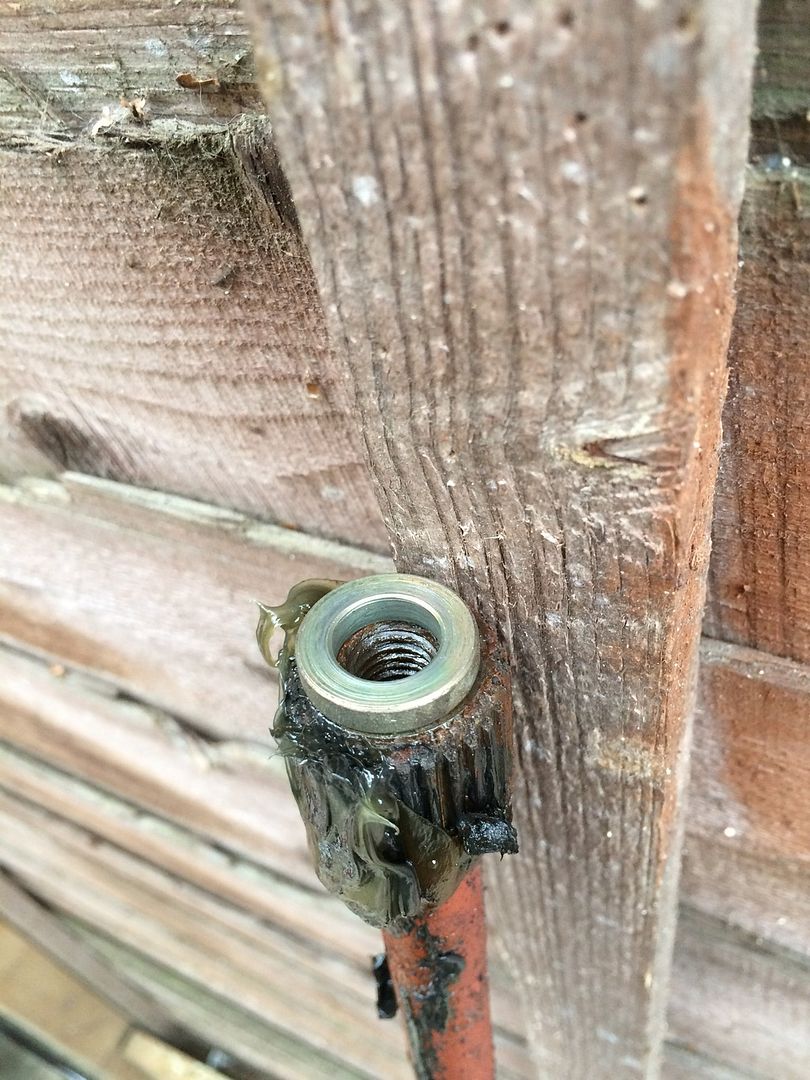
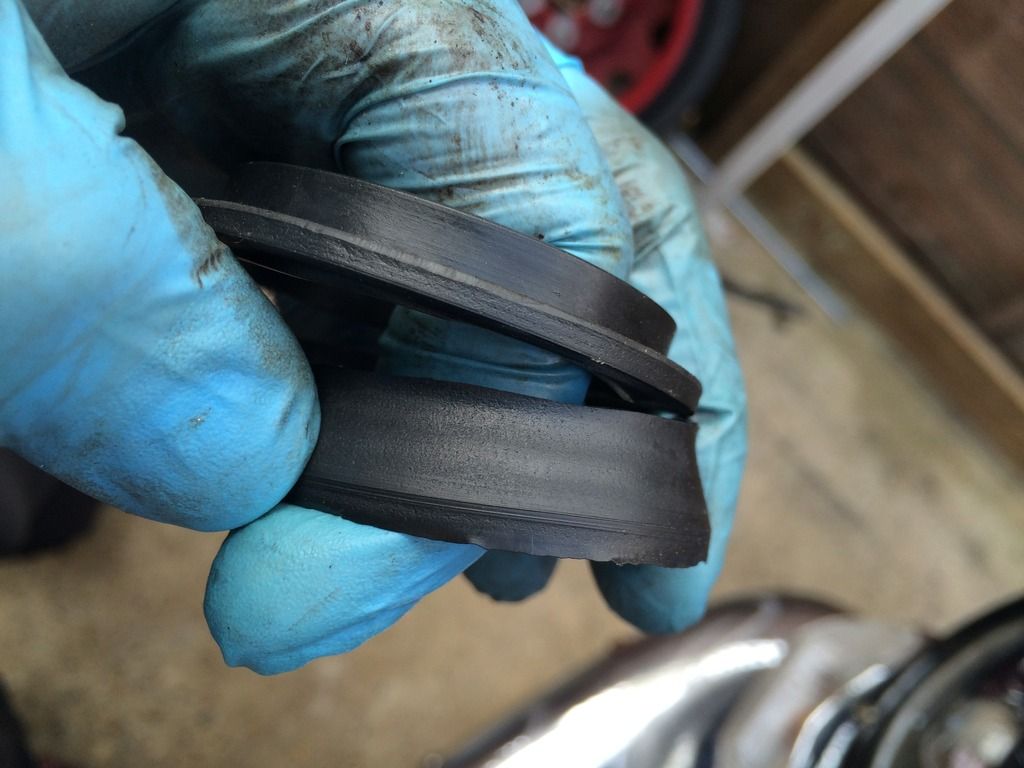
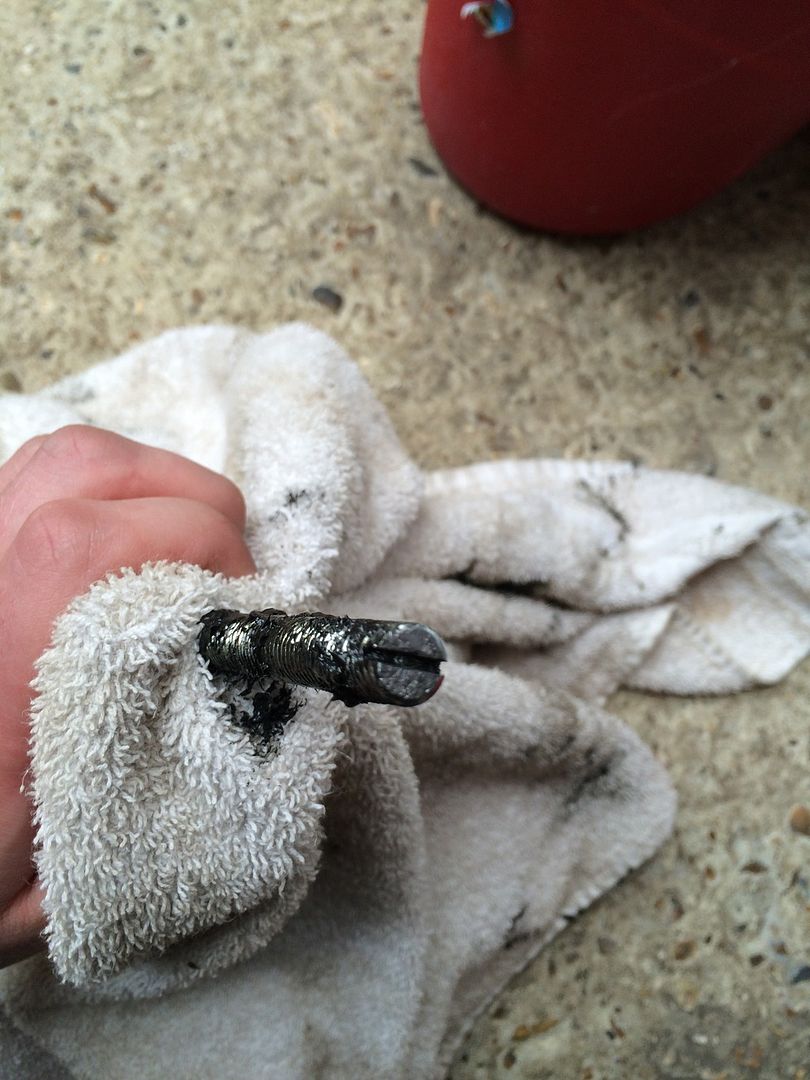
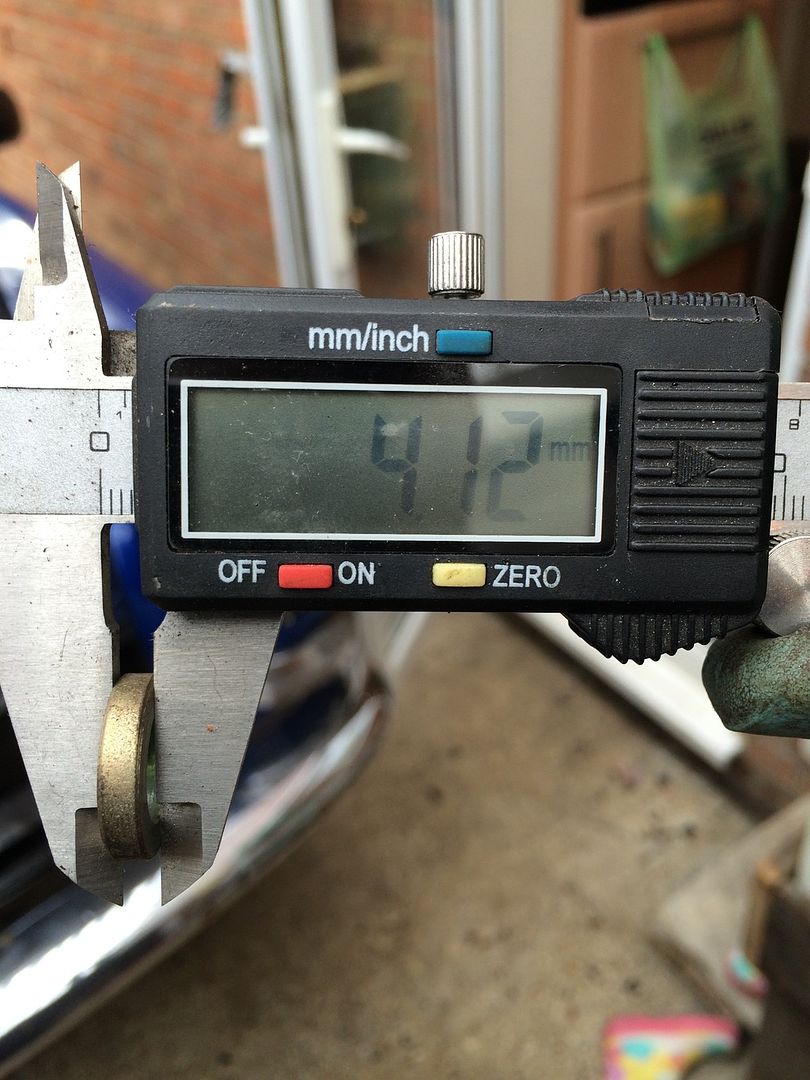
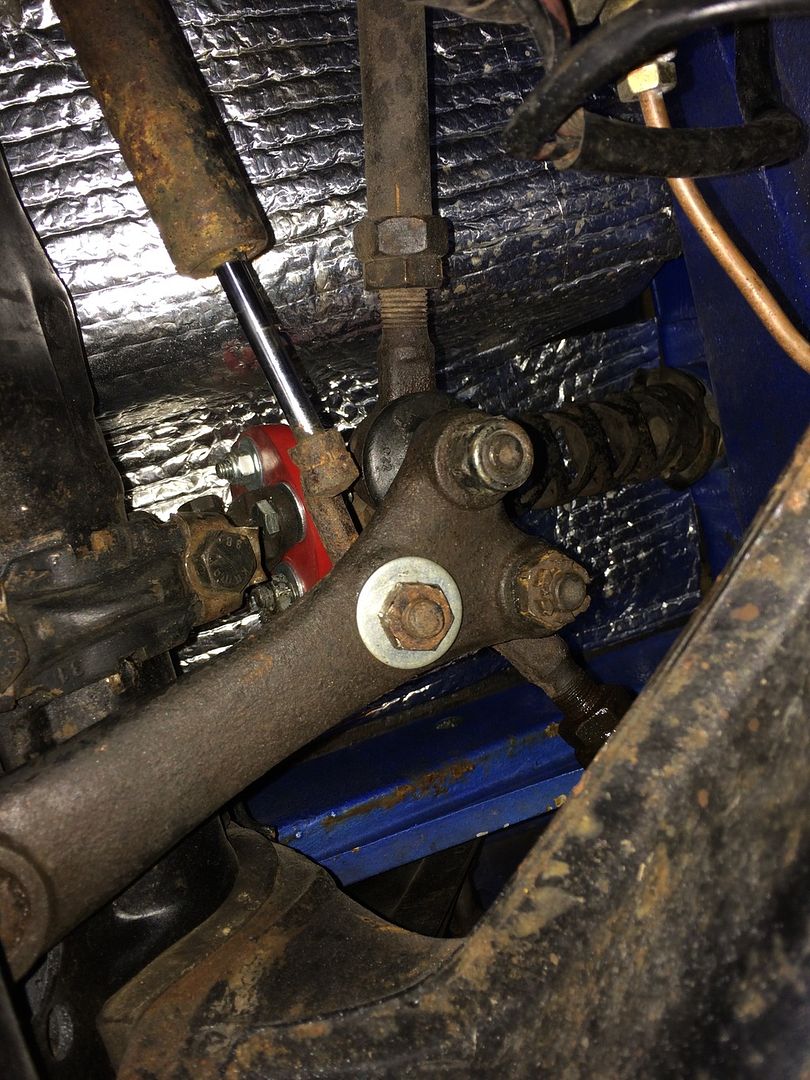
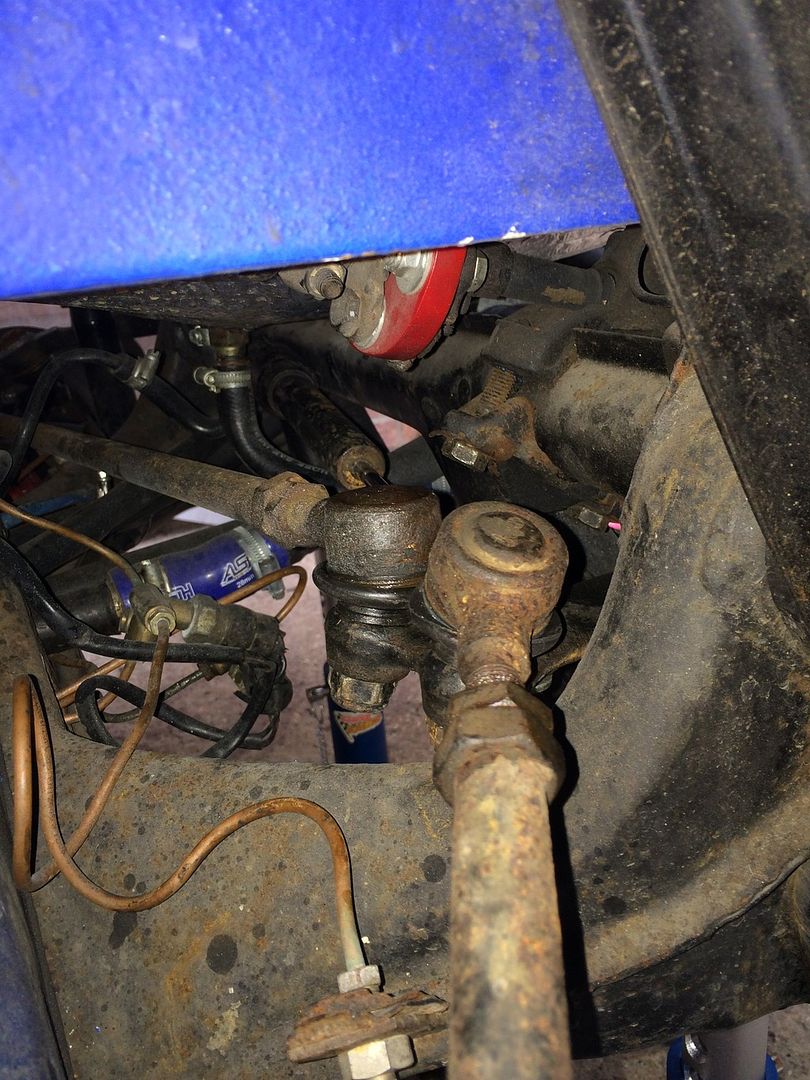
Anyway. Long of the short. I used a 5mm spacer at the end of the torsion bar. By my crude way of measuring the new camber angle I would say I've gain 1 negative degree. Last time I had an alignment the listed figure achievable was +1.5 degrees of camber. My new measurement which is unconfirmed is +0.5 degrees. It's an easy modification. Took me 2 hours to do both sides plus find in a suitable spacer which came off from a seatbelt bolt arrangement. Problem I know have is that it's clear that the lower arm on the left hand side has a fucked bearing as the play is horrific and made much worse with the spacer. I've ordered a replacement bearing however I'm not confident it will cure my specific problem. The other side is held in fine which is were my measurement came from. With my car having massive negative camber on the rear and positive camber on the front it looks very strange indeed hence why I wanted to do this modification. In an ideal world I would suggest getting a spacer made up to bridge the gap created at the seal, not only to give the deal a surface to run against but I'm sure that the bearing looses its support and preload by doing this modification. Anyway next step for me is to change the bearing and afterwards to embark on a custom front end. Mazda MX5 or go McPherson strut with the Porsche Cayman set up I have out in the shed.
http://i16.photobucket.com/albums/b37/r ... qvjq9d.jpg
http://i16.photobucket.com/albums/b37/r ... zeo8fd.jpg
http://i16.photobucket.com/albums/b37/r ... mpv1fj.jpg
http://i16.photobucket.com/albums/b37/r ... ahpbh1.jpg
http://i16.photobucket.com/albums/b37/r ... zb6ysl.jpg
http://i16.photobucket.com/albums/b37/r ... tqi53e.jpg
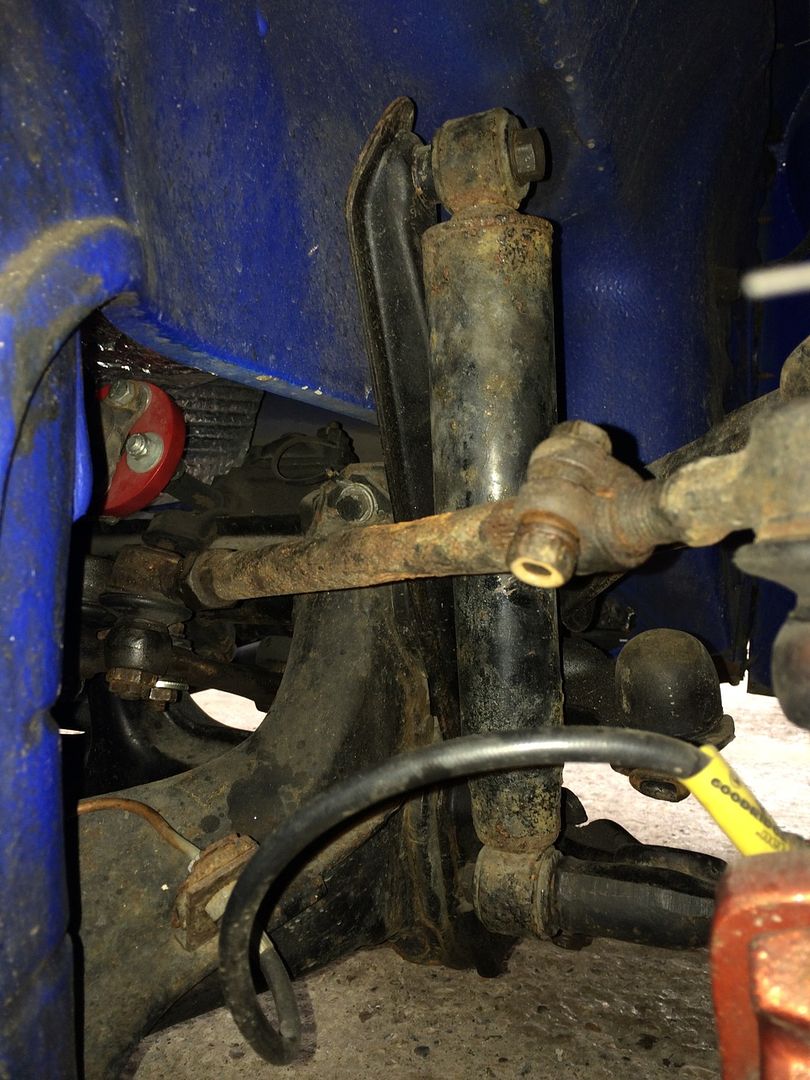
On a side not, my track rod arms where at a 45 degree angel between the track rod ends. Rather then to fot one of those ball joint flip kits as I don't have the facilities to fit them at home I chose to flip the arm instead. Either way the track was going to need adjusting so I just flipped it over
To help eliminate some bumpsteer. Whilst the arm was off I took the time to refit my steering dampener as the bush had long been removed and I've struggled to find a replacement bush. The install of the bush was a total hash up but its in there and is only temporary whilst I come up with my master plan of ditching the front beam.
http://i16.photobucket.com/albums/b37/r ... nd2lnx.jpg
http://i16.photobucket.com/albums/b37/r ... jwmrtx.jpg
http://i16.photobucket.com/albums/b37/r ... xlyujn.jpg
Anyway. Long of the short. I used a 5mm spacer at the end of the torsion bar. By my crude way of measuring the new camber angle I would say I've gain 1 negative degree. Last time I had an alignment the listed figure achievable was +1.5 degrees of camber. My new measurement which is unconfirmed is +0.5 degrees. It's an easy modification. Took me 2 hours to do both sides plus find in a suitable spacer which came off from a seatbelt bolt arrangement. Problem I know have is that it's clear that the lower arm on the left hand side has a fucked bearing as the play is horrific and made much worse with the spacer. I've ordered a replacement bearing however I'm not confident it will cure my specific problem. The other side is held in fine which is were my measurement came from. With my car having massive negative camber on the rear and positive camber on the front it looks very strange indeed hence why I wanted to do this modification. In an ideal world I would suggest getting a spacer made up to bridge the gap created at the seal, not only to give the deal a surface to run against but I'm sure that the bearing looses its support and preload by doing this modification. Anyway next step for me is to change the bearing and afterwards to embark on a custom front end. Mazda MX5 or go McPherson strut with the Porsche Cayman set up I have out in the shed.
http://i16.photobucket.com/albums/b37/r ... qvjq9d.jpg
http://i16.photobucket.com/albums/b37/r ... zeo8fd.jpg
http://i16.photobucket.com/albums/b37/r ... mpv1fj.jpg
http://i16.photobucket.com/albums/b37/r ... ahpbh1.jpg
http://i16.photobucket.com/albums/b37/r ... zb6ysl.jpg
http://i16.photobucket.com/albums/b37/r ... tqi53e.jpg
On a side not, my track rod arms where at a 45 degree angel between the track rod ends. Rather then to fot one of those ball joint flip kits as I don't have the facilities to fit them at home I chose to flip the arm instead. Either way the track was going to need adjusting so I just flipped it over
To help eliminate some bumpsteer. Whilst the arm was off I took the time to refit my steering dampener as the bush had long been removed and I've struggled to find a replacement bush. The install of the bush was a total hash up but its in there and is only temporary whilst I come up with my master plan of ditching the front beam.
http://i16.photobucket.com/albums/b37/r ... nd2lnx.jpg
http://i16.photobucket.com/albums/b37/r ... jwmrtx.jpg
http://i16.photobucket.com/albums/b37/r ... xlyujn.jpg
-
Piledriver
- Moderator
- Posts: 22753
- Joined: Sat Feb 16, 2002 12:01 am
Re: Type 3 front end additional camber
Cool.
My "new" stock front end worked really well, if you can find the bearings let me know, I was considering making some up in delrin or something.
pics of the cayman front end?
My "new" stock front end worked really well, if you can find the bearings let me know, I was considering making some up in delrin or something.
pics of the cayman front end?
Addendum to Newtons first law:
zero vehicles on jackstands, square gets a fresh 090 and 1911, cabby gets a blower.
EZ3.6 Vanagon after that.(mounted, needs everything finished) then Creamsicle.
zero vehicles on jackstands, square gets a fresh 090 and 1911, cabby gets a blower.
EZ3.6 Vanagon after that.(mounted, needs everything finished) then Creamsicle.
-
Kai4130
- Posts: 19
- Joined: Sun Sep 22, 2013 3:04 am
Re: Type 3 front end additional camber
On the lower set of arms each arm has an inner and outta bearing. I've bought a bug outter needle bearing to chuck into it as all the movement I have appears to be in that area. Also I don't want to spend slot of money on this as I intend of getting shot of it in good time. AND!!! The anti roll bar doesn't appear to be working as the top area are easily moving independently to each other.
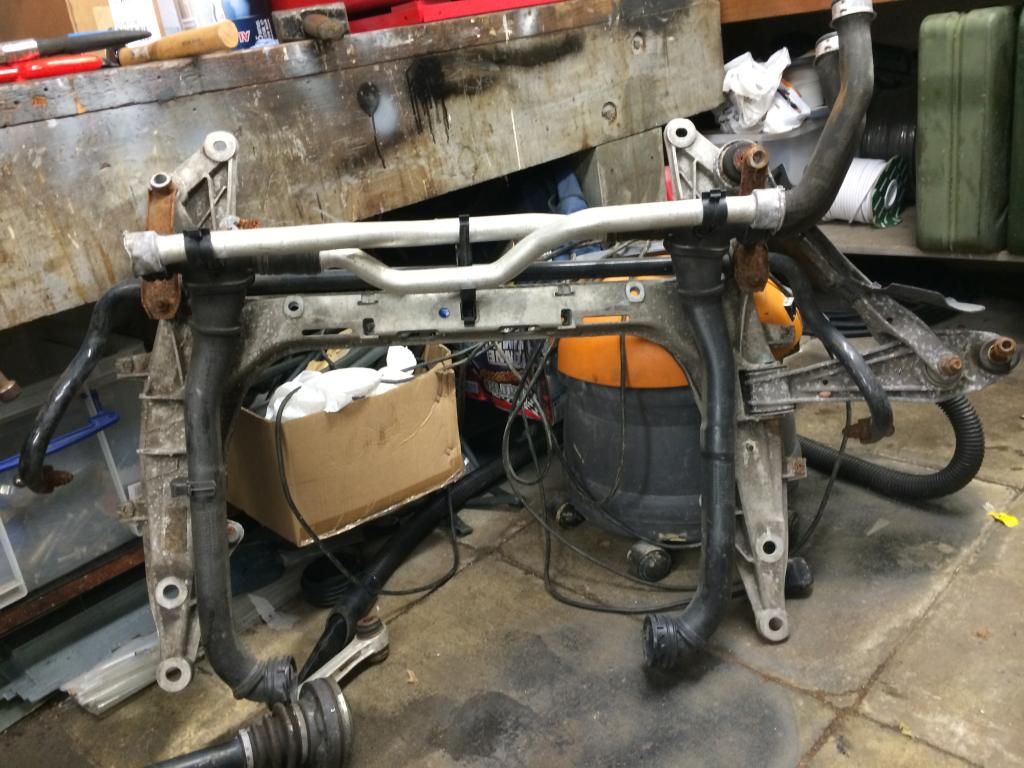
Historical pictures
http://i16.photobucket.com/albums/b37/r ... yqbzdg.jpg
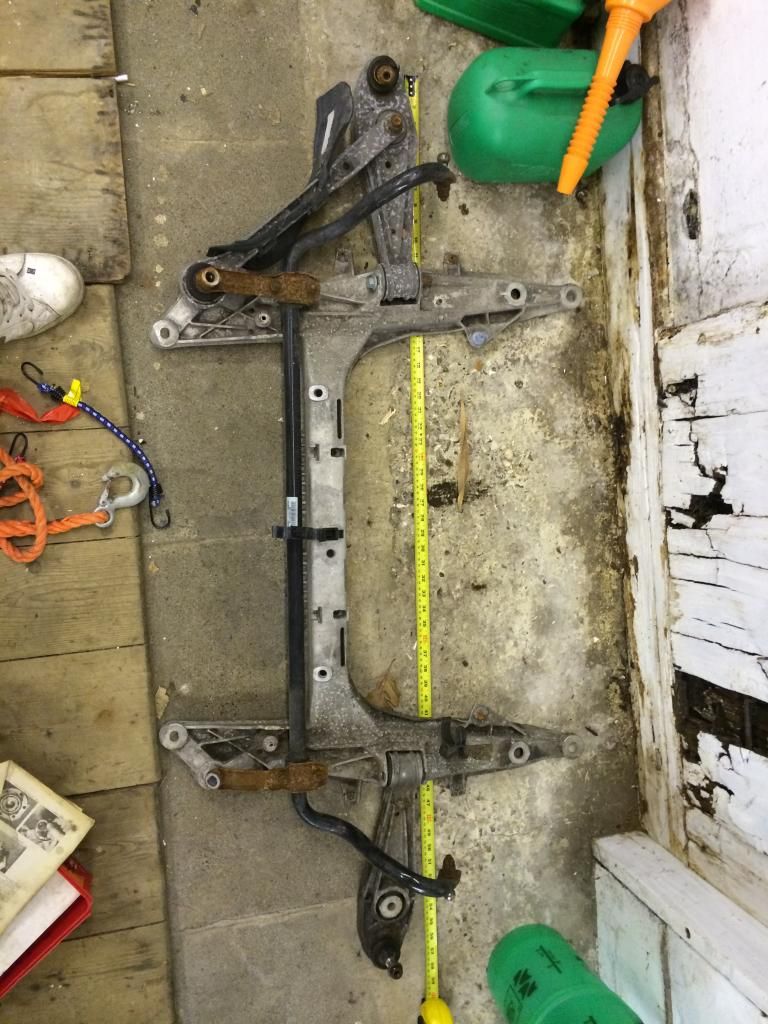
The main Ali frame is going to be redundant. It's about 11inchs too wide that's not even with the hubs attached. But the arms are simple enough to fabricate something to hold it all together.
Better picture
http://i16.photobucket.com/albums/b37/r ... ssyjro.jpg
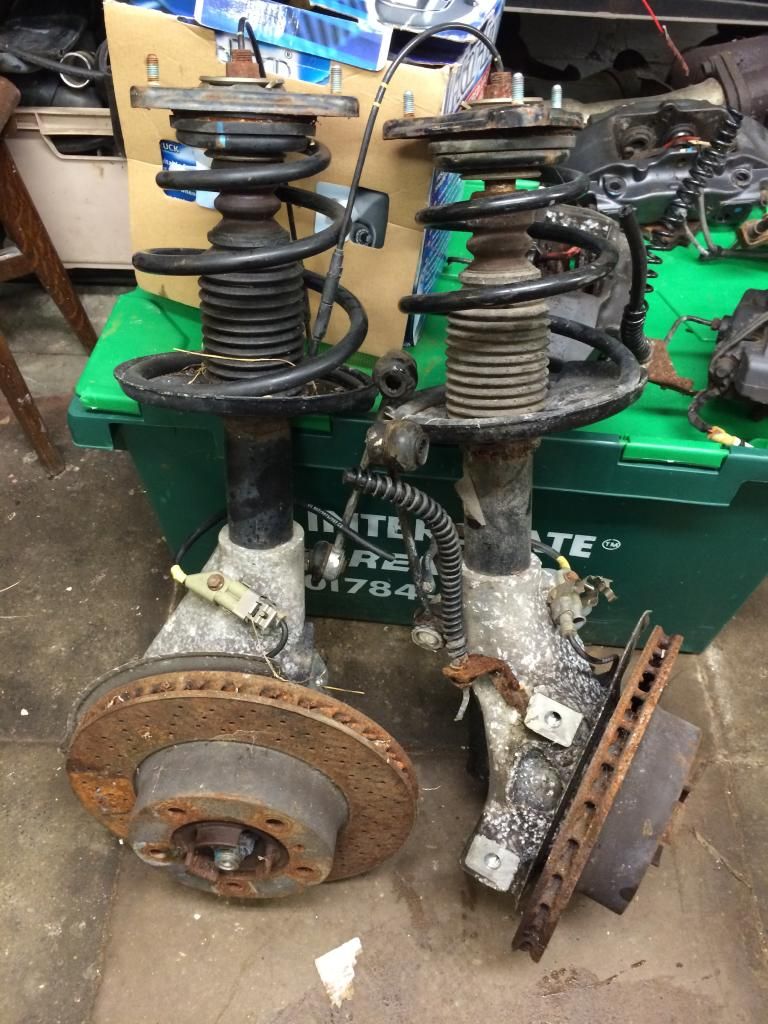
Front struts, I'll change these for a smaller set of coilovers
http://i16.photobucket.com/albums/b37/r ... kjimlf.jpg
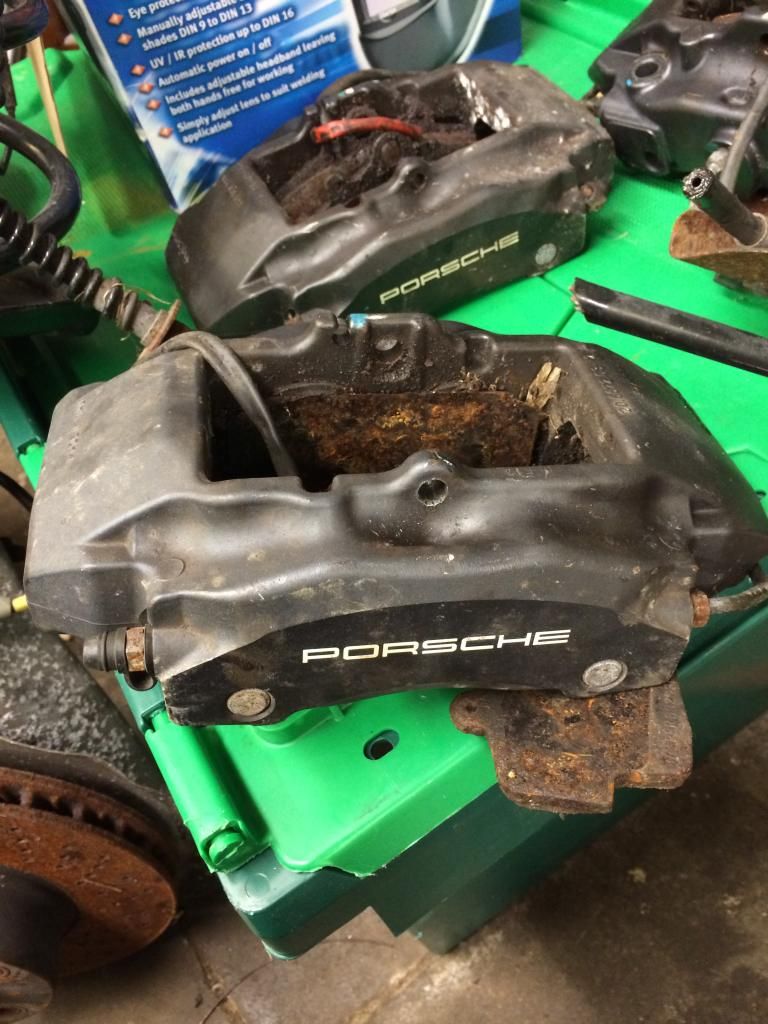
Struts force me to use the calipers
http://i16.photobucket.com/albums/b37/r ... 20hidd.jpg
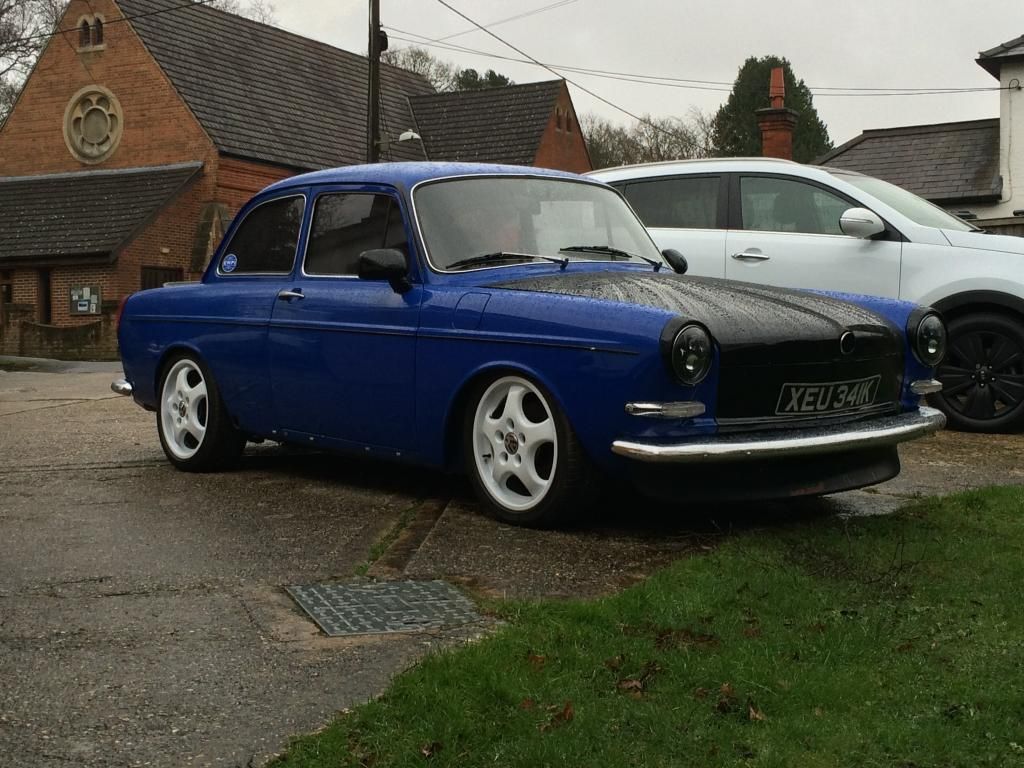
Just for show, enjoy
http://i16.photobucket.com/albums/b37/r ... dwdoak.jpg
Rice burner
http://i16.photobucket.com/albums/b37/r ... el72iv.jpg
Historical pictures
http://i16.photobucket.com/albums/b37/r ... yqbzdg.jpg
The main Ali frame is going to be redundant. It's about 11inchs too wide that's not even with the hubs attached. But the arms are simple enough to fabricate something to hold it all together.
Better picture
http://i16.photobucket.com/albums/b37/r ... ssyjro.jpg
Front struts, I'll change these for a smaller set of coilovers
http://i16.photobucket.com/albums/b37/r ... kjimlf.jpg
Struts force me to use the calipers
http://i16.photobucket.com/albums/b37/r ... 20hidd.jpg
Just for show, enjoy
http://i16.photobucket.com/albums/b37/r ... dwdoak.jpg
Rice burner
http://i16.photobucket.com/albums/b37/r ... el72iv.jpg